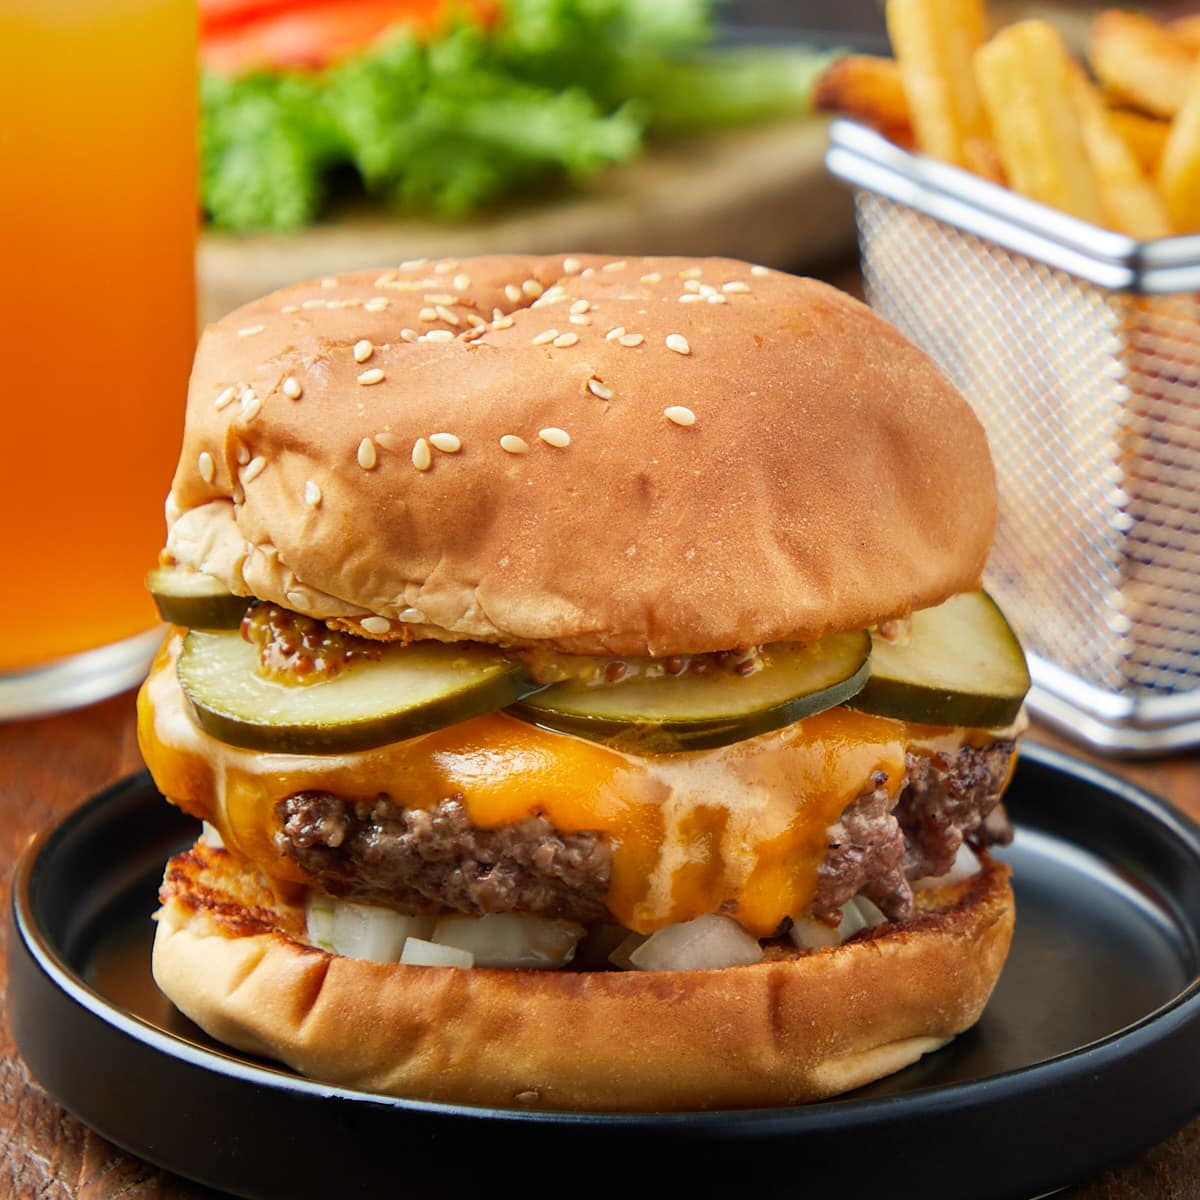
One of the most iconic foods to enjoy off the backyard barbecue is a hamburger. There’s something special about the smell of patties sizzling on the grill that is the core of many happy memories. We’ve experimented with various options from ready-made patties and budget-friendly ground beef to upscale, grass-fed beef and even ground buffalo. The unmatched taste and texture achieved by grinding your own custom blend surpasses them all. Additionally, grinding your own beef allows you to customize the flavor and seasoning to achieve an unbelievably tasty, juicy burger.
Want To Save This Recipe For Later?
If you love creating custom burger blends at home, consider trying these mini burgers. Fresh ground beef also makes an excellent bacon blue cheese burger, a classic Texas burger, or even a smash burger bowl when you want those same crisp-edged burger flavors in a fork-friendly version.
Best Meat for Hamburgers
There are many different cuts of beef that you can choose from, based on your taste and budget. For the most part, it’s good to combine two to three different cuts that will contribute to the flavor and texture of the best burger. Regardless of the cut you choose, trim any excess fat that won’t render out or any silver skin to achieve a balanced fat ratio for burgers. Aim for a final fat content in your grind of around 20-30%. We prefer to use a combination of short rib and brisket for our burgers.
- Boneless Short Rib: High in fat and flavor, this cut makes for exceptionally moist and rich burgers.
- Brisket: Typically used in chili, brisket boasts a beefy flavor and higher fat content, which contribute to a rich, flavorful burger.
- Chuck Steak: Known for its rich flavor and ideal fat-to-lean ratio, making it a favorite for juicy, flavorful burgers.
- Sirloin: A leaner option that delivers a robust beef taste. Mixing it with fattier cuts can enhance moisture and flavor.
- Round: Extremely lean and more affordable, this option is suitable for those seeking a lower-fat choice. It is best to combine this beef with fattier meats.
- Tri-Tip: Similar to sirloin, it’s moderately lean and flavorful, benefiting from blending with fattier cuts.
- Flank: These cuts include London Broil, skirt steak, hanger steak, and flank steak. These cuts of beef are flavorful and juicy, but also affordable. They tend to be leaner cuts of beef, so combine them with fattier ones.

How to Grind Beef for Burgers
Here are the quick, step-by-step instructions with visuals; you can find the full instructions, including the exact ingredients, in the recipe card below.
Pro-tip: Place the metal components of the appliance you’re going to use in the freezer with the meat to help keep the fat solid, creating a pebbly texture instead of turning the beef into a pasty mess.
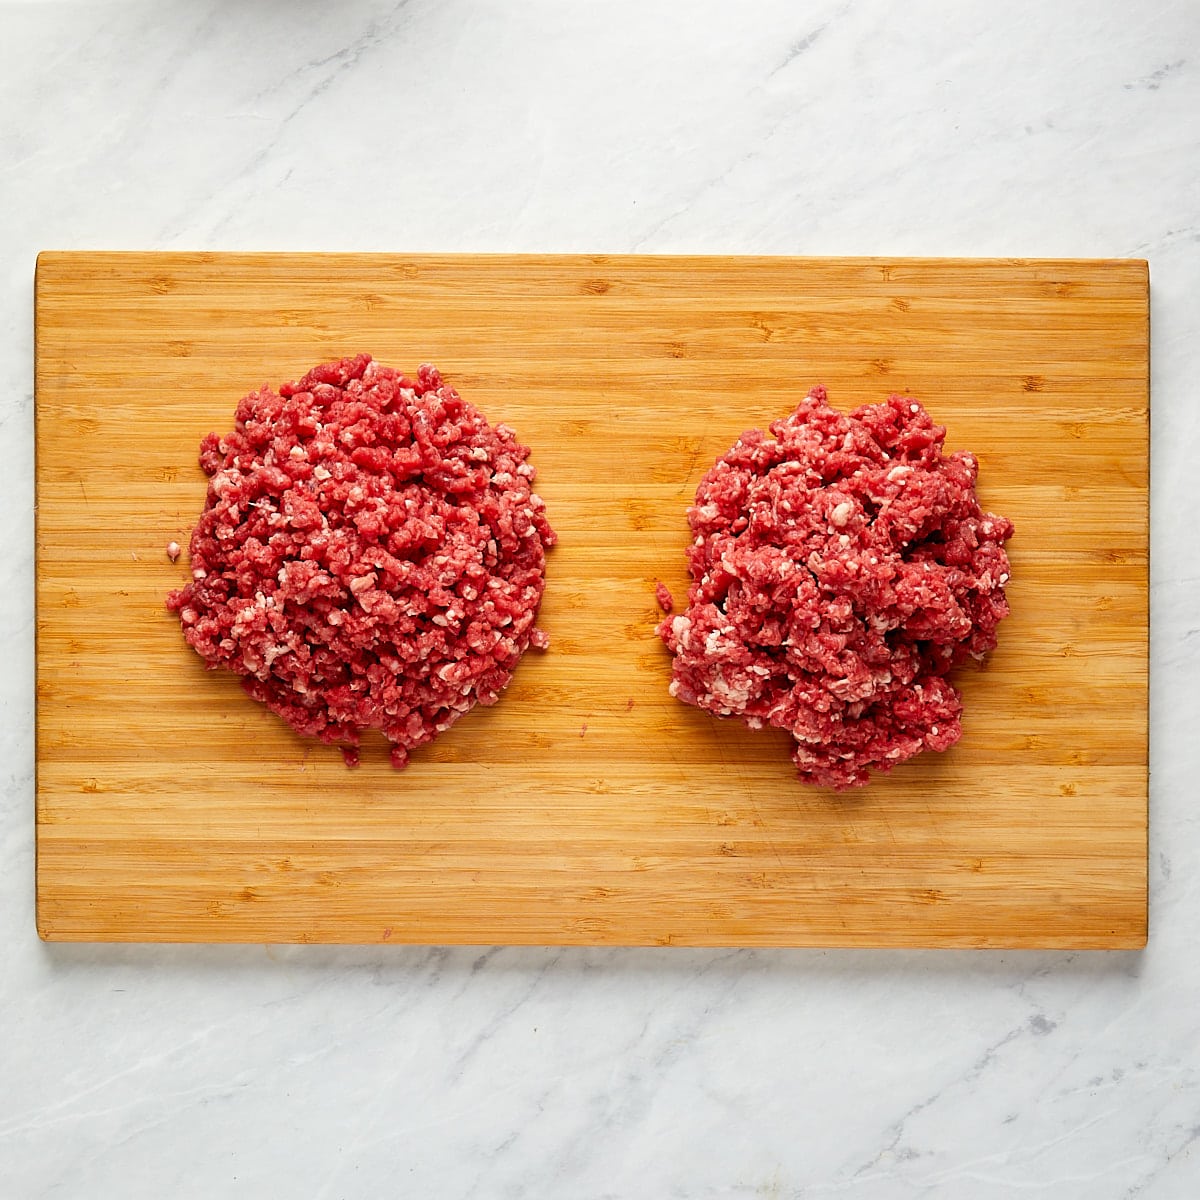
We’ve tried two different methods for grinding beef for hamburgers, and both yielded excellent results. If we had to choose one over the other, we slightly preferred the texture of the KitchenAid food grinder (left), and cleanup was easier. However, using a food processor (right) is still worth it compared to store-bought ground beef.
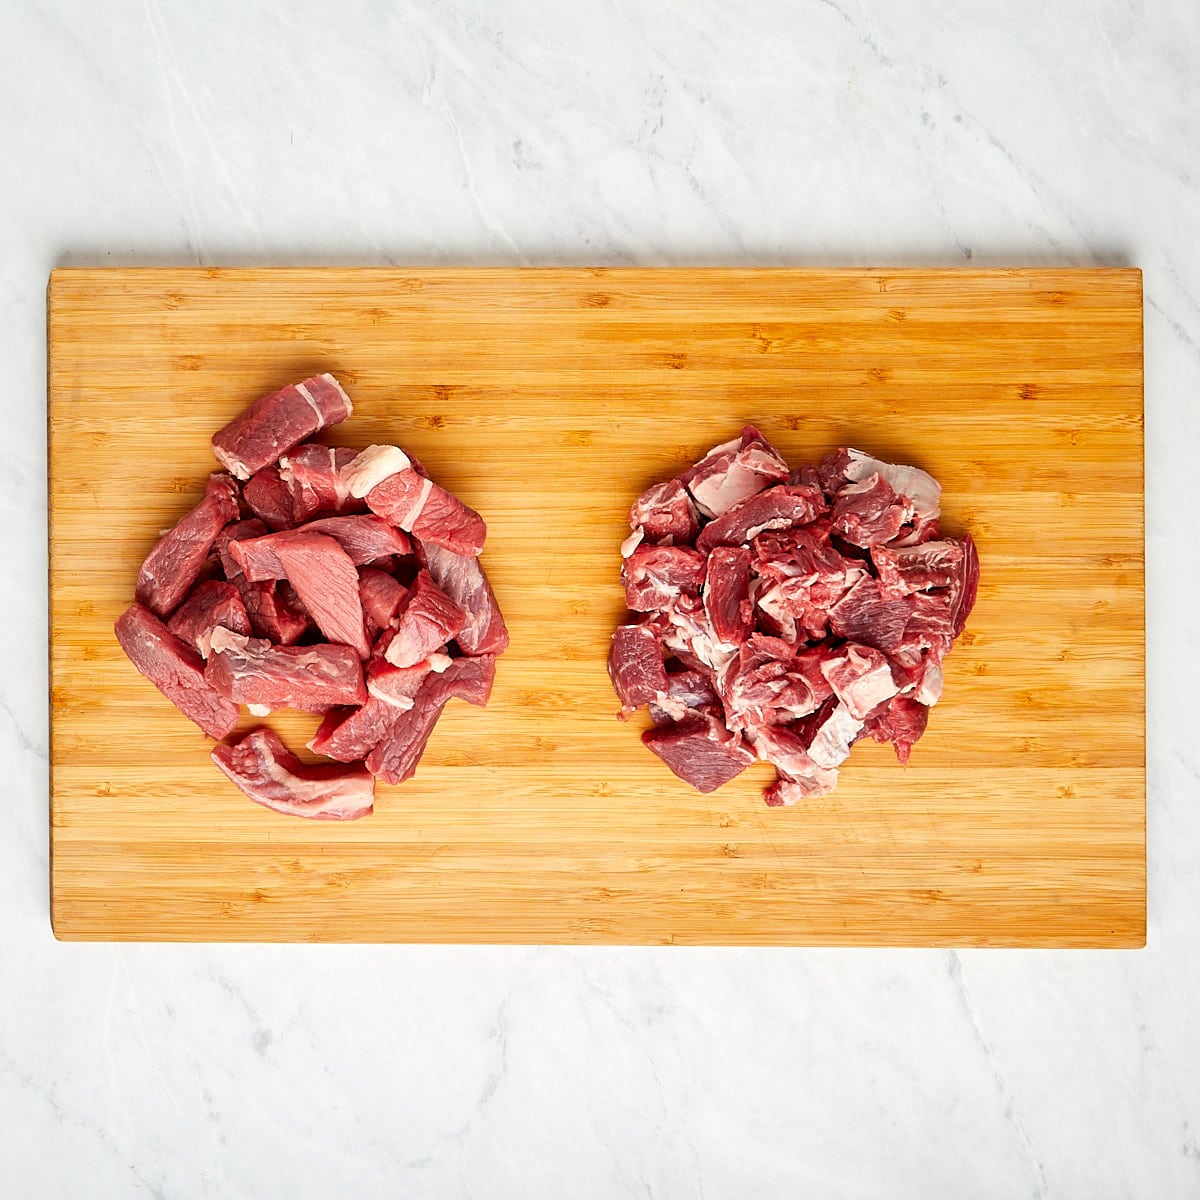
1. Cut the meat: Remove any excess fat from the beef and cut the meat into 1 to 1 1/2 inch cubes, mixing the different kinds in a bowl so that when you grind the various muscle fibers are evenly distributed.
2. Slightly freeze the meat: This is the key to achieving the perfect grind, but you don’t want to overdo it. 30-45 minutes is sufficient to firm up the fats in the beef cubes, but the muscle fibers should still yield to a firm squeeze between two fingers. Don’t forget to put the metal blade and the medium grinder plate in the freezer as well for the best results.
3. Grind the beef: Once your beef cubes are firm but still yielding, you can remove them from the freezer and begin grinding them.
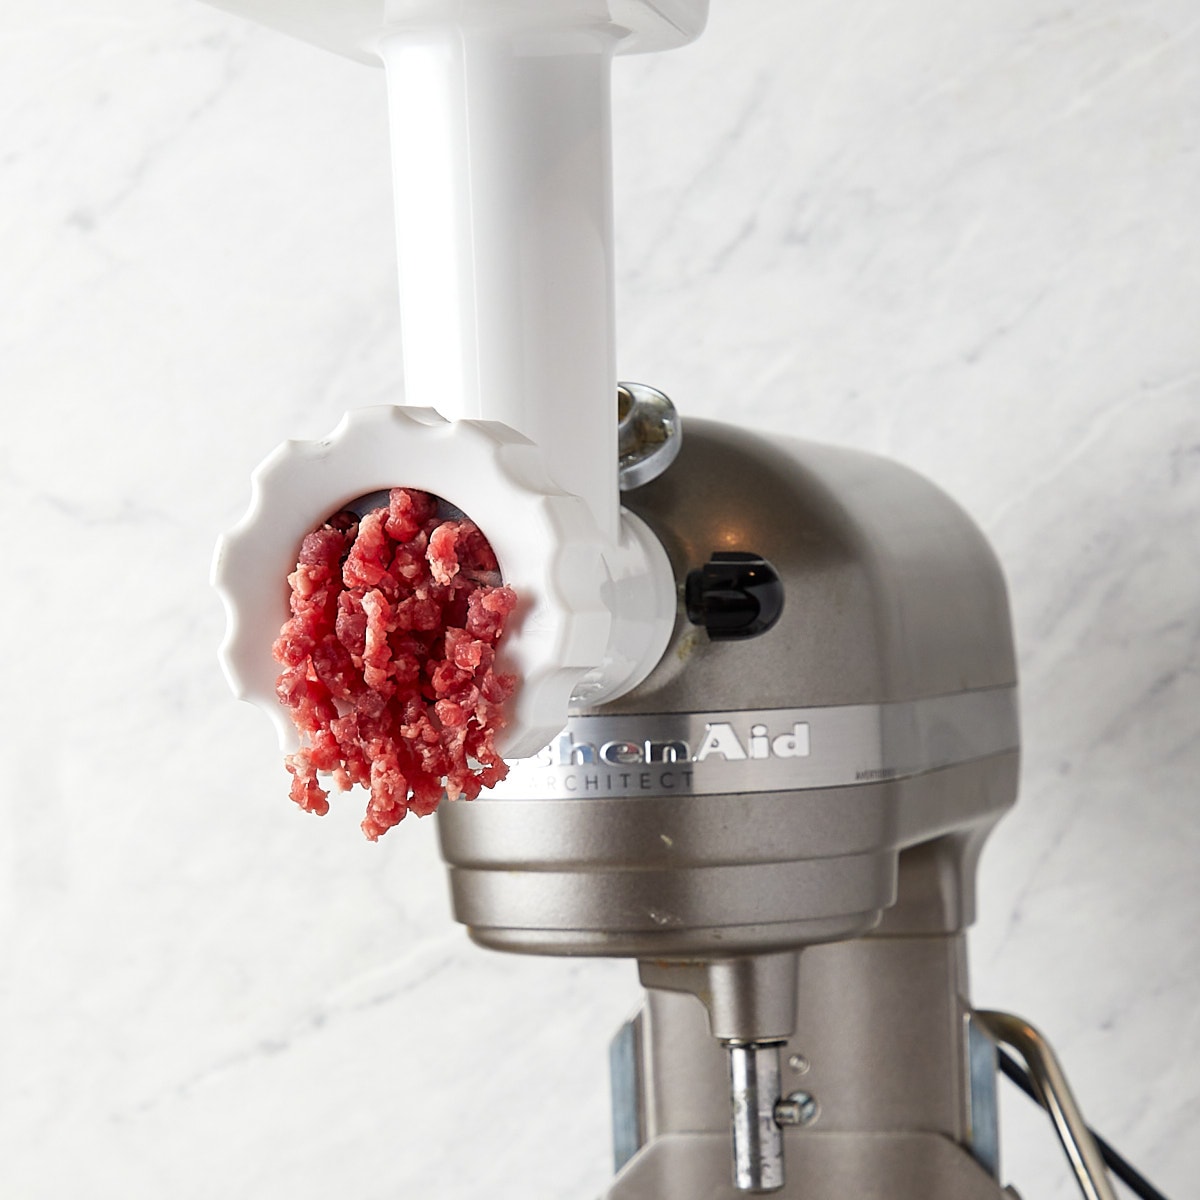
Using a KitchenAid with a grinder attachment: Attach the cold meat grinder attachment to your KitchenAid stand mixer, then place a bowl under the grinder. Turn on the KitchenAid mixer at low speed and begin feeding the beef cubes into the grinder’s feed tube, one piece at a time. Use the food pusher to guide the meat down into the grinder. It’s essential to work slowly to avoid clogging or overloading the grinder. Place a bowl beneath the grinder to catch the beef as it is ground.
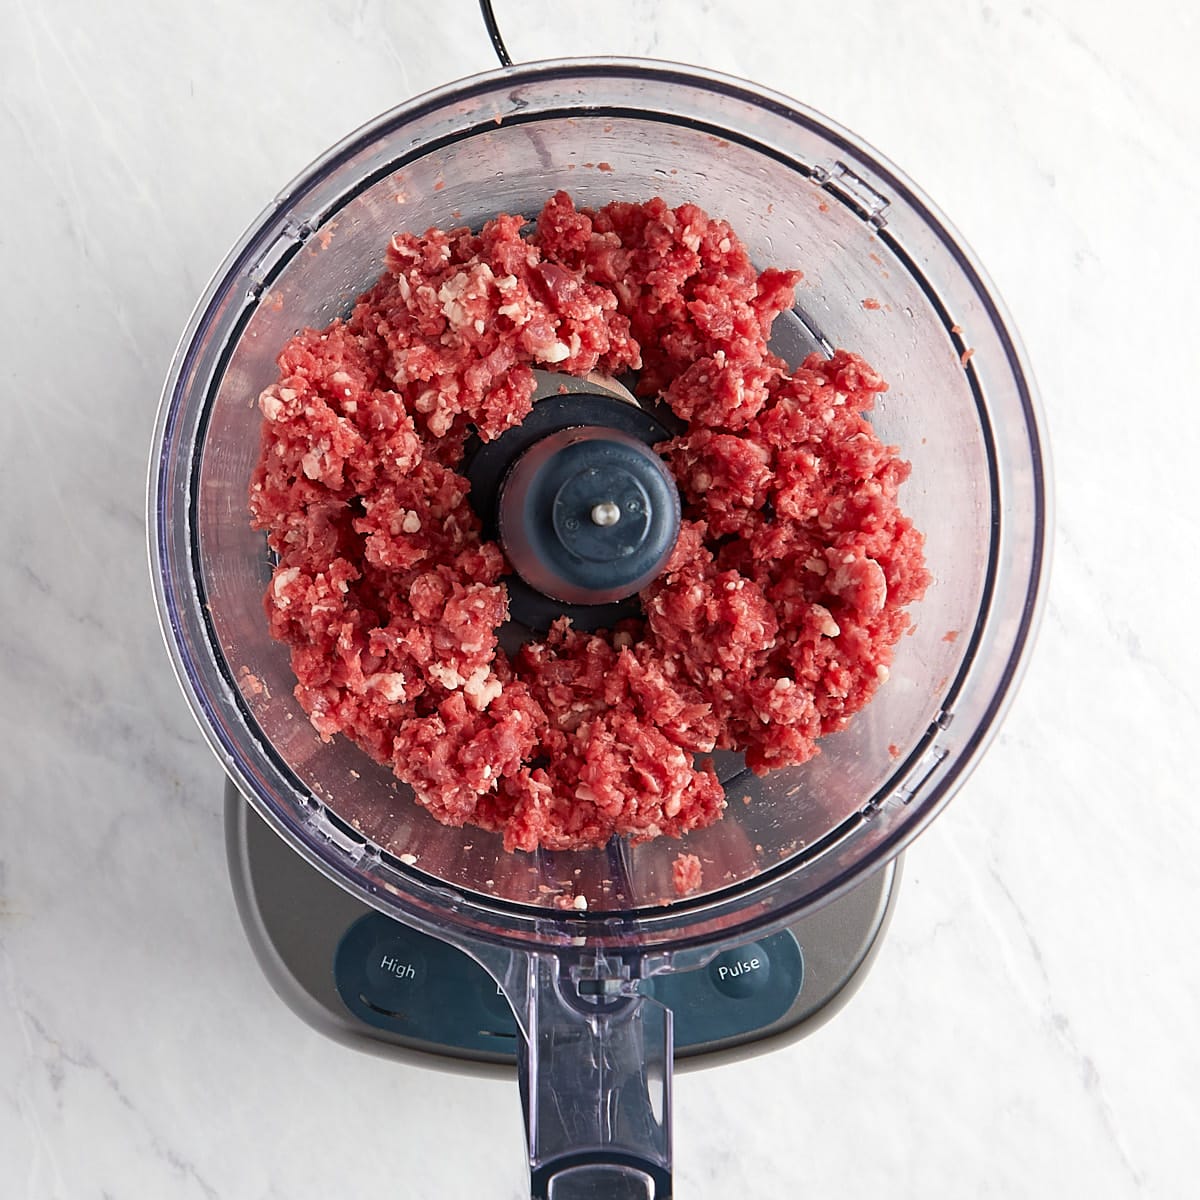
Using a food processor: Place the food processor’s blade, bowl, and beef in the freezer for about 15-20 minutes before grinding. Place a portion of the cold, cubed beef into the food processor, being careful not to overload the processor. Work in batches if necessary to avoid overcrowding. Pulse the meat in short bursts to grind it evenly. Do not run the processor continuously. Continue pulsing until you reach the desired coarseness of the ground beef. Repeat this process with the remaining batches of beef until you have ground all the meat.
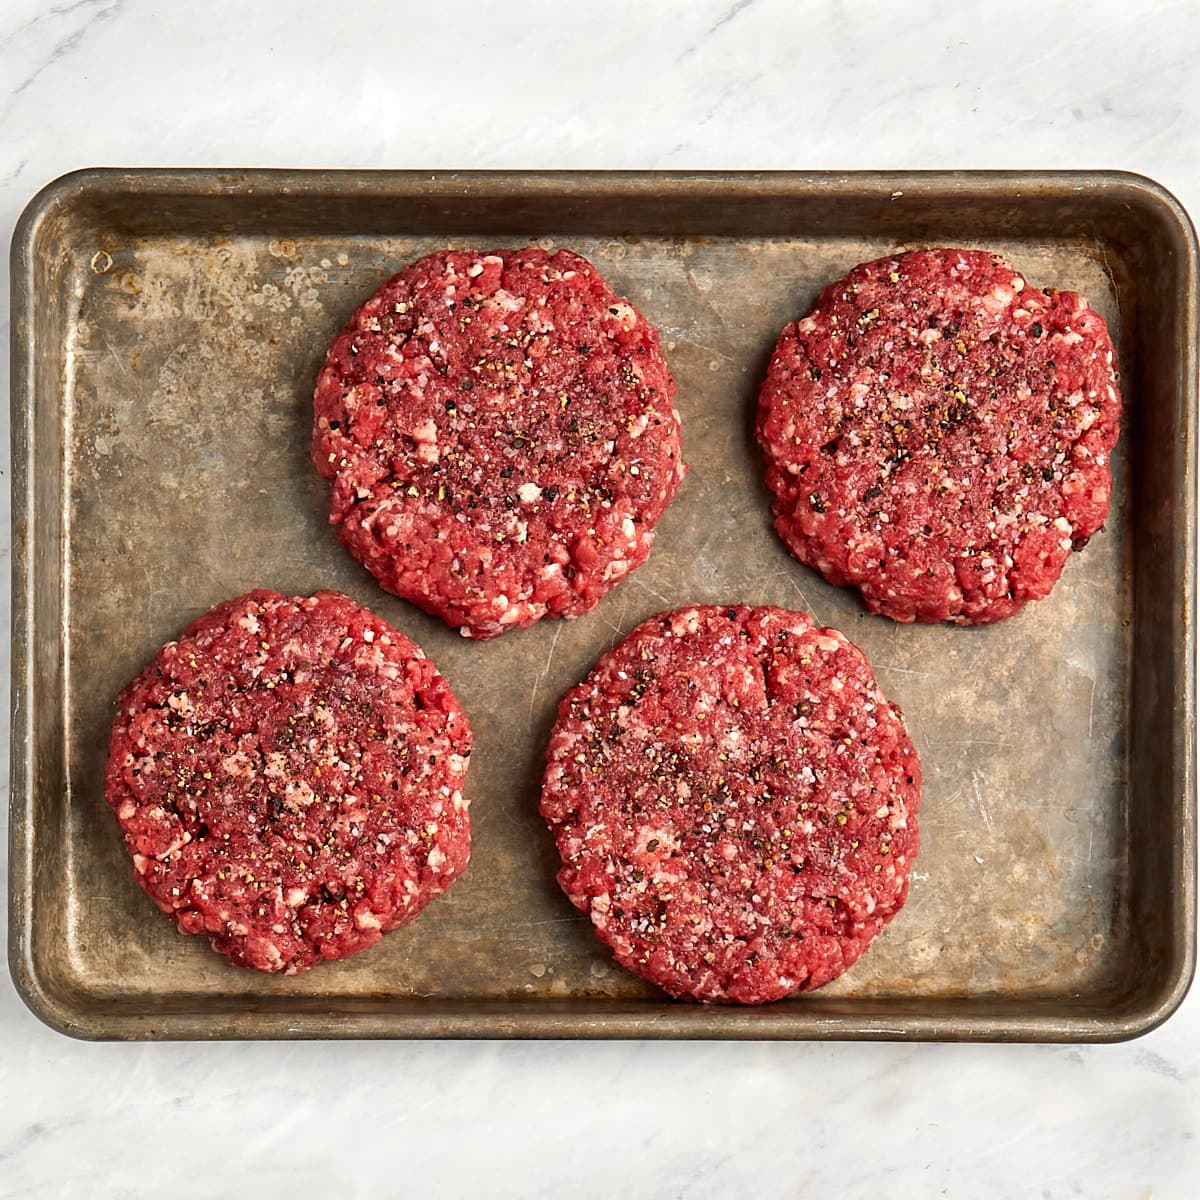
4. Form the patties: Once you’ve ground all the beef, you can form the hamburger patties. Make them as large as you want – from a quarter pound up to a half pound if you’re feeling indulgent. We prefer about a third of a pound for our patties, but it’s all a matter of taste. You’ll notice your hands don’t get as sticky from the myosin as they do with store-bought ground beef. Refrigerate your burger patties until they are ready to cook, keeping the fat solidified to help prevent them from falling apart as they cook. Season with salt and pepper just before cooking.
Freezing and Storage
Freezing and storing fresh ground beef is a great way to enjoy delicious burgers throughout the summer.
Freezing Freshly Ground Beef: Place your formed patties in a single layer on a baking sheet lined with wax or parchment paper, then transfer the baking sheet to the freezer. Once the patties are frozen, transfer them to an air-tight, freezer-safe bag or container. We recommend placing a square piece of wax paper or parchment paper between the frozen patties to prevent them from sticking together. Frozen patties can be kept in the freezer for up to 3 months. We recommend following the USDA guidelines for freezing food, including beef.
Thawing and Using Freshly Ground Beef: Frozen burger patties should be thawed in the refrigerator before cooking. It can be kept in the refrigerator for up to 2 days.
Recipe Tips and Notes
- Trim the Fat. Remove any excess fat, sinew, or silver skin from the meat before grinding. While fat is crucial for flavor and juiciness, too much or the wrong kind (such as sinewy parts) can negatively affect the texture.
- Keep it Cold. Both the beef and the grinder attachment/metal blade need to be kept as cold as possible. As the beef warms, the fat does too, which can get messy and make clean-up more difficult.
- Cut into Chunks. Before grinding, cut your meat into 1-2 inch chunks. This size is manageable for most grinders, ensuring an even grind.
- Grind in Batches. If you’re grinding a large amount of meat, do it in batches to keep the meat as cold as possible throughout the process. This prevents any warmth from affecting the fat’s consistency.
- Grind Twice if Necessary. For a finer texture, consider grinding the meat twice. However, for most burgers, a single grind is sufficient to provide the ideal balance between texture and juiciness.
- Don’t Overwork the Ground Beef. When forming your burger patties, mix the meat as little as possible. Overworking the meat can lead to tough burgers that fall apart easily. Gently shape your burgers without pressing them too hard.
- Chill the Patties. Before grilling or cooking, refrigerate the burger patties for about 30 minutes. This helps the fat solidify slightly, which in turn keeps the burgers together more effectively during cooking.
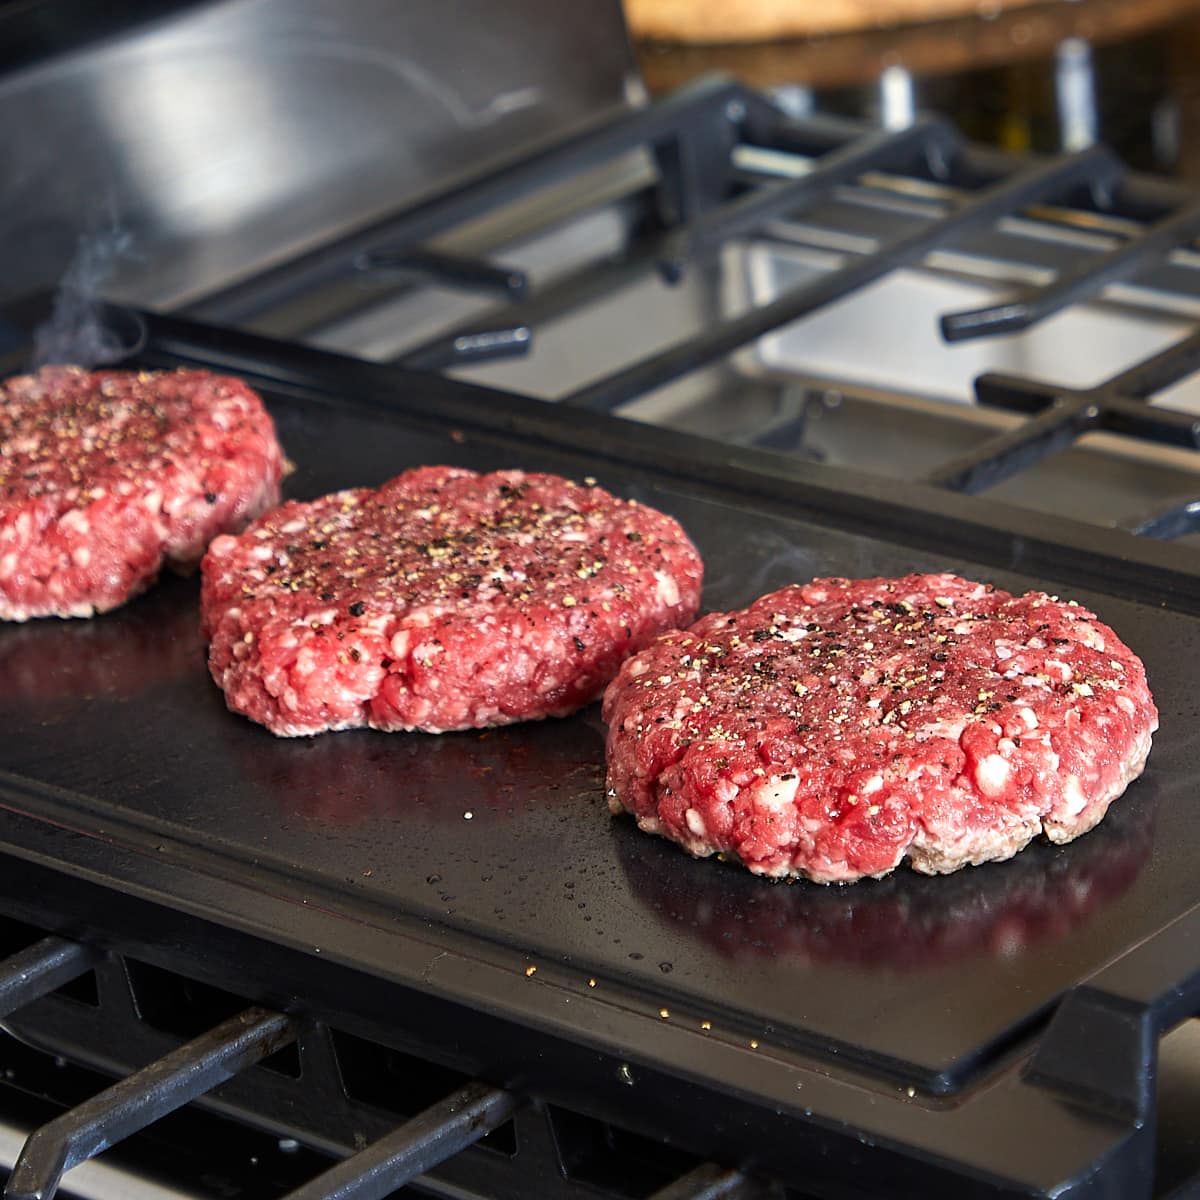
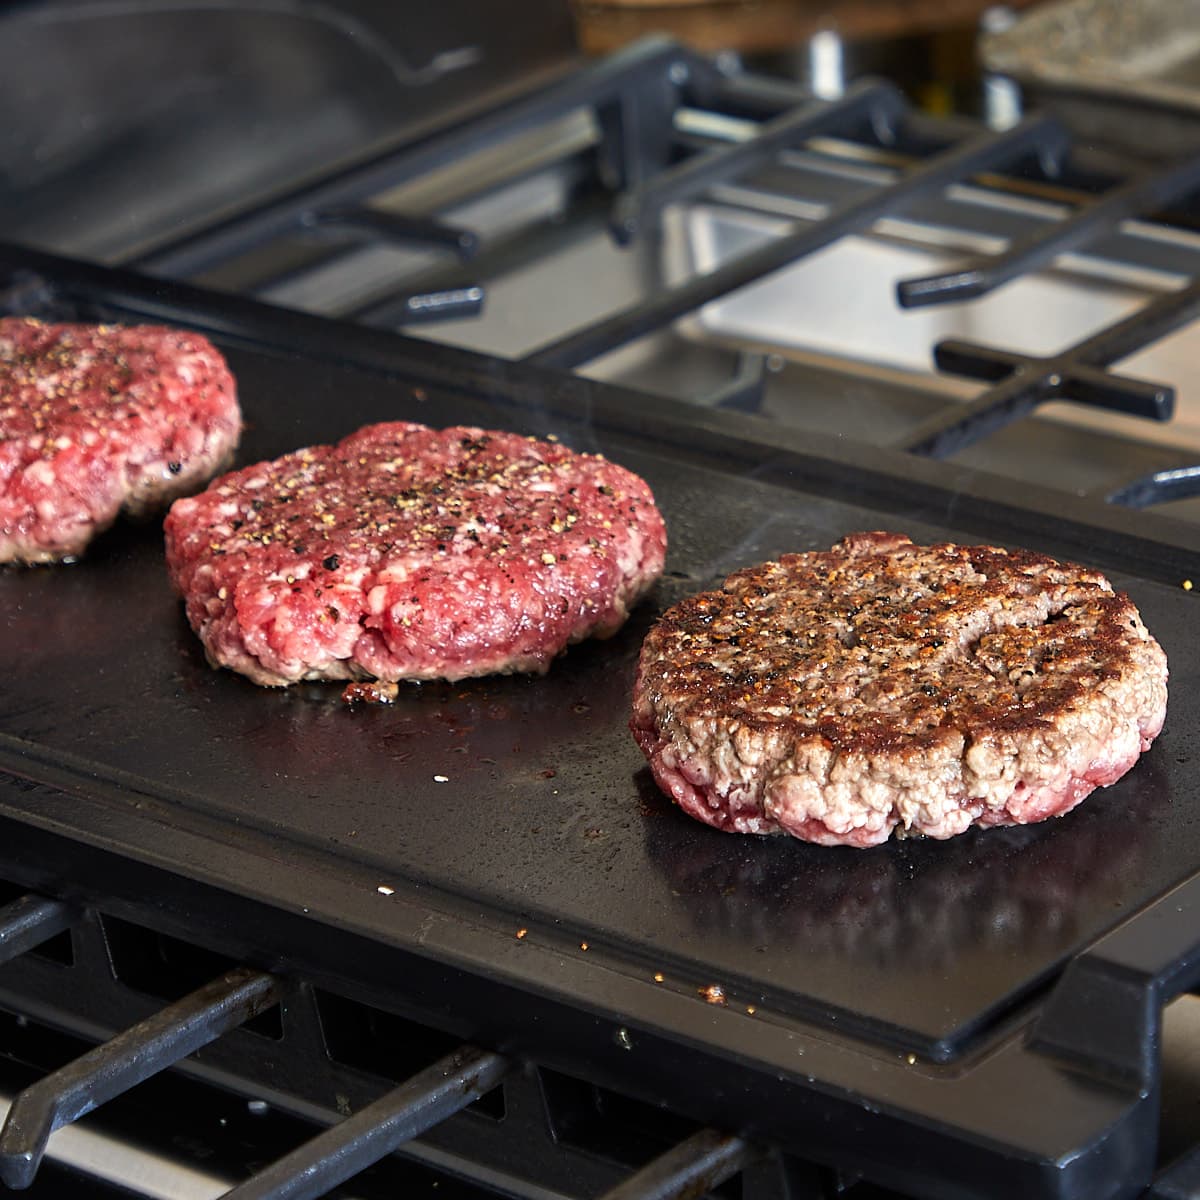
- Don’t Press Down on the Burgers While Cooking. Pressing down on the burgers with a spatula releases their juices and can cause them to fall apart. Let the burgers cook undisturbed, flipping them only once midway through cooking. This will also help them achieve a nice seared outer layer, keeping the burgers juicy.
- Flip the Burgers Once. Wait until the burgers develop a crust on the bottom and release easily from the grill or pan before flipping. This crust helps keep the burger together.
More Burgers & Sliders To Try
Looking for burger or slider recipes? Try these other favorites:
- Classic Texas Burger – Made with juicy beef patties, crisp pickle slices, fresh diced onions, and a generous smear of mustard. These burgers are a must at your next backyard cookout.
- Bacon Blue Cheese Burger – Experience the ultimate burger crafted from premium ground beef. These gourmet patties are grilled and topped with crispy bacon and melty blue cheese
- Caramelized Onion Mushroom Swiss Turkey Burger – These delicious burger is loaded with sweet caramelized onions and sautéed mushrooms and are the perfect burger for any BBQ or gathering. Bonus: all the ingredients can be prepped ahead of time.
Let’s Connect! If you make this recipe or any other recipe on Casual Epicure, please don’t forget to rate the recipe and leave a comment below. It helps others who are considering making our recipes and we love hearing about your cooking experiences. And if you snapped some shots, share them on Instagram, and be sure to tag @casual.epicure so we can feature them in our stories.
How to Grind Beef for Burgers
Want To Save This Recipe For Later?
Equipment
- 1 KitchenAid Mixer with Meat Grinder Attachment
- 1 Food Processor
Ingredients
- 12 ounces brisket
- 12 ounces boneless short ribs
Instructions
Grinding Beef Using a KitchenAid
- Trim away any excess fat from the brisket and short ribs, then cut the beef into small, evenly sized pieces that can easily fit into the grinder's feed tube.
- Place the meat grinder attachment and the beef in the freezer for about 15-20 minutes.
- Attach the meat grinder attachment to your KitchenAid stand mixer. Place a bowl under the grinder attachment.
- Turn on the KitchenAid mixer at a low speed. Start feeding the beef cubes into the grinder's feed tube one piece at a time. Use the food pusher to guide the meat down into the grinder. It's essential to work slowly to avoid clogging or overloading the grinder.
- Once you've ground all the beef, you can use it immediately in your recipes or store it in the refrigerator in an airtight container for later use.
Grinding Beef Using a Food Processor
- Trim away any excess fat from the beef and cut the meat into small, evenly-sized pieces.
- Place the food processor's blade, bowl, and the beef in the freezer for about 15-20 minutes.
- Place a portion of the cold, cubed beef into the food processor. Don't overload the processor; work in batches if necessary to avoid overcrowding.
- Pulse the meat in short bursts to grind it evenly. Do not continuously run the processor; use the pulse function to control the consistency.
- Process until you reach the desired coarseness of ground beef.
- Continue this process with the remaining batches of beef until you have ground all the meat.
- Once you've ground all the beef, you can use it immediately in your recipes or store it in the refrigerator in an airtight container for later use.