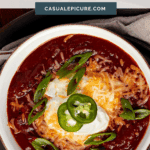
This beer chili is built for game days when you want a pot that feels hearty enough for a crowd and still tastes even better by halftime. Our game day beer chili starts with a dark lager simmered and a dried ancho and guajillo chile paste, so the flavor is deep without being too spicy.

Want To Save This Recipe For Later?
We live in Texas, so we know the bean conversation well, and this is our go-to recipe when we want a bean-based chili. Set out a chili bar with plenty of toppings, warm up a batch of old-fashioned cornbread, and keep a little extra for leftovers later in the week.
Why Add Beer to Chili?
Beer gives chili a depth you just cannot get from broth alone. A dark lager brings a warm, malty note that rounds out the roasted ancho and guajillo chiles in the paste, and the long simmer lets everything blend into a rich, balanced base. It also does a great job deglazing the pan, pulling up all the browned bits from the beef and onions, so none of that flavor gets left behind.
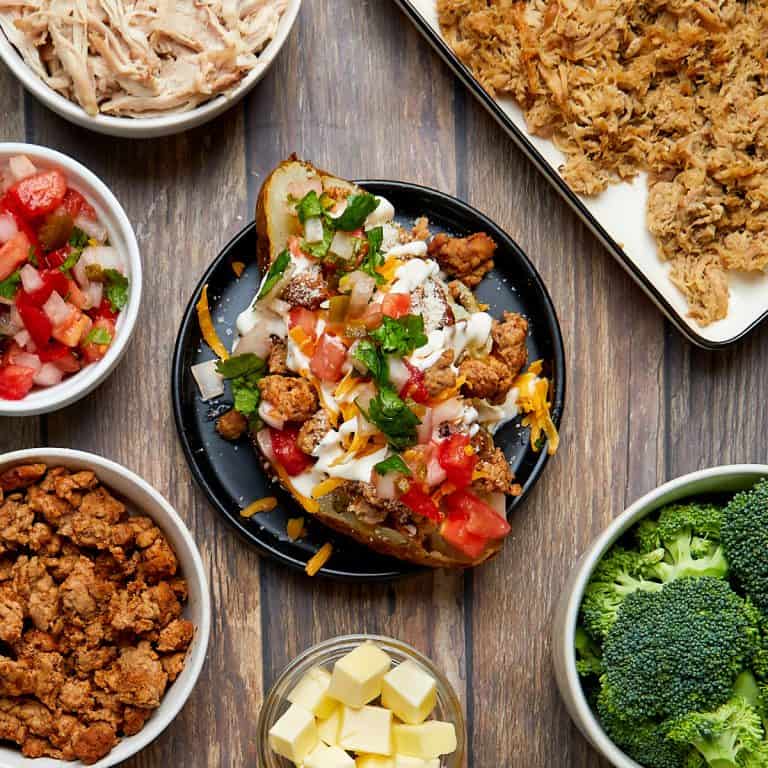
Living in Texas, we have made every version of chili you can imagine, from our traditional no-bean Texas Chili to this smoky vegetarian chili. Each chili has its place in our kitchen, and this version leans into the beer and homemade chili paste for a deeper flavor. It stays hearty for long game day afternoons and is easy to serve with toppings or over baked potatoes, Fritos, nachos, or cornbread.
Key Ingredients and Substitutions
This beer chili uses a mix of ground beef, dried chiles, tomatoes, beans, and a dark lager to build a deep, steady flavor while it simmers. Each ingredient has a job, and a few simple swaps can help you tailor the chili to your taste.
The full ingredient list and measurements are listed in the printable recipe below.
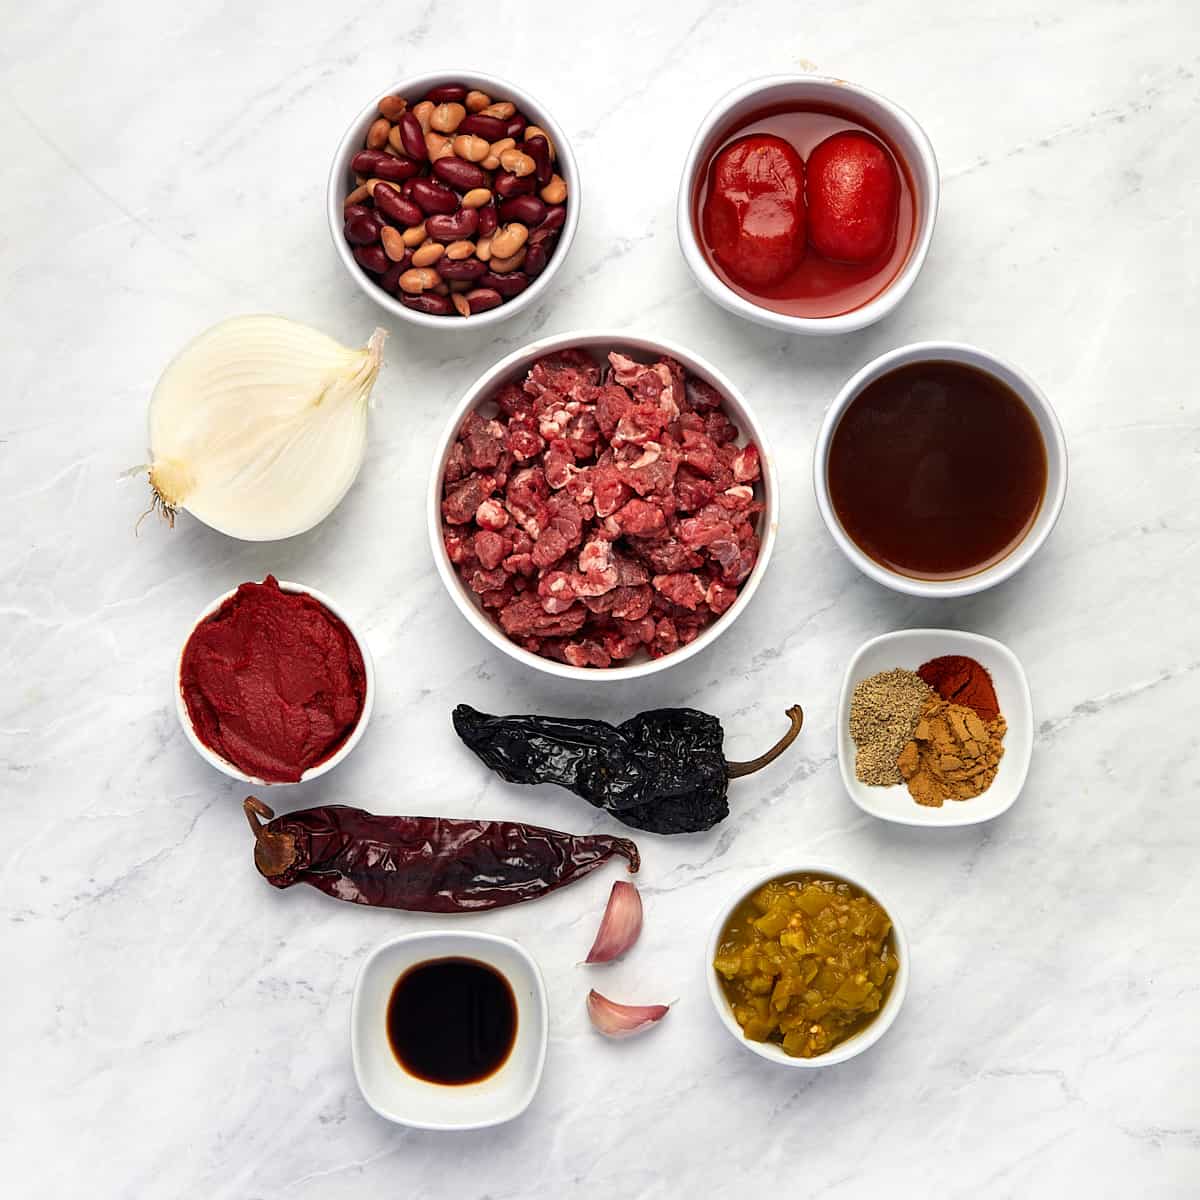
- Ground Beef – Coarse ground beef is the best for making chili; our Texas grocery store labels it as ‘Ground Angus Chuck Chili Meat’. Since it is a coarser grind, it will not break down as much as fine ground beef, giving the chili more texture. You can substitute regular ground beef, turkey, or chicken based on your preference.
- Beans – There is a heated debate about whether real chili has beans. We think if you like beans in your chili, then add them. If you don’t, then skip them. We prefer a combo of red kidney beans and pinto beans, but you can add or substitute any bean. You can soak and cook your own or use canned.
- Onion and Garlic – While we prefer to use fresh and not powdered, if all you have on hand is onion powder and garlic powder, it will do. Approximately 1/2 tablespoon of onion powder is equivalent to 1/4 cup of raw onion, and about 1/2 teaspoon of garlic powder is equivalent to 2 cloves of pressed garlic. Be careful not to use onion or garlic salt by mistake since this could make your chili taste too salty.
- Tomatoes – You can use either whole peeled tomatoes or diced tomatoes (along with their juices), which tend to hold their shape better. We used whole peeled tomatoes that we lightly hand-crushed for a richer-tasting chili.
- Beef Broth – Beef broth adds additional beef flavor to the chili, but you can substitute chicken or vegetable broth if that is all you have. Just note that the final flavor will be different.
- Spices – The chile paste does most of the heavy lifting, so you only need a small amount of cumin, paprika, salt, and pepper.
- Dark Beer– We used Shiner Bock, a darker lager-style beer, since it is local to San Antonio and lightly hopped. A dark lager brings a warm, malty note that fits the chile paste and deepens the flavor as the chili cooks. A porter or stout can also work. Skip highly hopped beers since they can make the chili taste bitter.
- Worcestershire Sauce – Worcestershire sauce is a great umami amplifier, which is why it’s commonly added to Bloody Marys. Adding it to the chili helps create a rich, savory base.
- Homemade Chile Paste– Typical chili recipes will call for chili powder, a combination of chile peppers, spices (as in cumin and paprika), salt, and garlic. The ingredients will vary by brand, so we prefer to skip the powder and make our own chile paste. The paste sets this chili apart. Ancho and guajillo chiles blend into a smooth base that adds depth without bringing too much heat. You can use other dried chiles, but the flavor will shift.
How to Make Game Day Chili
Here are the quick, step-by-step instructions with visuals; you can find the full instructions, including the exact ingredients, in the recipe card below.
Pro-tip: Gameday chili freezes well so make a little extra on a cold day when you need a bowl to warm you up.
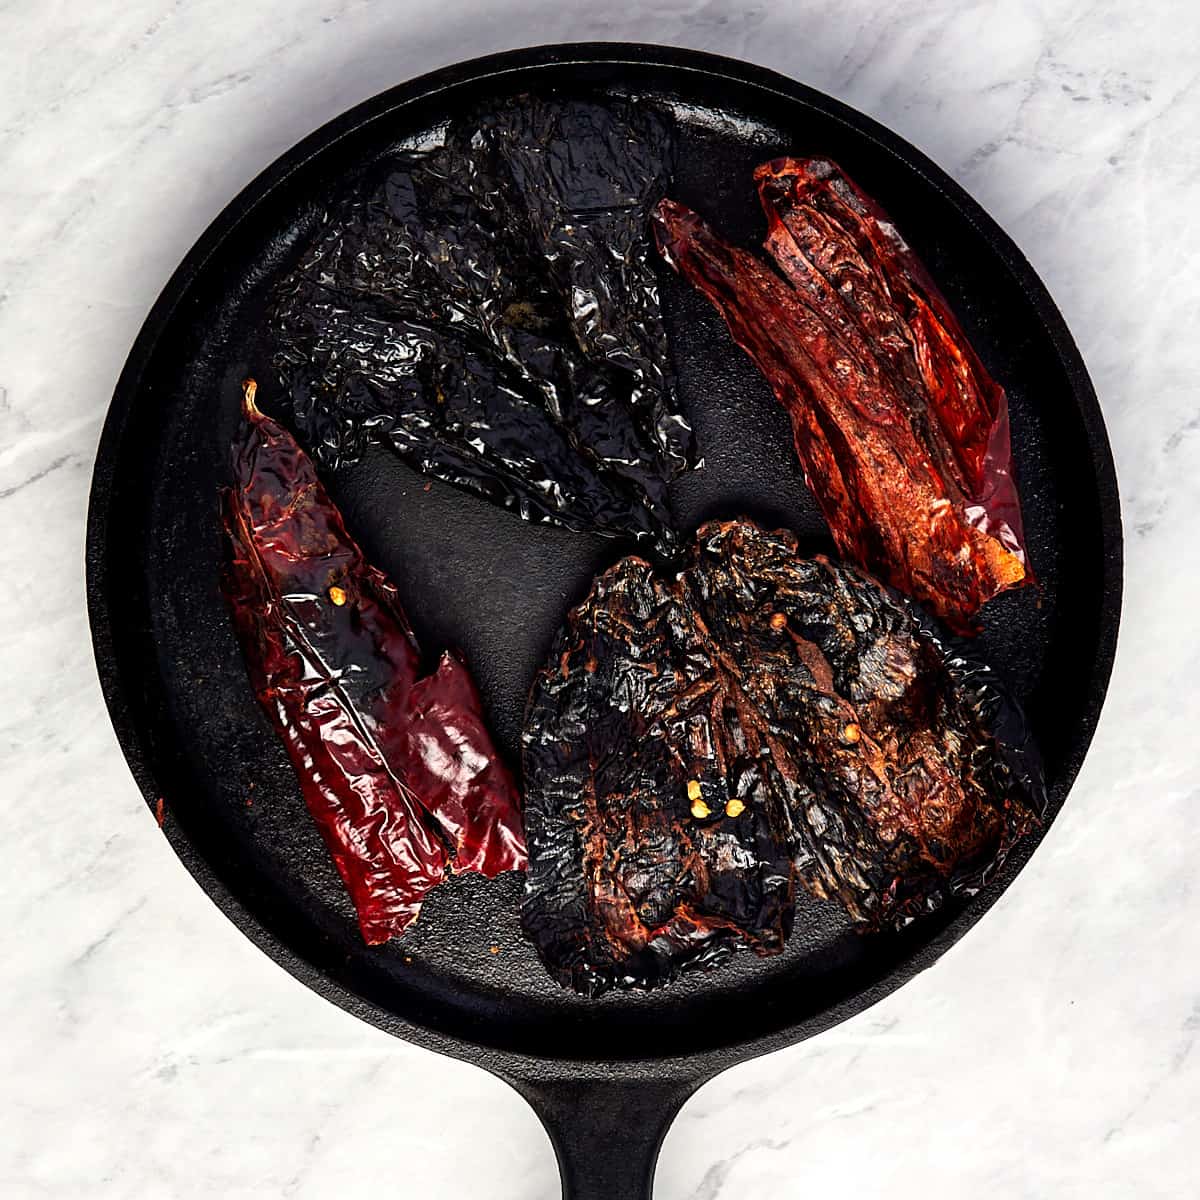
1. Toast the Chiles: Warm the beef broth in a medium saucepan. Split and deseed the dried chiles. Toast the chiles in a cast iron pan for approximately 20-30 seconds per side. The chiles will begin to have a fruity smell and darken. Be careful not to over-toast.
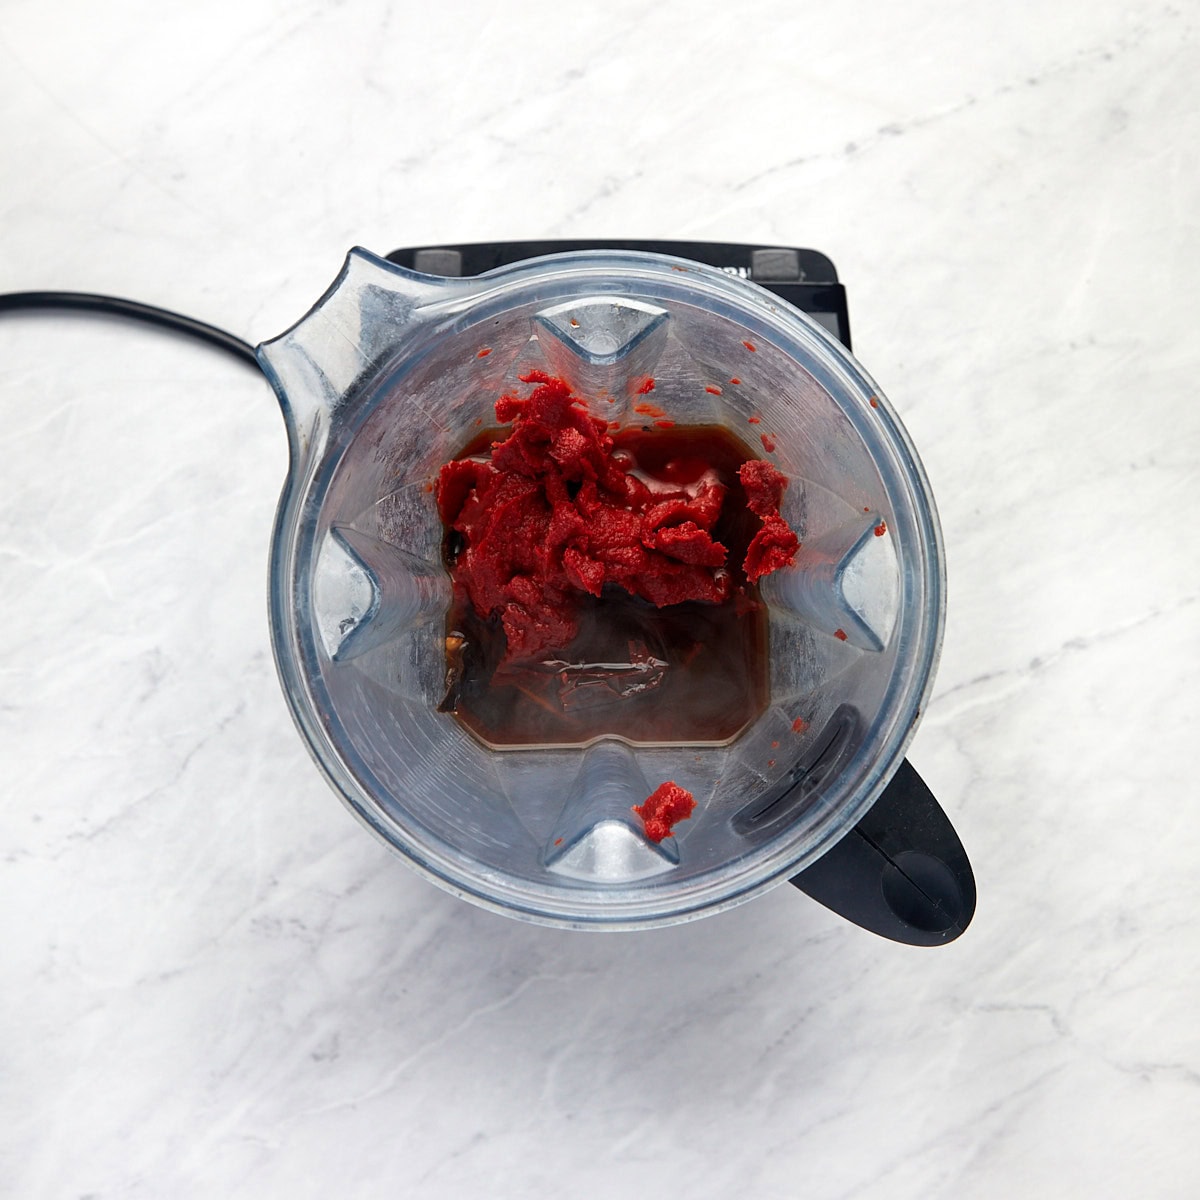
2. Blend Chiles and Broth: Tear or cut chiles into 1-2 inch pieces and add them to the beef broth. Bring to a boil and then remove from heat. Let chiles and beef broth sit for 5-10 minutes. Blend the chiles and beef broth in a blender for approximately 2-3 minutes or until the chiles have been broken down. Add tomato paste and blend until smooth.
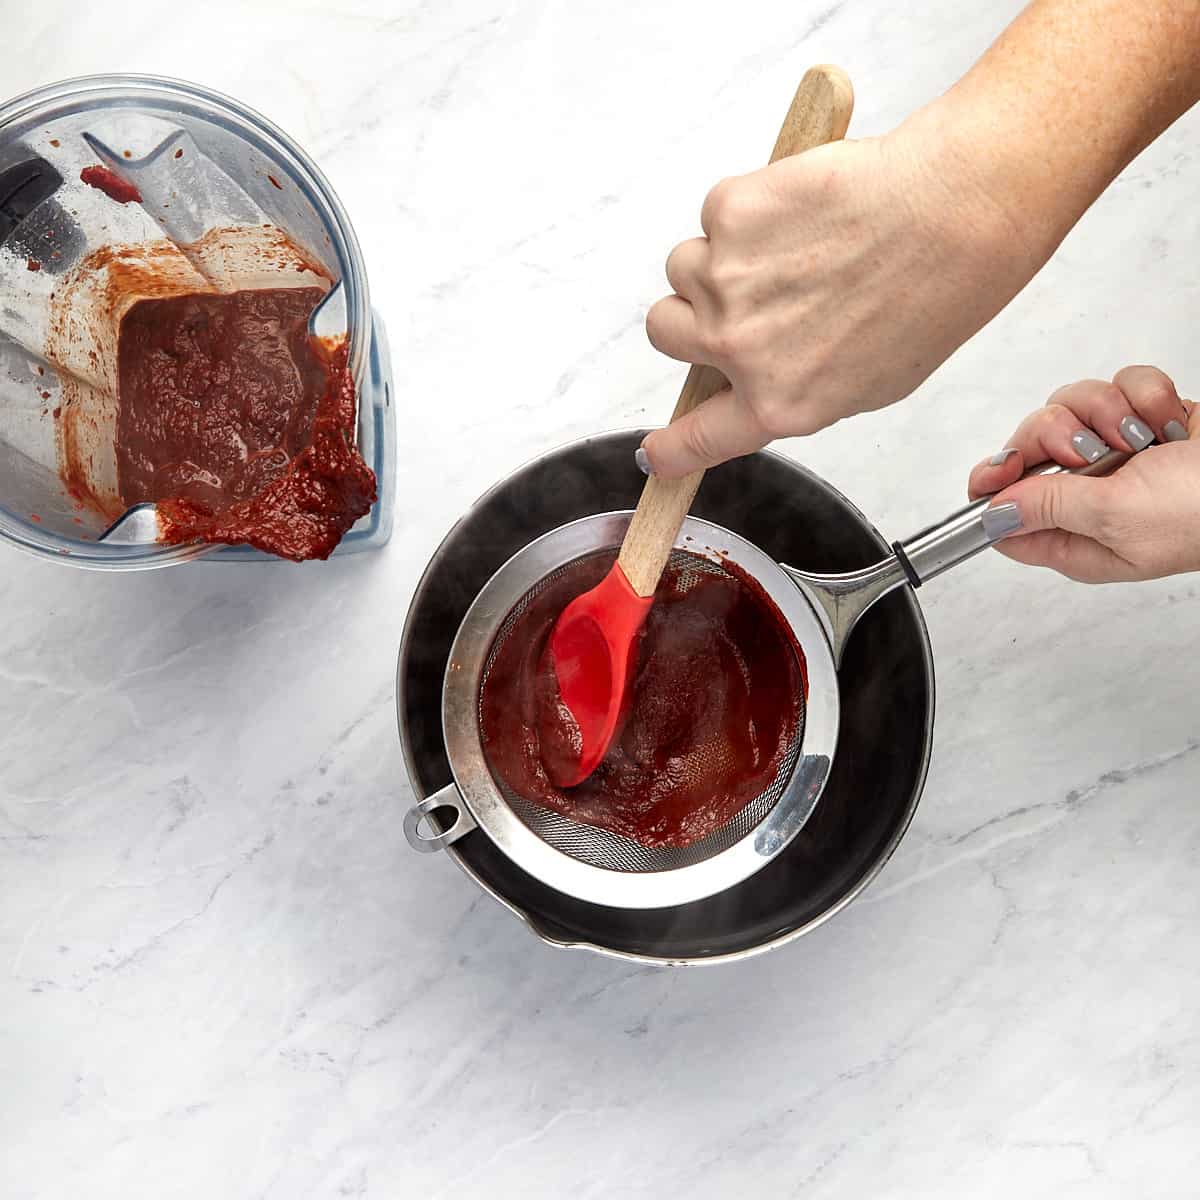
3 Strain Chile Paste: Use a spatula to work the chile mixture through a wire strainer to remove residual chile stems or seeds. Set the chile pasta aside.

4. Cook Ground Beef, Onions, and Garlic: Cook ground beef, onion, and garlic in a large pot or Dutch oven over medium heat. Stir until the meat crumbles and is no longer pink. Drain well.
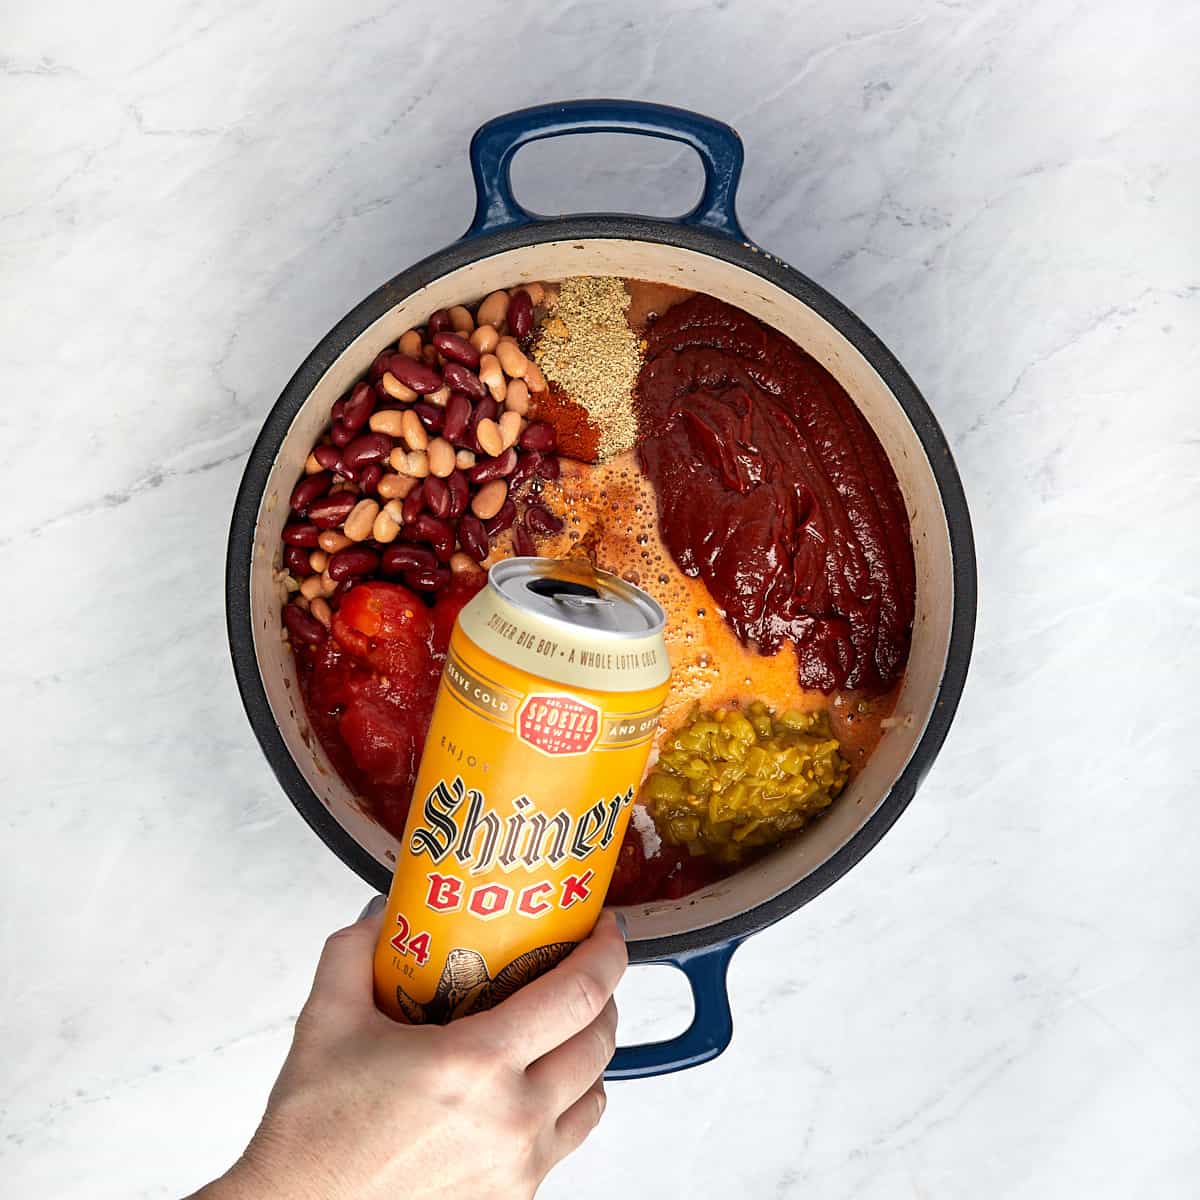
5. Combine Remaining Ingredients: To the Dutch oven add the pinto beans, kidney beans, whole peeled tomatoes, beer, green chiles, Worcestershire saue, ground cumin, paprika, and ground black pepper. Combine well.
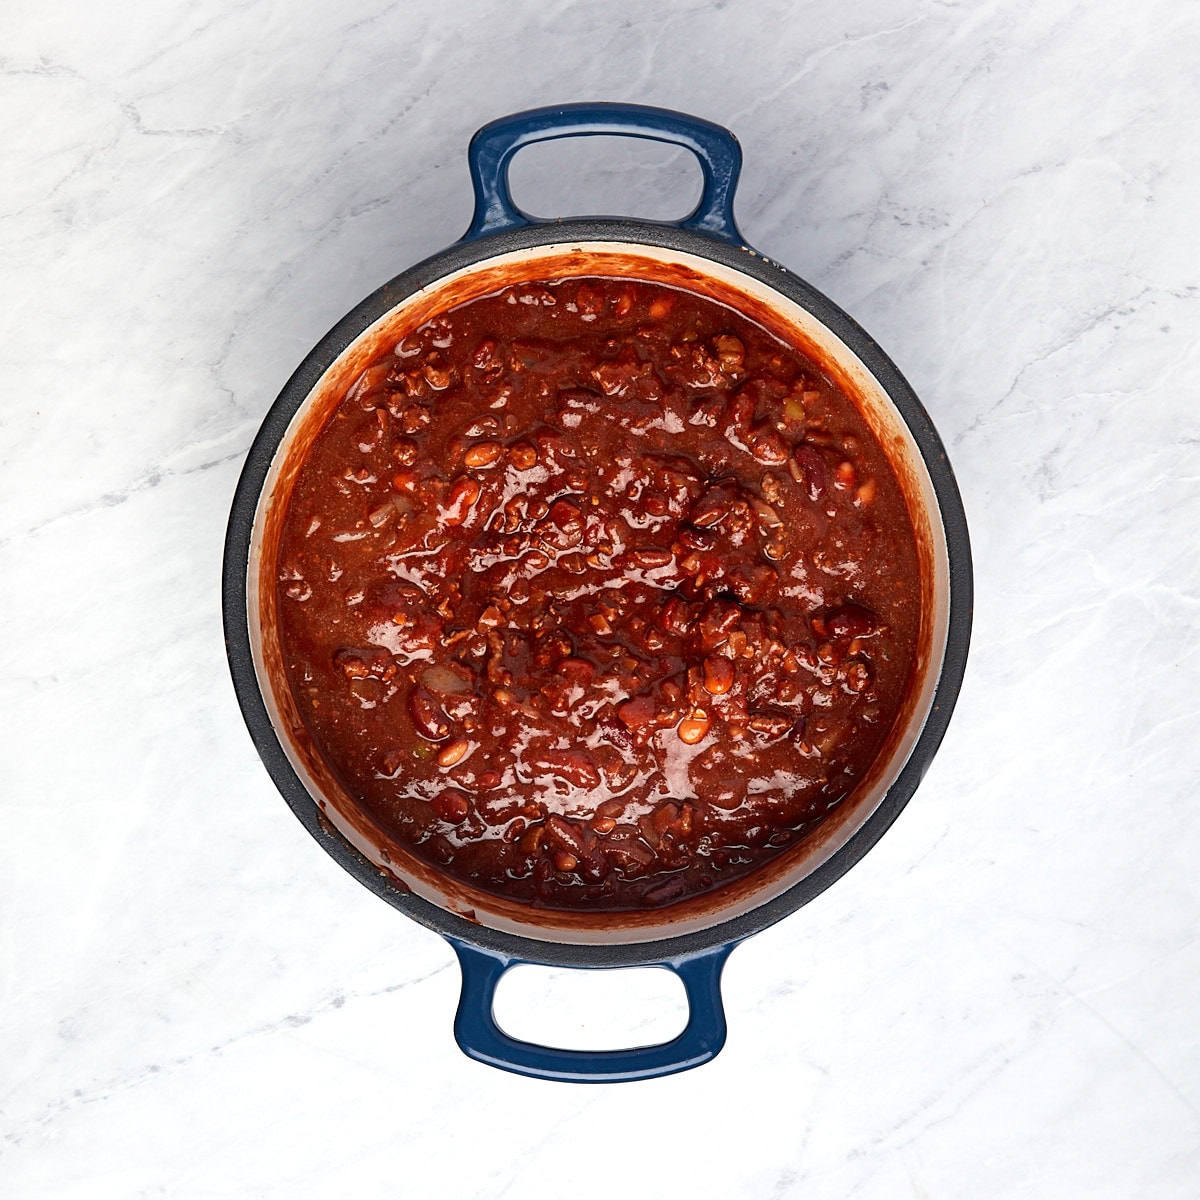
6. Simmer the Chili: Reduce the heat and simmer for 3 hours or until the chili has thickened. Serve hot and topped with your favorite garnishes or side.
Chili Topping and Serving Suggestions
The right toppings can turn a pot of beer chili into a full game day spread. Set everything out buffet-style or keep it simple with a handful of your favorites. Either way, a mix of fresh, creamy, and crunchy elements gives everyone a chance to build their ideal bowl.
Fresh toppings: Cilantro, diced white or green onions, sliced jalapeños, and chopped avocado bring brightness that balances the deep flavor of the beer and chile paste.
Creamy elements: Shredded cheddar or colby jack, sour cream, and a scoop of guacamole add richness. We love adding some Tex-Mex queso to our chile, too.
Crunchy additions: Corn chips, tortilla strips, and our cornbread croutons add texture. Cornbread on the side is never a bad idea, and our old-fashioned cornbread is a great side for this chili.
For entertaining, set up a chili bar toppings station and let everyone customize their own bowl. It’s perfect for game day gatherings or casual dinner parties. If you have a little left the next day, we have a whole list of leftover chili recipes to turn it into something new.
Recipe Tips and Notes
- Watch the chile paste closely. Toasting the dried chiles only takes a short time and they can burn fast. Once they darken slightly and smell fruity, pull them from the heat.
- Blend the paste until smooth. Any large pieces of skin or seeds will affect the texture, so strain it well before adding it to the pot.
- Deglaze with the beer. Pour it in and scrape the bottom of the pot to lift the browned bits into the chili.
- Simmer low and steady. A gentle simmer helps the beer, chile paste, and spices blend without reducing too quickly.
- Stir from time to time. The long cook can cause the bottom to stick if it sits too long without a stir.
- Thicken the chili slowly. Let it simmer uncovered or add a small spoon of masa harina if you want a thicker bowl.
- Thin the chili with broth. A splash or two brings it back to the right texture if it gets too thick as it rests.
- Taste before serving. The seasoning changes as the chili cooks, so check the salt and heat level near the end.
Make-Ahead and Storage
Make-Ahead: You can make chili up to three days in advance. Prepare the chili according to the instructions, then store it in an airtight container in the refrigerator once it has cooled. When you’re ready to eat, follow the reheat instructions below.
How to Store: Once the chili has cooled, store it in a freezer-safe container or gallon-size freezer bag. We prefer freezer bags since they can be placed flat in the freezer and stacked. The chili can be frozen for up to 3 months. Defrost the chili overnight in the refrigerator before reheating. Leftovers can also be refrigerated in an airtight container for up to 3 days.
How to Reheat: The chili will thicken as it sits in the refrigerator, so a few splashes of broth or water may need to be added to loosen it up a bit when you reheat it. To reheat on the stove, transfer it to a saucepan and heat over medium-low heat, stirring occasionally for about 10 minutes. To reheat in the microwave, transfer to a microwave-safe dish, cover with a microwave-safe lid or paper towel, and heat for about 2 minutes, stirring every 30 seconds.
Frequently Asked Questions

More Game Day Recipes to Try
Looking for more football and tailgating recipes? Try these other favorites:
- 20 Toppings Every Nacho Bar Needs – Serve the ultimate nacho bar at your next football watch party. There are instructions on setting up your self-serve topping bar, a list of 20+ must-have toppings, and some topping combos you must try.
- 20 Toppings Every Chili Bar Needs – Serve yourself chili bars are an easy party option that is affordable. A list of all the best toppings for a chili bar and other side ideas.
Let’s Connect! If you make this recipe or any other recipe on Casual Epicure, please don’t forget to rate the recipe and leave a comment below. It helps others who are considering making our recipes and we love hearing about your cooking experiences. And if you snapped some shots, share them on Instagram, and be sure to tag @casual.epicure so we can feature them in our stories.
Game Day Chili
Want To Save This Recipe For Later?
Equipment
- Medium Saucepan (2-3 Quarts)
- Cast-Iron Round Griddle
- Blender
- Fine Mesh Strainer
- Large Saucepan or Dutch Oven
Ingredients
Homemade Chile Paste
- 5-6 large guajillo chiles, dried
- 4-5 large ancho chiles, dried
- 2 ½ cups beef broth
- 6 ounce can of tomato paste
Game Day Chili
- 1.5 – 2 pounds ground beef, chili grind
- 1 medium onion, chopped
- 2 cloves garlic, minced
- 1 15 ounce can of pinto beans
- 1 15 ounce can of red kidney beans
- 1 28 ounce can of whole peeled tomatoes, crushed by hand
- 1 12 ounce bottle dark beer, such as Shiner Bock
- 1 4.5 ounce can of chopped green chiles
- 1 tablespoon Worcestershire sauce
- 2 teaspoons ground cumin
- 3 teaspoons black pepper, freshly ground
- 1 teaspoon paprika
Optional Garnishes
- shredded cheddar or colby jack cheese
- sour cream
- green onions, diced
- jalapenos
- avocado
Instructions
Homemade Chile Paste
- In a medium saucepan warm the beef broth.
- Split and deseed dried chiles.
- Toast chiles in a cast iron pan for approximately 20-30 seconds per side. Chiles will begin to have a fruity smell and darken, resembling leather. Be careful not to over-toast.
- Tear or cut chiles into 1-2 inch pieces and add chiles to broth. Bring to a boil and then remove from heat, letting sit for 5-10 minutes.
- Blend chiles and beef broth in a blender for approximately 2-3 minutes or until chiles have been broken down. Add tomato paste and then blend until smooth.
- Using a spatula work the chile mixture through a wire strainer to remove residual chile stems or seeds.
Game Day Chili
- Cook ground beef, onion, and garlic over medium heat in a large pot or Dutch oven. Stir until meat crumbles and is no longer pink. Drain well.
- Combine the remaining ingredients, including chile paste and beer, with the meat mixture and bring to a boil.
- Reduce heat and simmer for 3 hours or until chili has thickened.
- Serve hot and topped with your favorite garnishes or sides.