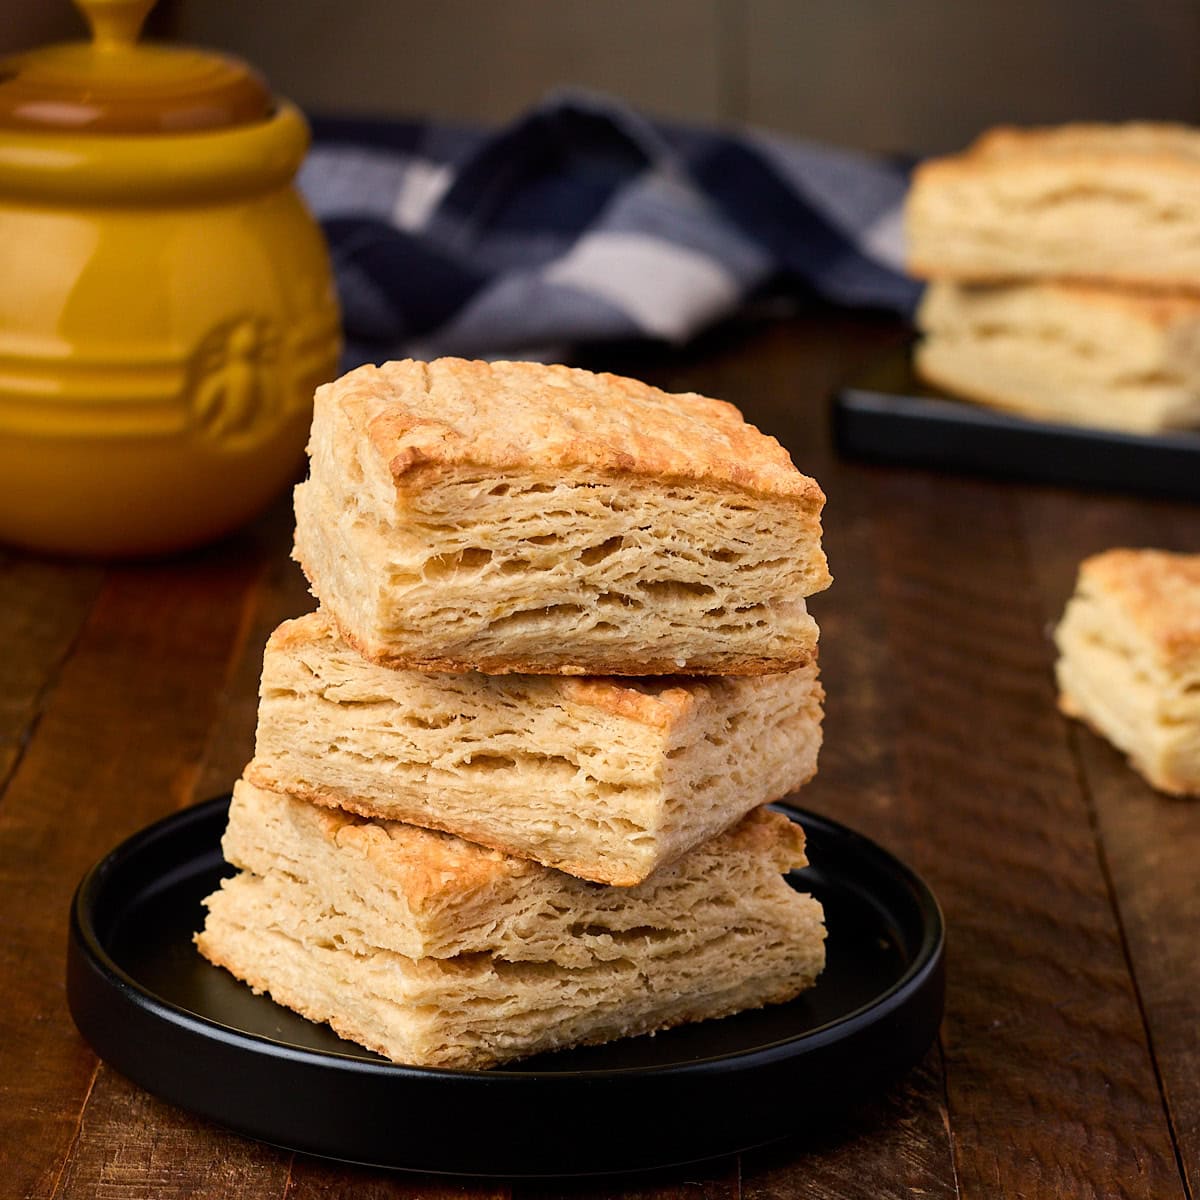
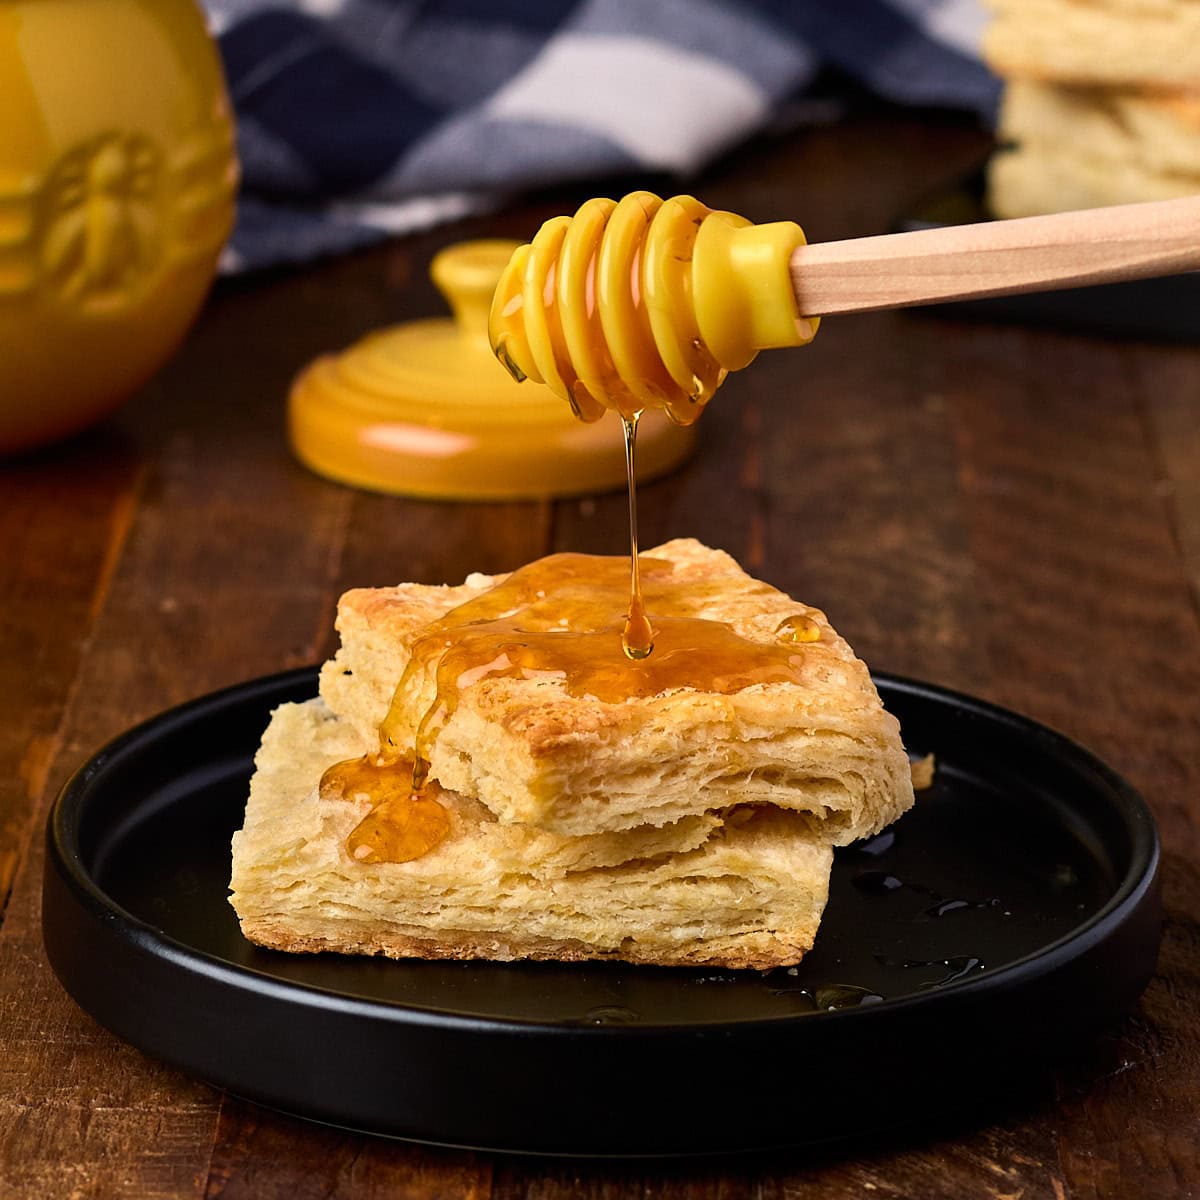
Growing up, I spent a lot of time in the kitchen with my Nana, watching her make biscuits from scratch. There’s something nostalgic about homemade buttermilk biscuits with flaky layers and golden, buttery tops. Using frozen, grated butter and folding the dough creates those coveted flaky layers that practically melt in your mouth. They rise well in the oven, creating light, airy pockets. My papa’s favorite was covering these with black pepper gravy, and it’s one of Jim’s favorite breakfasts, too. They also make the perfect bacon, egg, and cheese biscuit for an on-the-go breakfast.
Want To Save This Recipe For Later?
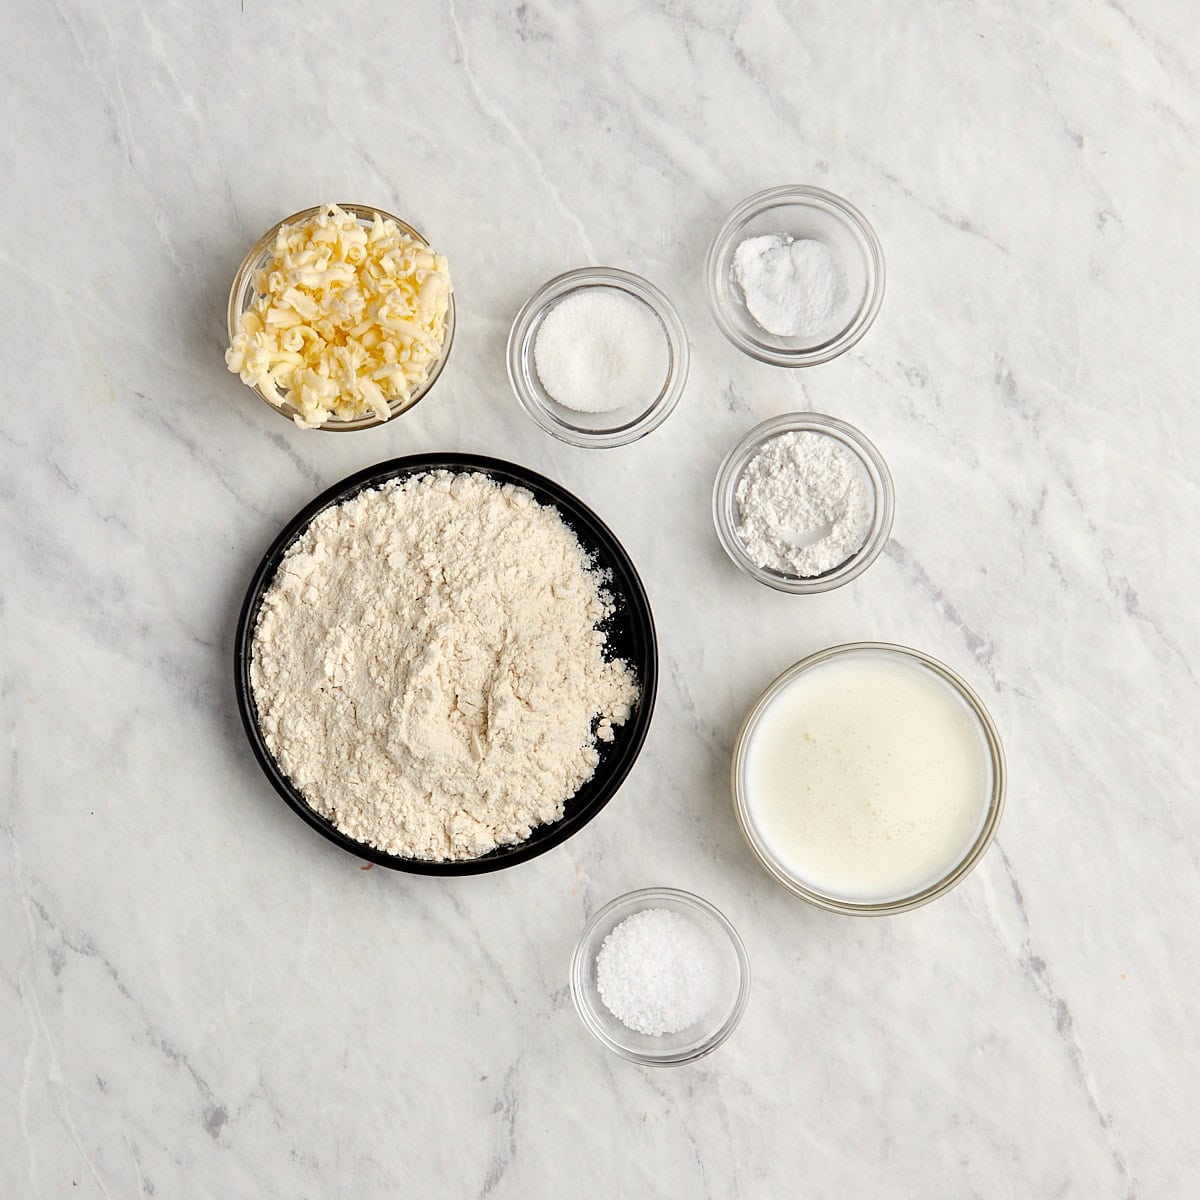
Key Ingredients and Substitutions
You only need a handful of pantry staple ingredients for the flakiest biscuits.
In the printable recipe below, you can find a complete list of ingredients and measurements.
- Butter: Frozen, shredded butter is key to creating those coveted flaky layers in your biscuits; unsalted butter lets you control the salt content. You can use salted butter in a pinch, but reduce the added salt.
- All-Purpose Flour: This flour provides structure to the biscuits, offering just the right balance for a tender crumb.
- Leavening Agents (baking powder and baking soda): These work together to give your biscuits their rise and tender crumb.
- Granulated Sugar: A small amount of sugar balances the savory ingredients and adds a touch of sweetness to the biscuits. It also helps with the browning process as they bake.
- Buttermilk: Cold buttermilk reacts with the baking soda, helping the biscuits rise and adding a tangy flavor. If you don’t have buttermilk, whole milk with a splash of lemon juice can be used as a substitute.
More About the Butter
Splurge for a more expensive butter. For the best results, use a high-fat, low-water-content butter like European unsalted butter. If using salted butter, omit the additional salt from the flour mixture.
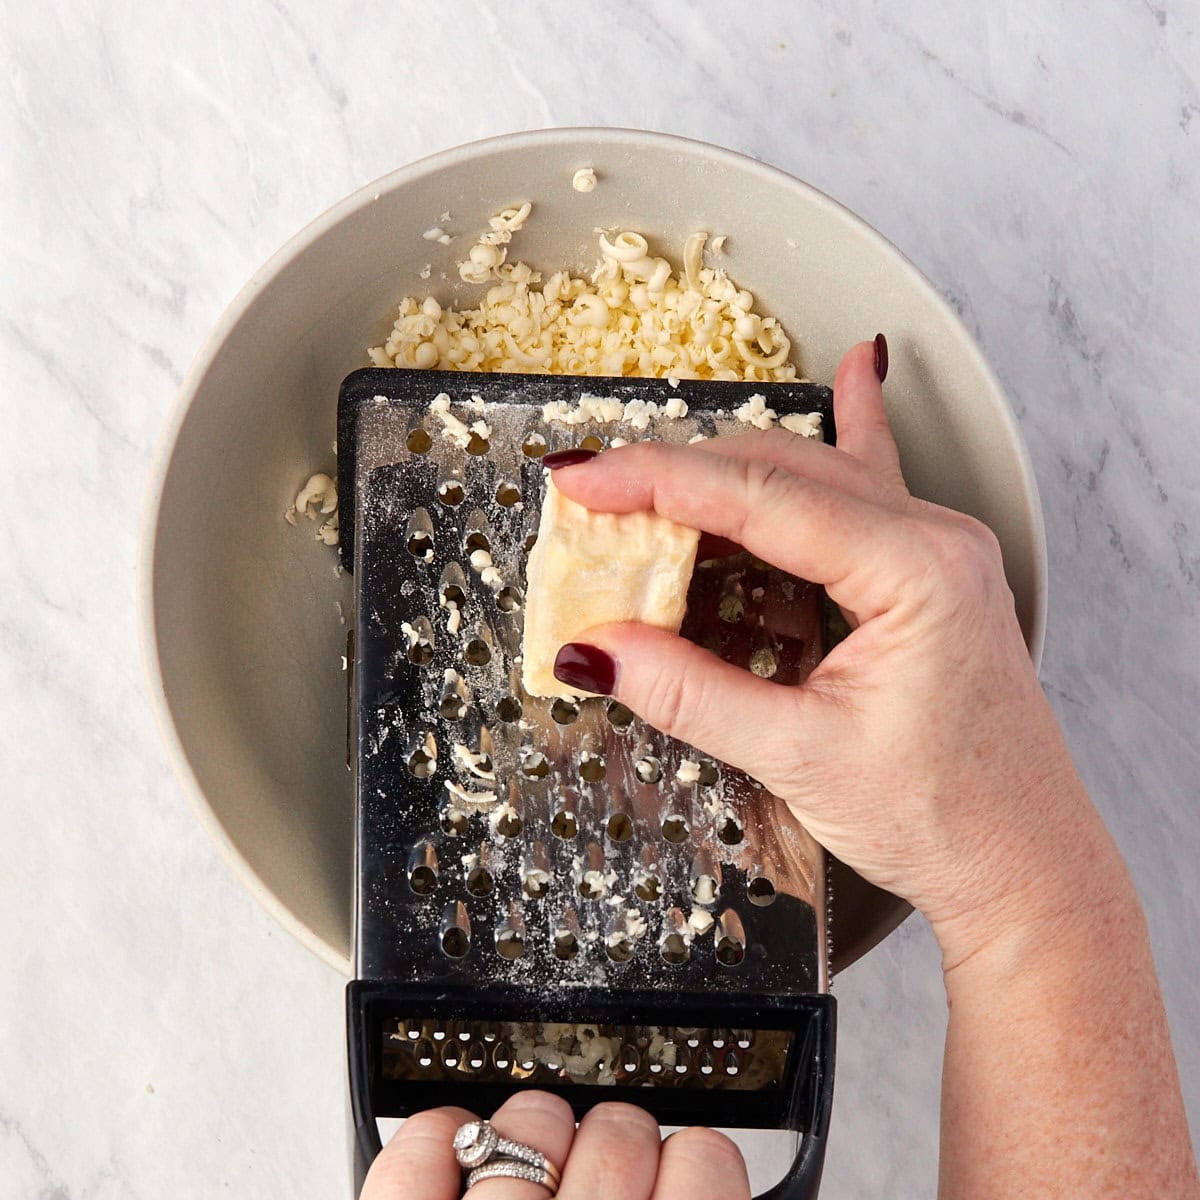
Grating the butter. Grating butter creates small, even pieces that distribute more evenly through the dough, resulting in perfectly flaky layers. First, lightly coat the frozen butter in flour before grating to prevent it from sticking. Use the large holes of a box grater or a food processor with a medium shredding disk. Both methods have pros and cons: grating by hand takes longer, but there is less “butter waste” than with the food processor. If the butter begins to soften, refreeze it briefly before continuing. Keep the grated butter cold until ready to combine with the dry ingredients.
Keep the butter cold. Warm butter will combine with the flour, resulting in a tougher dough without flaky layers. Cold butter creates layers in the flour, so as the biscuits bake, the butter melts, creating steam and resulting in tender, flaky layers. If you notice the dough getting warm and mushy during the folding and rolling, place it in the freezer for 20 minutes.
How to Make Old Fashioned Buttermilk Biscuits
Here are the quick, step-by-step instructions with visuals; you can find the full instructions, including the exact ingredients, in the recipe card below.
Pro-tip: Grate it straight from the freezer and work quickly. Chilled butter releases steam while baking, creating the airy pockets that give biscuits their signature flaky texture.
1. Prepare the Butter: Preheat your oven to 400°F and prepare your ingredients. Lightly coat your stick of frozen butter in flour, then use your box grater and work quickly to grate the butter using the large holes. If the butter softens, pop it back in the freezer for a few minutes. You can also shred it in a food processor with a medium shredding disk for an easier option.
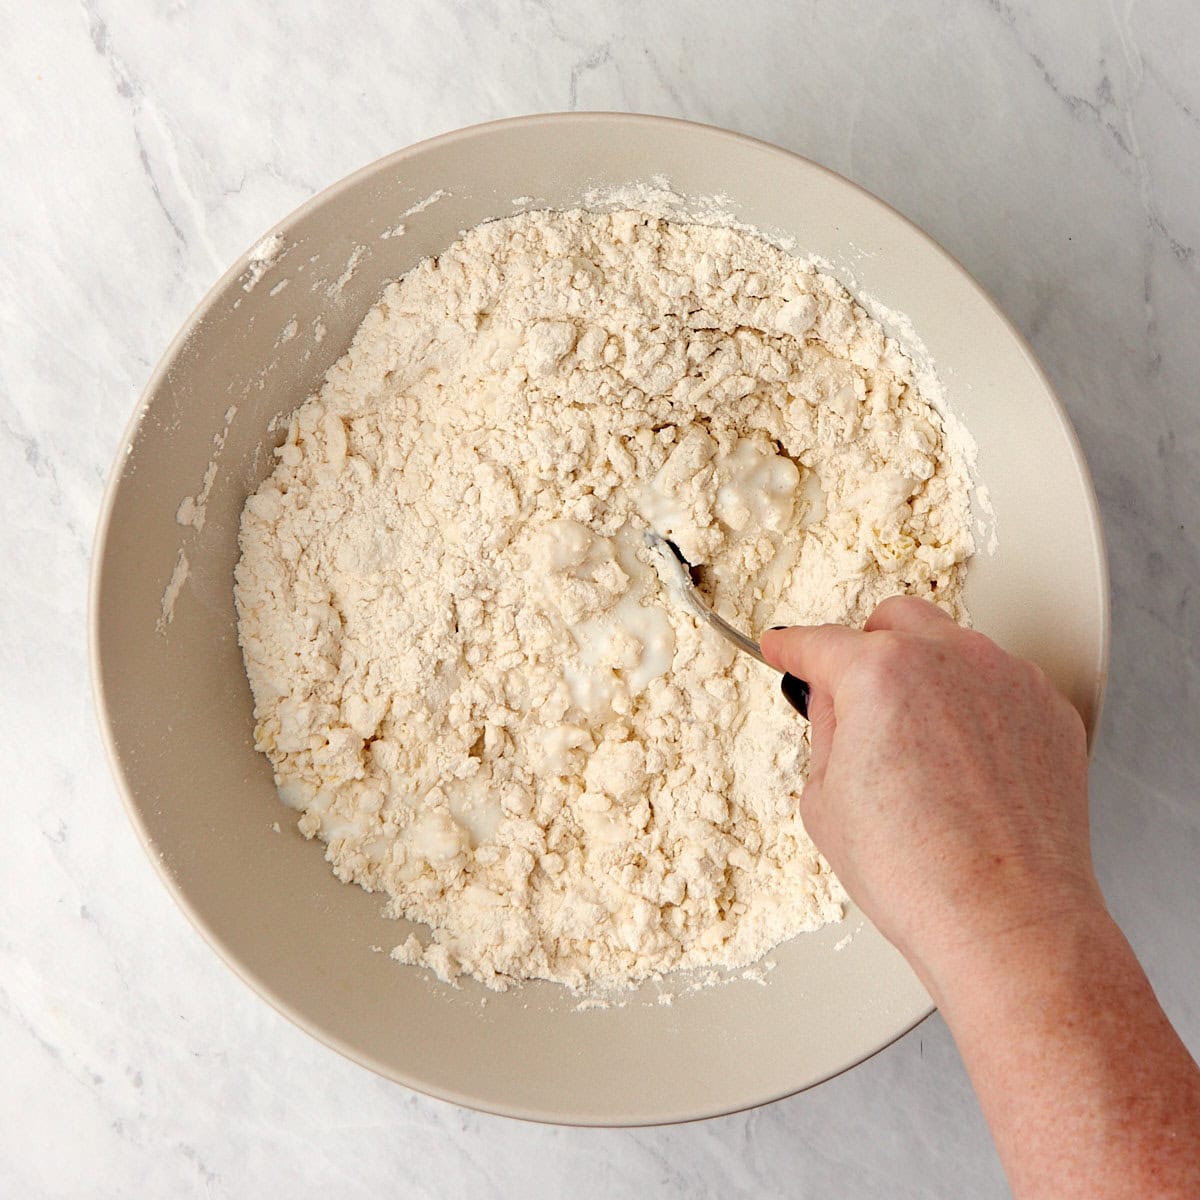
2. Combine the Ingredients: Once your butter is grated, return it to the freezer until you’re ready to mix. Combine your flour, baking powder, baking soda, salt, and sugar in a large bowl. Toss the frozen, grated butter into the flour mixture, ensuring it’s evenly coated. Make a well in the center of your dry ingredients and pour in the buttermilk.
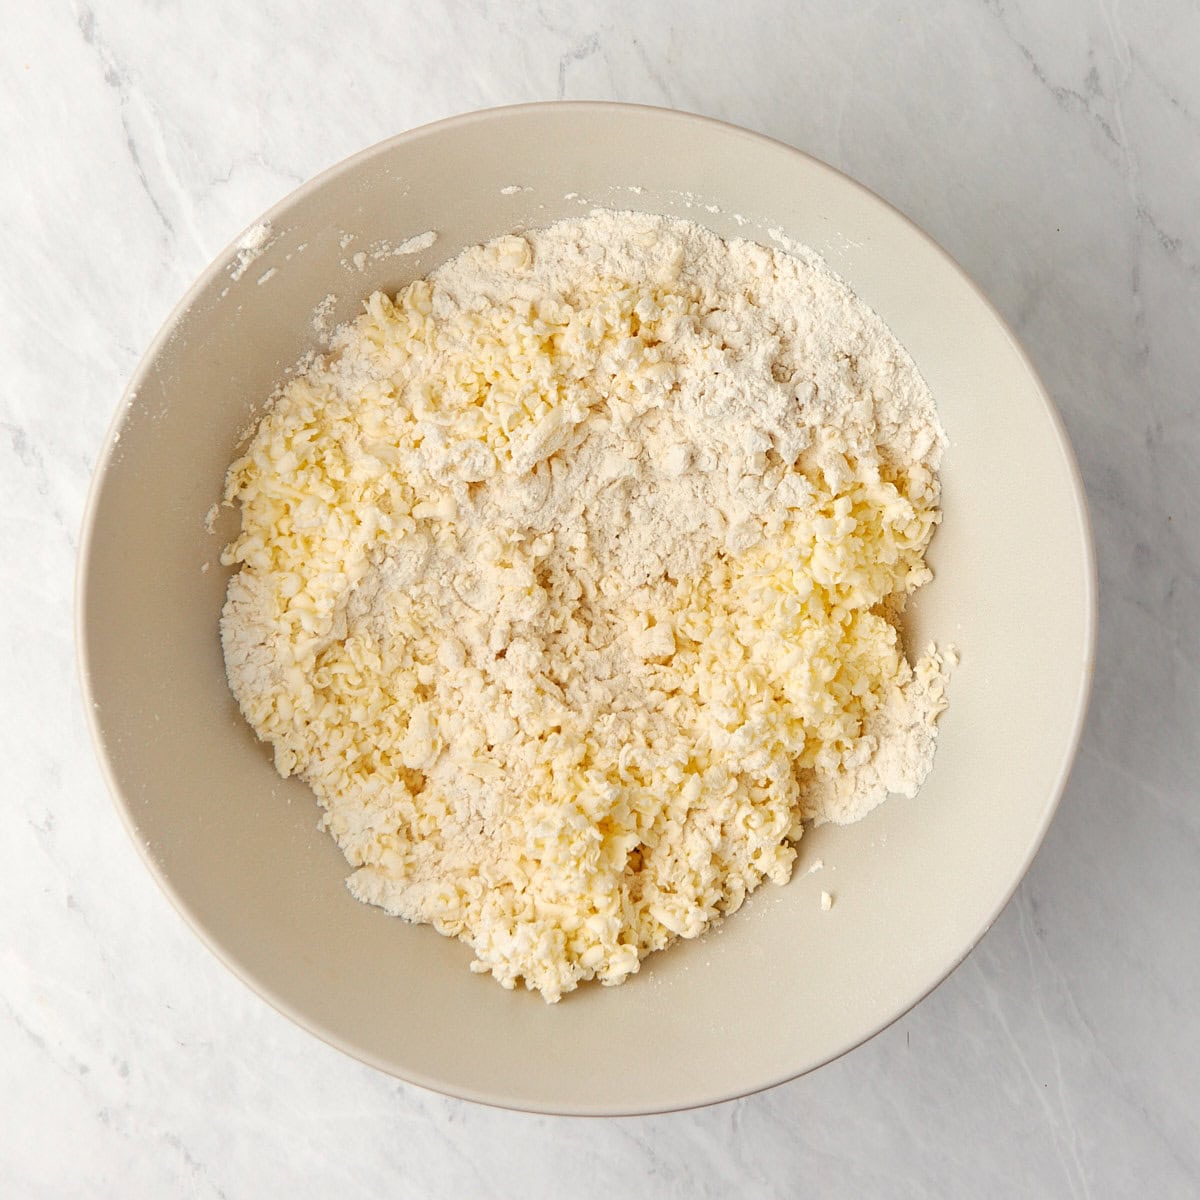
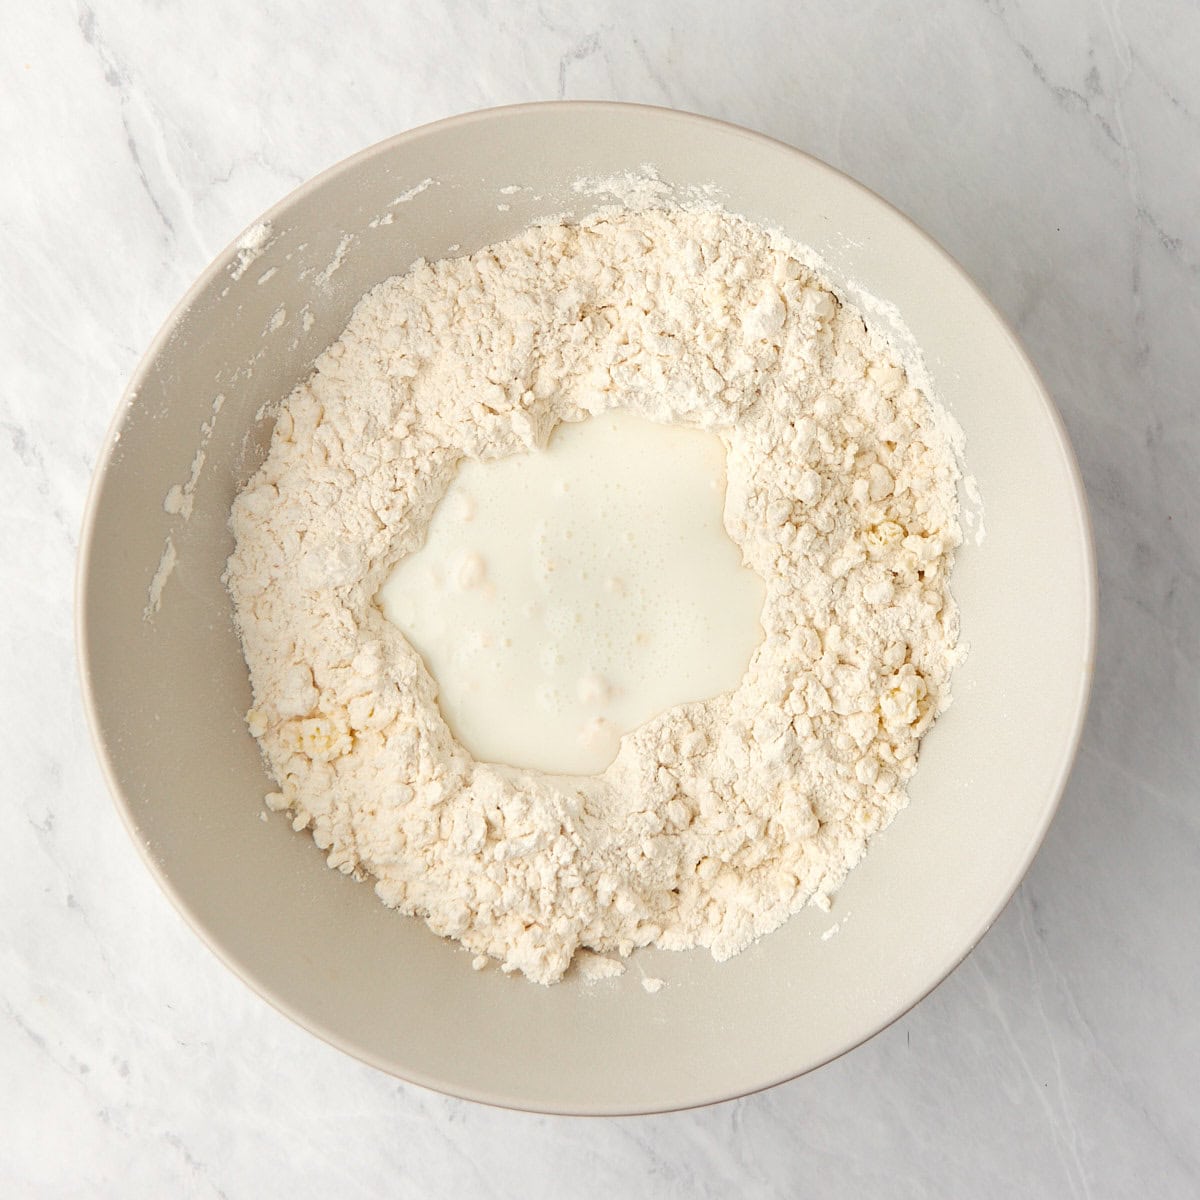
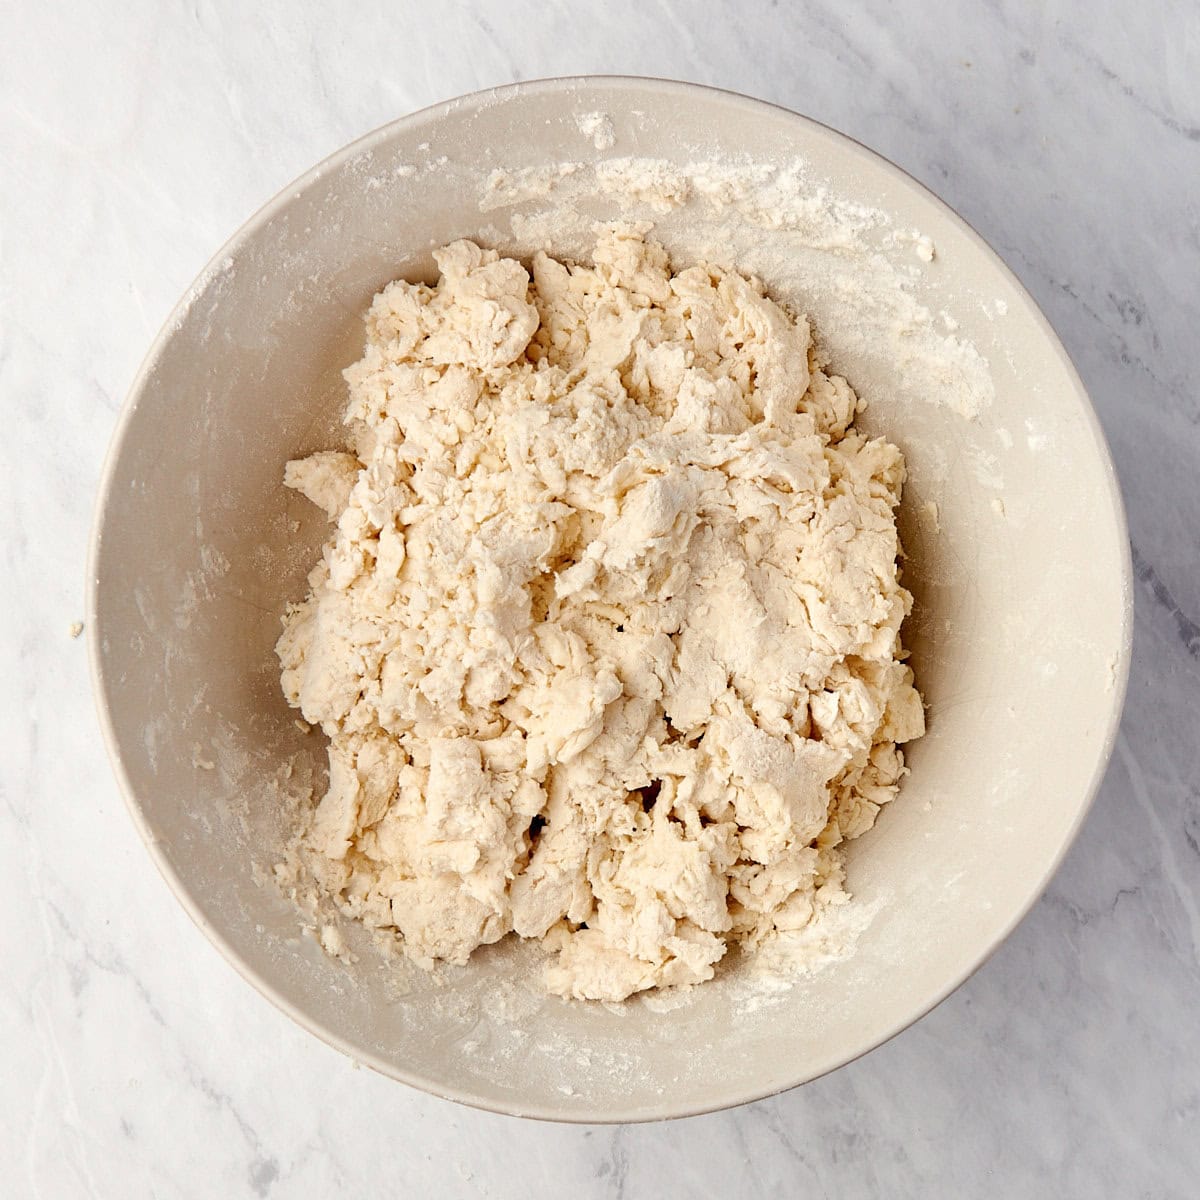
Gently stir with a fork. Your dough will be crumbly and a bit shaggy. Don’t overmix it.
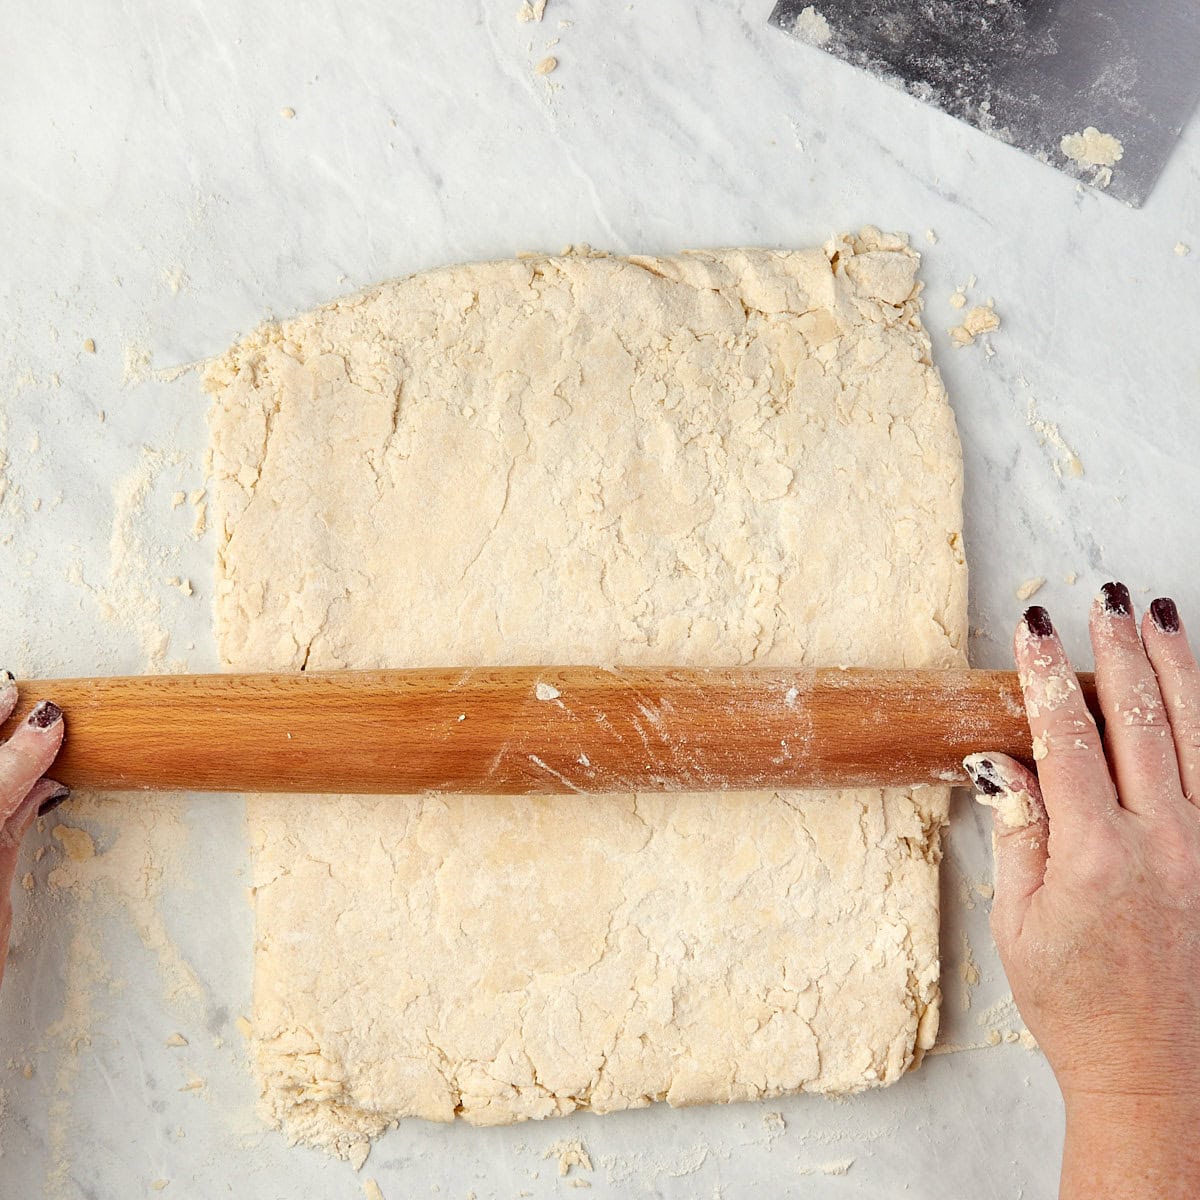
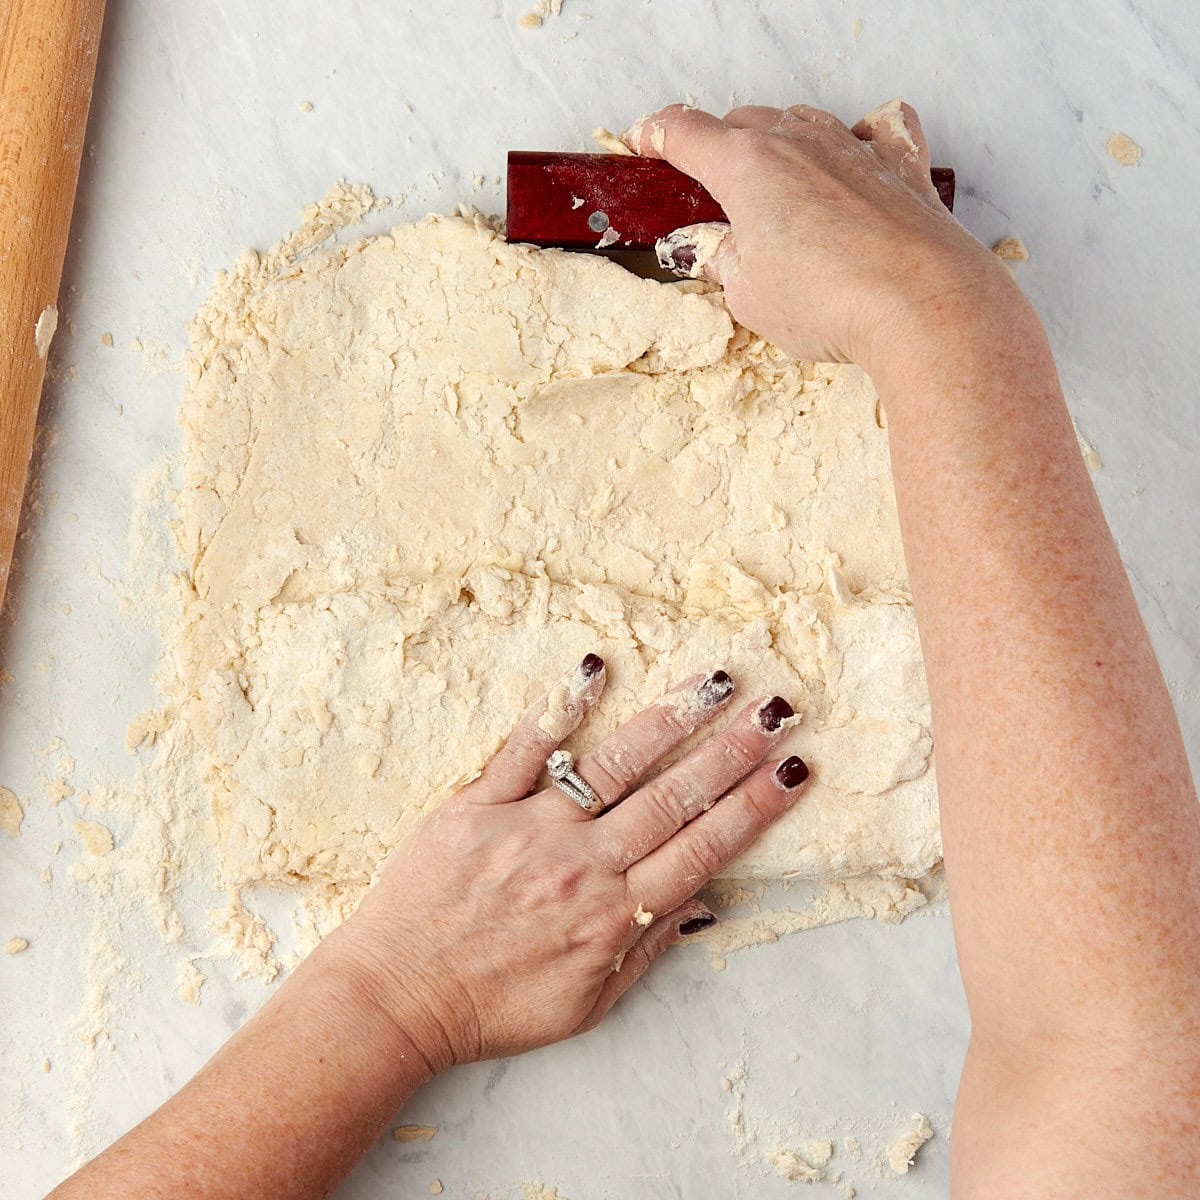
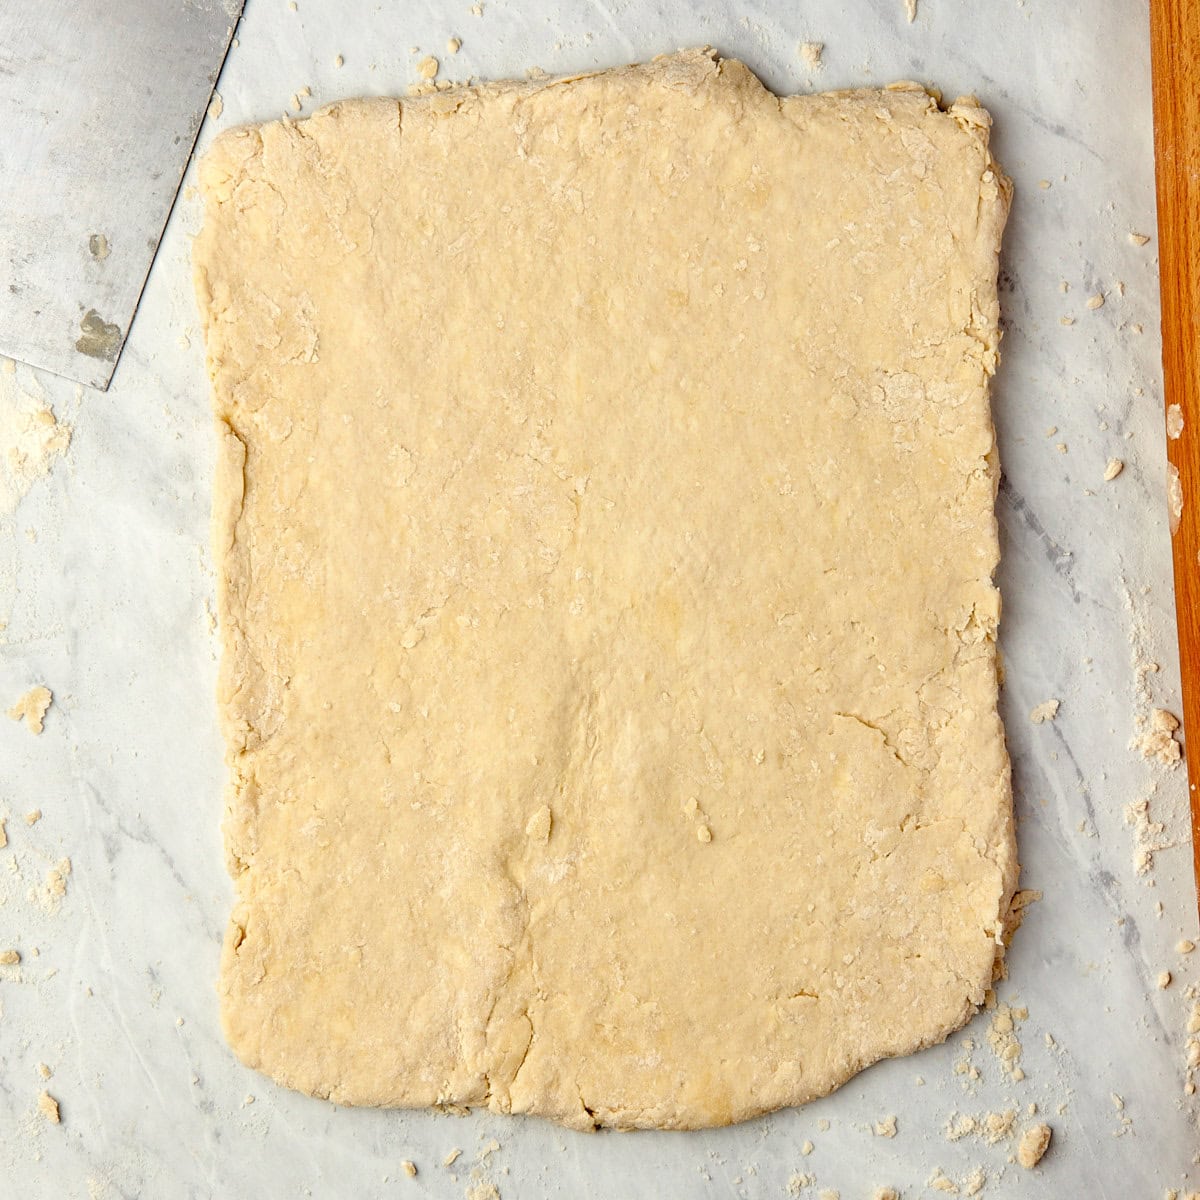
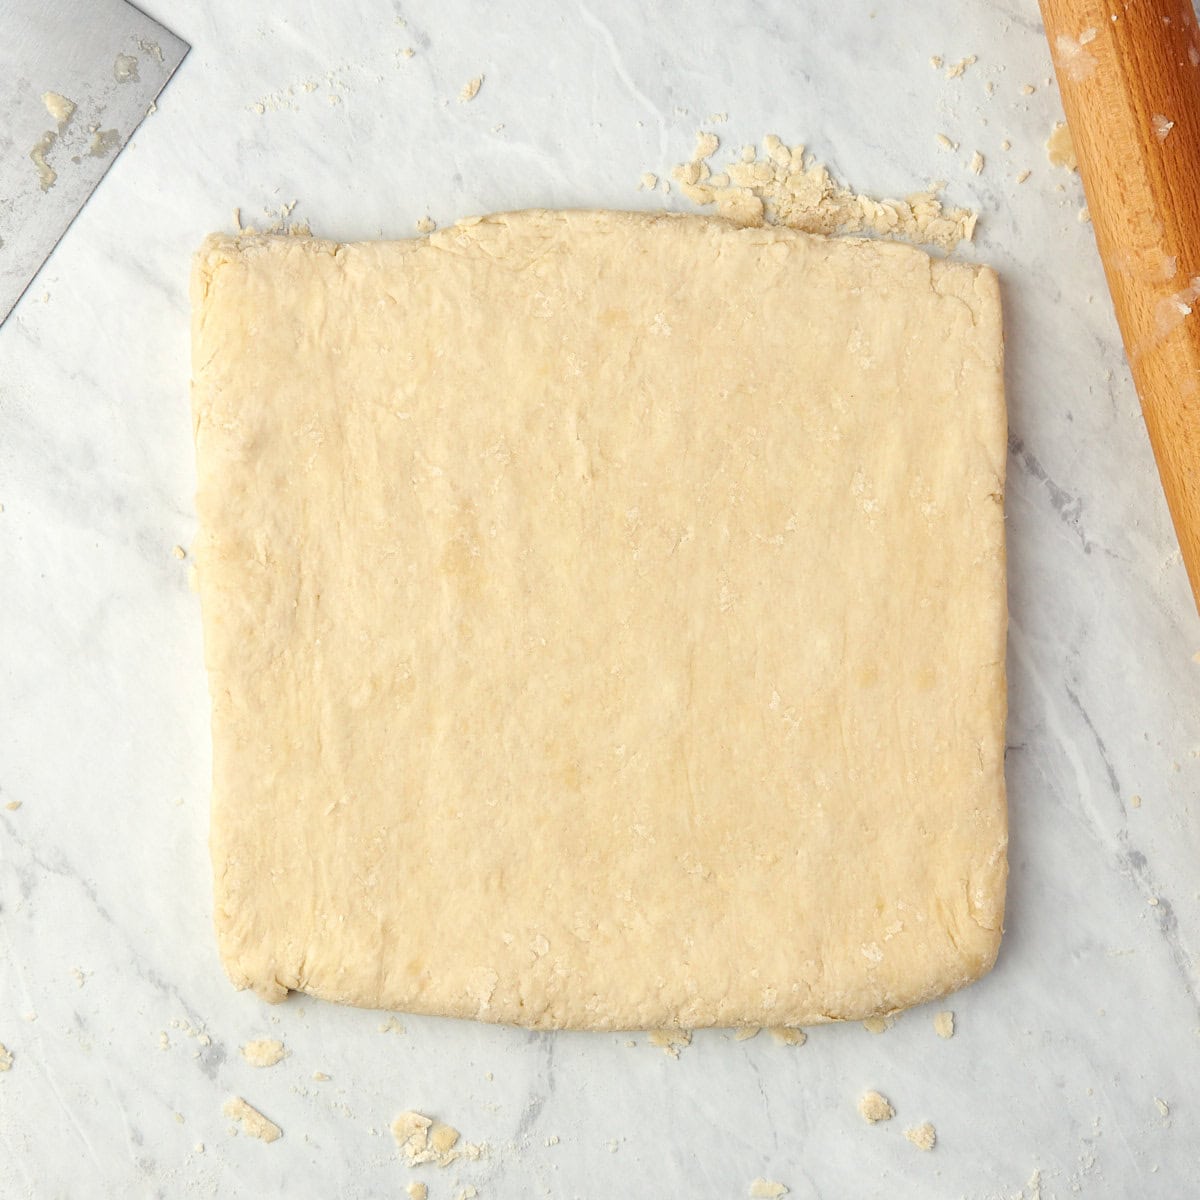
3. Create Layers: Turn the dough onto a lightly floured surface and shape it into a rough 6 to 7-inch square. Using a rolling pin, roll it out into a rectangle (about 9×12 inches). A bench scraper is really useful for folding and shaping the dough.
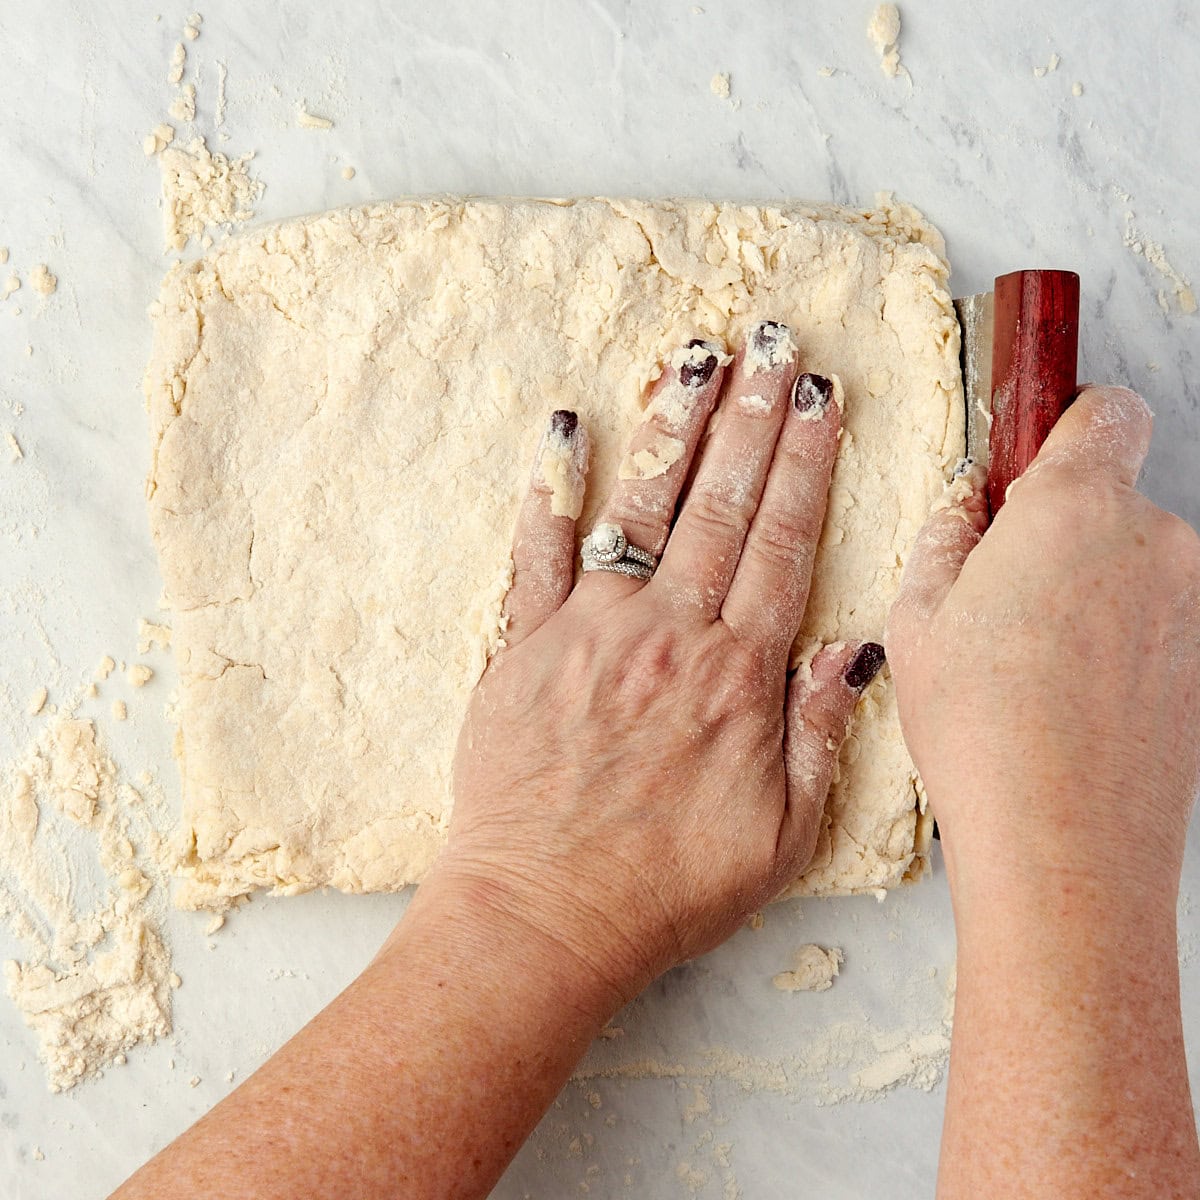
With the short side of the dough facing you, fold the bottom third up and the top third down like an envelope.
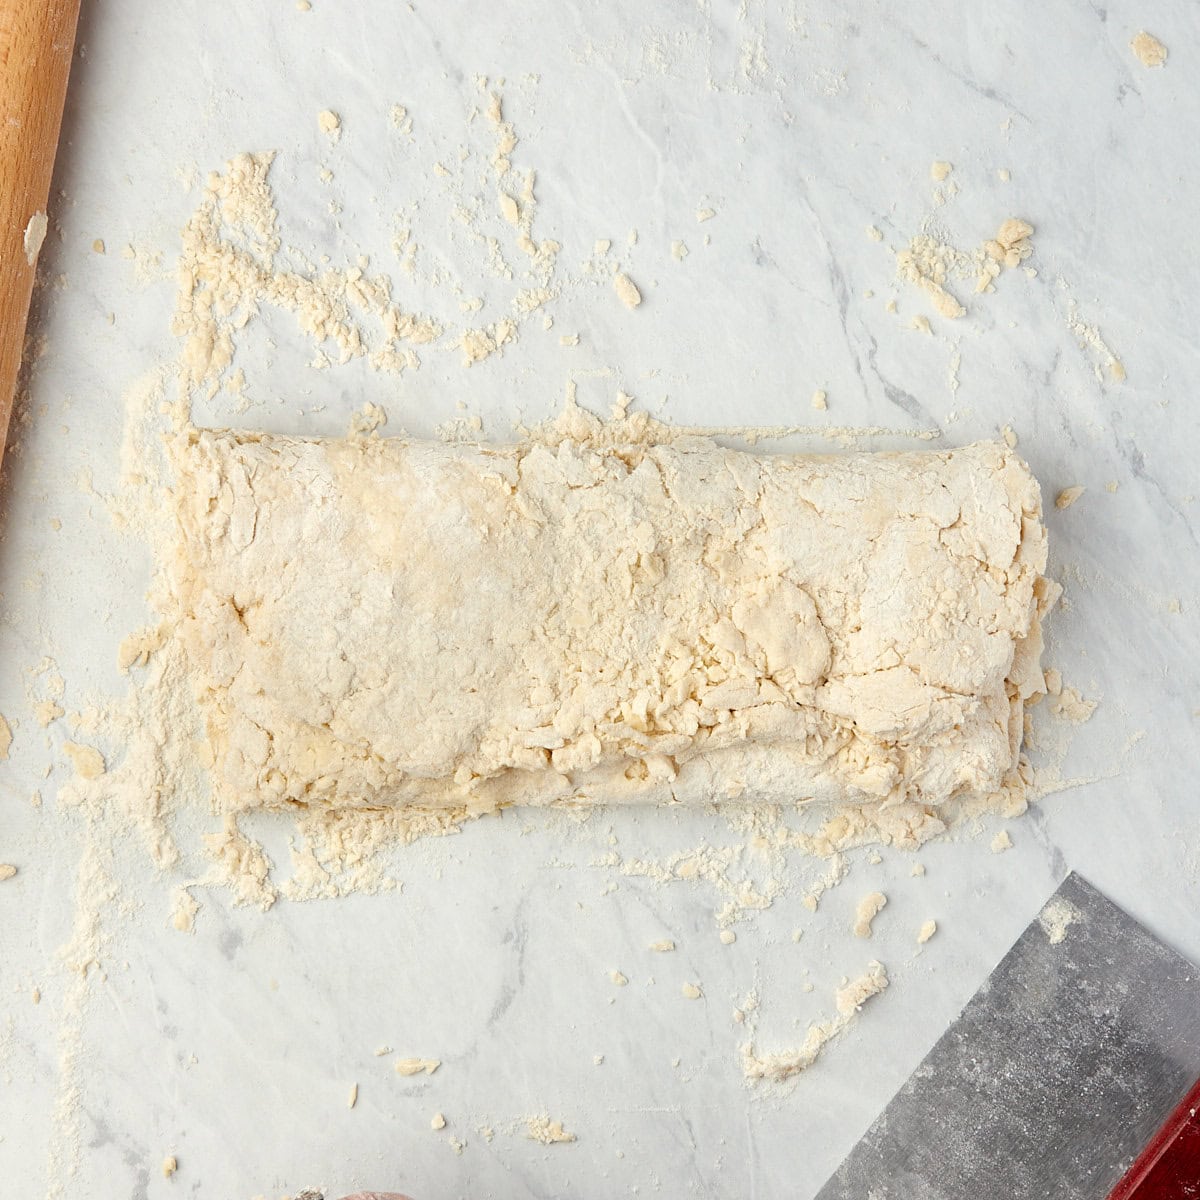
Rotate the dough 90 degrees, roll it out again, and repeat the fold. Do this two more times to create those signature flaky layers.
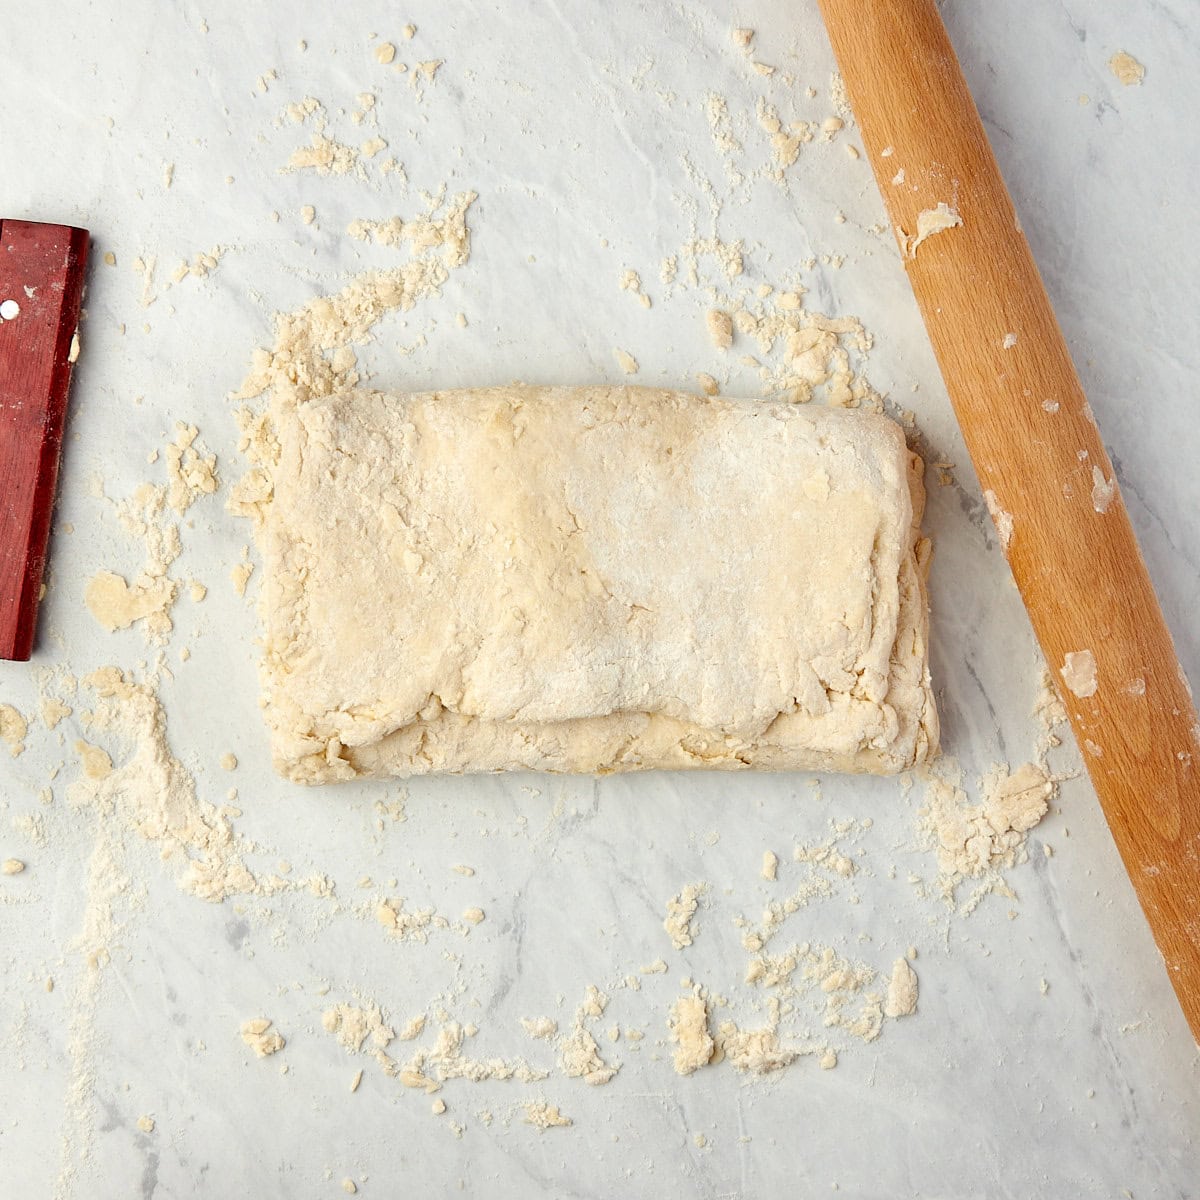
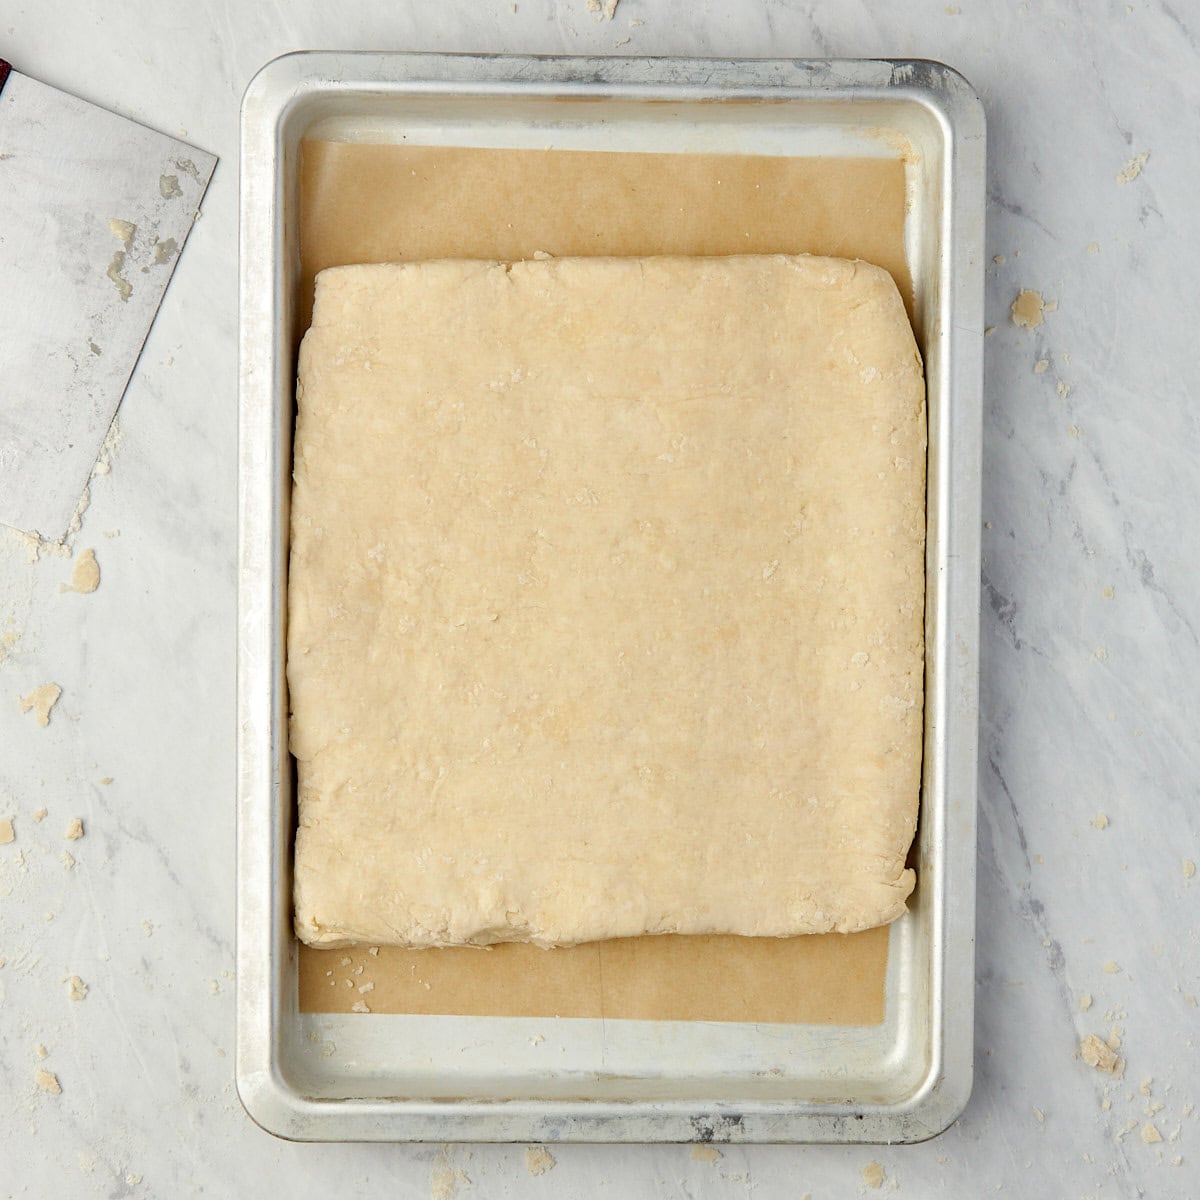
4. Chill the Dough: Shape the folded dough into an 8-9 inch square. Place on a parchment-lined baking sheet and chill in the freezer for 10 minutes to firm up.
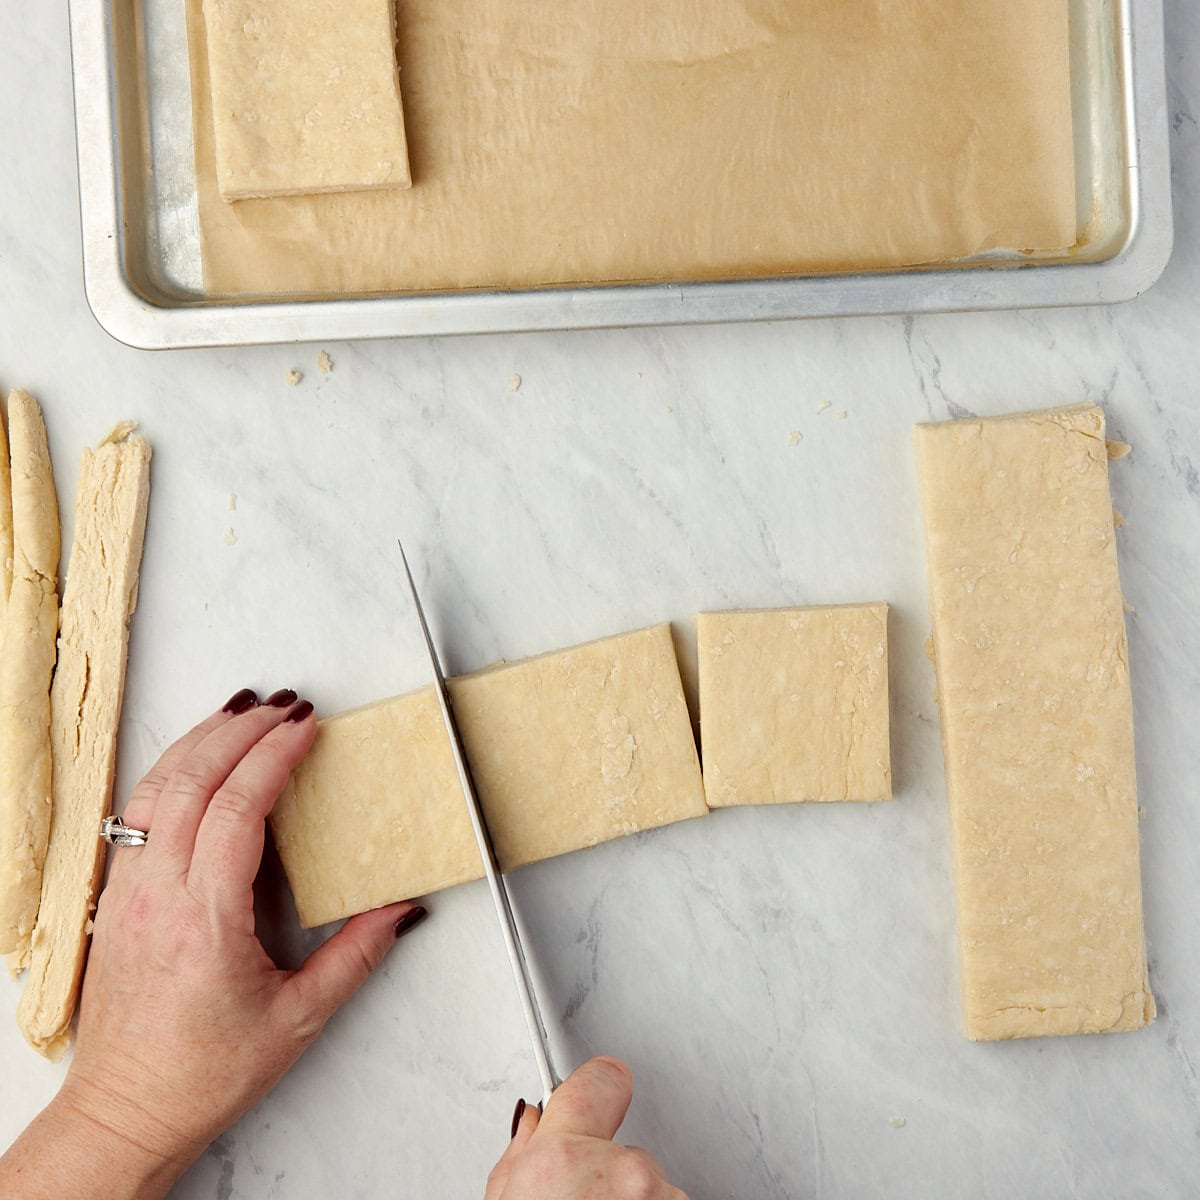
5. Cut the Biscuits: Use a sharp knife to trim the edges of the chilled dough. Cut into 9 square biscuits, careful not to twist or pull the knife.

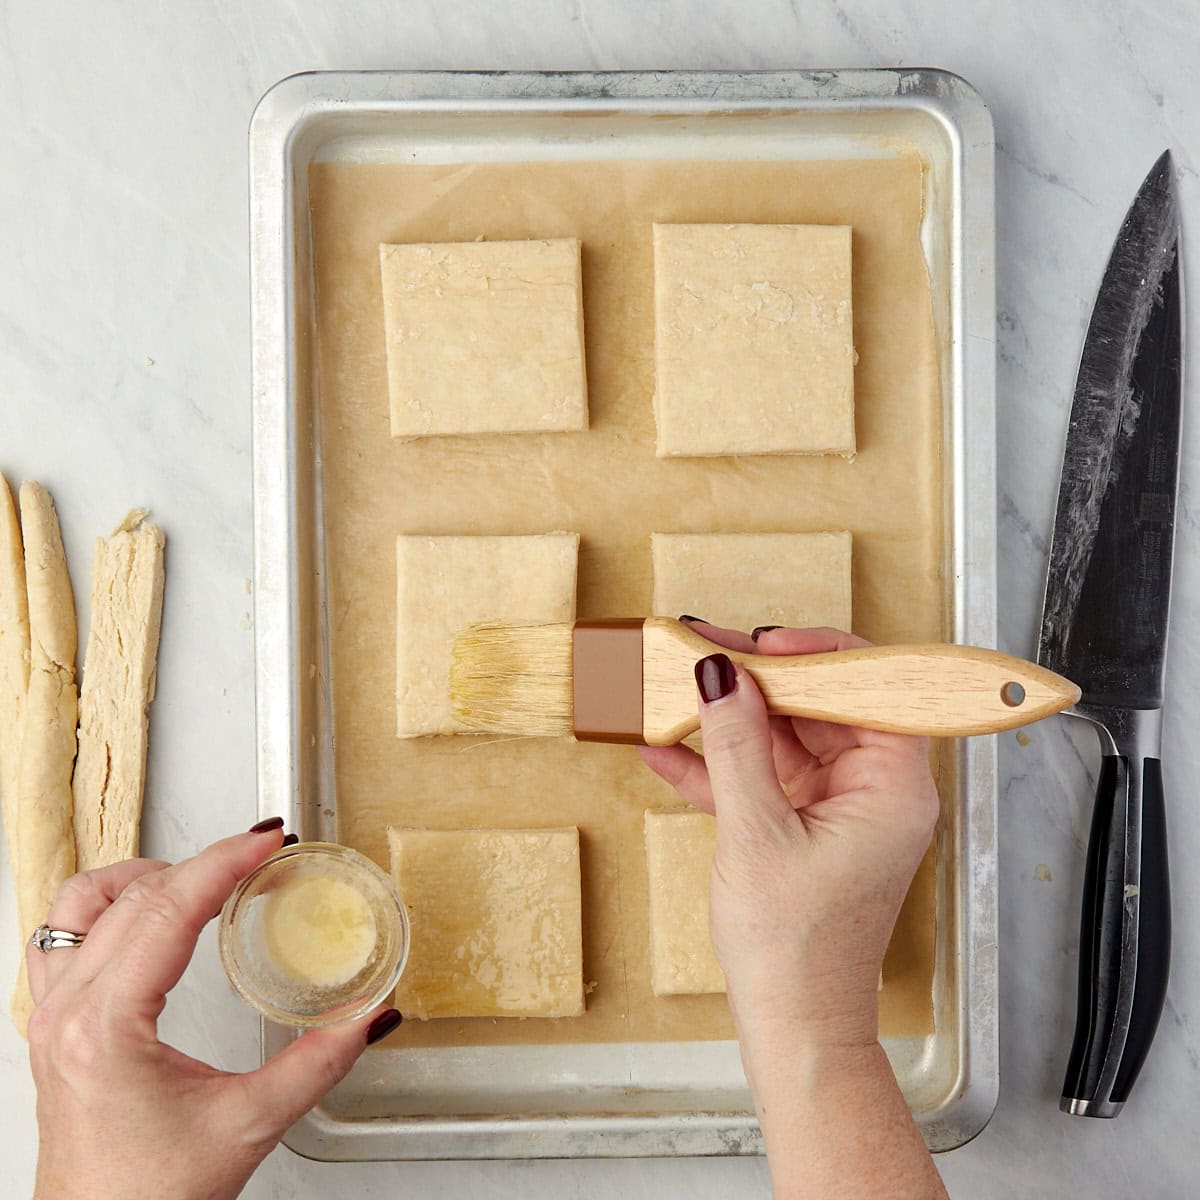
6. Bake the Biscuits: Arrange them on a parchment-lined baking sheet, about 1 inch apart. Brush the tops with melted butter, then bake for 15-20 minutes, rotating the pan halfway through. The biscuits are done when the tops are golden brown. Allow them to rest on the baking sheet for about 10 minutes after removing them from the oven. We baked our biscuits in two batches to allow enough space between them as they baked.
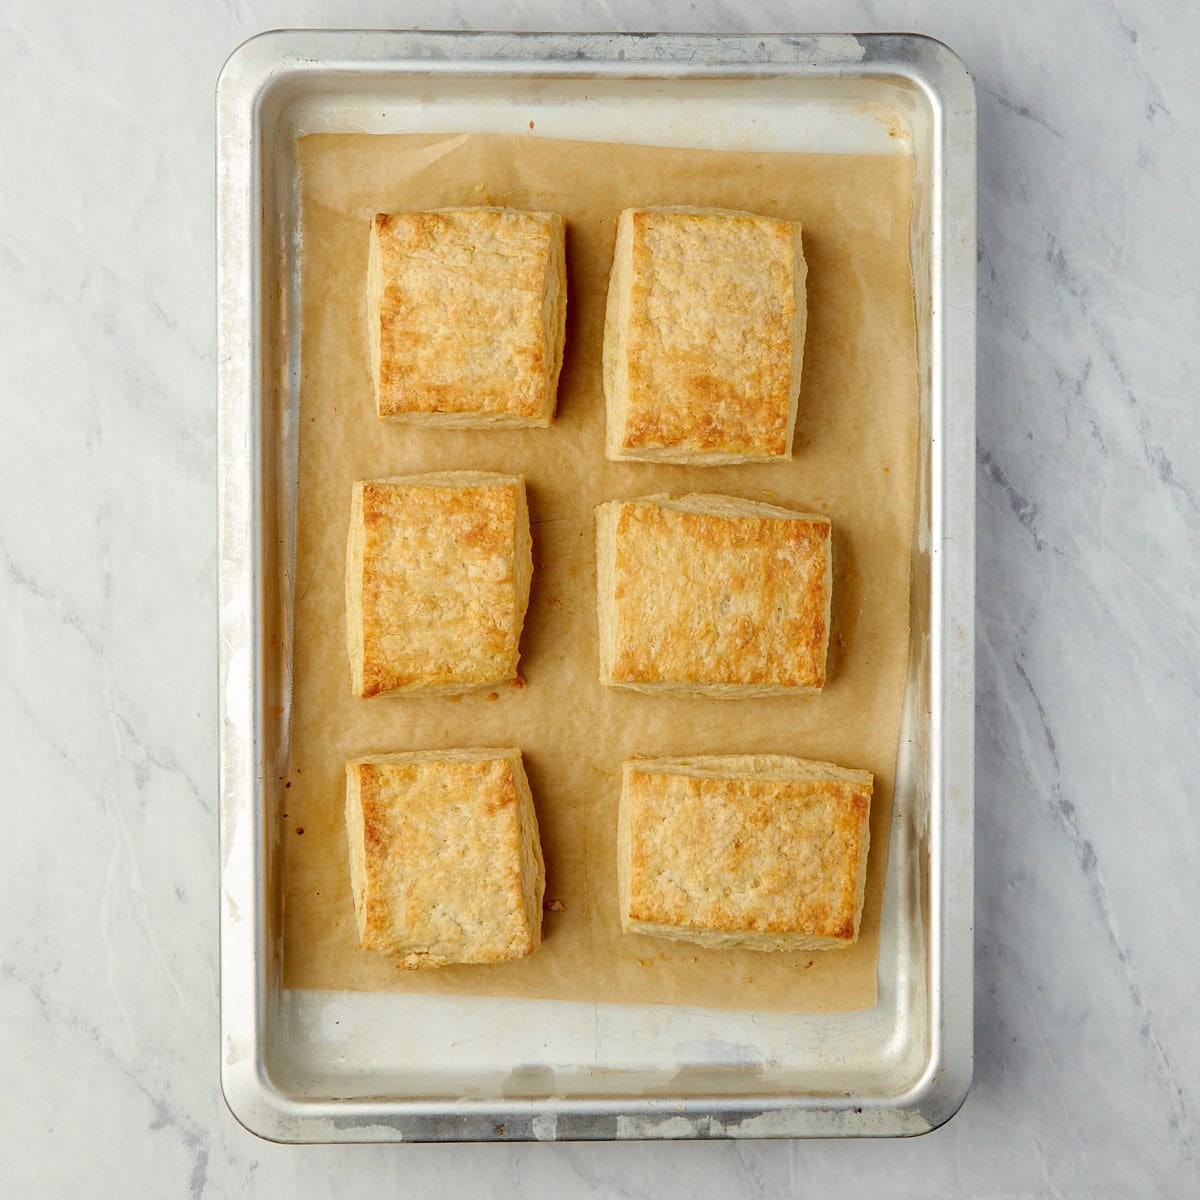
7. Serve: Enjoy these homemade buttermilk biscuits warm, served with our black pepper gravy, our sausage gravy, your favorite jam, or as a delicious bacon and egg biscuit sandwich.
Make-Ahead and Storage
Make-Ahead: You can prepare the biscuit dough up to 24 hours in advance. Shape the dough into squares, place on a parchment-lined baking sheet, cover with plastic wrap, and refrigerate. When ready to bake, brush with melted butter and pop them into a preheated oven.
How to Store: Once cooled, store leftover biscuits in an airtight container at room temperature for up to 2 days. For longer storage, place them in a freezer-safe bag or container and freeze them for up to 3 months.
How to Reheat: To reheat, wrap room temperature biscuits in foil and warm in a 350°F oven for about 10 minutes. For frozen biscuits, thaw overnight in the refrigerator before reheating, or reheat from frozen in a 350°F oven for 15-20 minutes until warm.
Recipe Tips and Notes
- Don’t overwork the dough. Mix the ingredients just until combined to avoid tough biscuits. Overworking the dough can lead to gluten development, resulting in less tender biscuits.
- Cut straight down. Use a sharp biscuit cutter or knife and cut straight down without twisting. This helps ensure proper rising and maintains those flaky layers in your biscuits.
- Keep everything cold. For the flakiest biscuits, use frozen butter and chilled ingredients. Consider chilling your tools and the flour mixture before use to maintain the ideal temperature for creating those coveted buttery layers.
- Chill before baking. Refrigerate your cut biscuits for about 15 minutes before baking. This extra chilling time helps solidify the butter, enhancing those buttery layers and ensuring your biscuits hold their shape while baking.
- Use a bench scraper. A bench scraper helps fold the biscuit dough into thirds and shape it cleanly without sticking to your hands.
- Customize your biscuits. Add mix-ins like shredded cheddar and fresh chives to the dough before folding, or try my cheddar cheese chive biscuits for a savory twist on this classic recipe.
Frequently Asked Questions
More Breakfast Recipes to Try
Looking for more filling breakfast recipes? Try these other favorites:
- Puff Pastry Breakfast Tart with Bacon and Eggs – A complete breakfast made with buttery, flaky puff pastry, a cheesy shallot mushroom spread, crispy bacon, and sunny-side-up eggs.
- Fluffy Silver Dollar Buttermilk Pancakes with Blueberries – These pancakes are incredibly easy to make and are bursting with blueberry flavor.
- Crepes with Berries – These easy-to-make blender crêpes are filled with homemade whipped cream and berries. It is perfect for breakfast or brunch.
Let’s Connect! If you make this recipe or any other recipe on Casual Epicure, please don’t forget to rate the recipe and leave a comment below. It helps others who are considering making our recipes and we love hearing about your cooking experiences. And if you snapped some shots, share them on Instagram, and be sure to tag @casual.epicure so we can feature them in our stories.
Old Fashioned Buttermilk Biscuits
Want To Save This Recipe For Later?
Equipment
- Large Bowl
- Cookie or Baking Sheet
Ingredients
- 1 cup unsalted butter, frozen and shredded
- 3 cup all-purpose flour
- 4 teaspoons baking powder
- ½ teaspoon baking soda
- 1 teaspoon kosher salt
- 2 tablespoon granulated sugar
- 1 ¼ cup buttermilk, plus extra for the top of the biscuits
Instructions
- Preheat oven to 400°F.
- Lightly coat the butter lightly in flour. Grate frozen butter using the large holes of a box grater. Work quickly since the frozen butter will begin to soften as you grate. Refreeze if it gets too soft. You can also grate butter using a food processor with a medium shredding disk.
- Place grated butter back into the freezer until ready for use.
- In a large bowl, combine flour, baking powder, baking soda, salt, and sugar.
- Add the butter to the flour mixture and toss the butter to coat it with the flour.
- Create a well in the center of the mixture by pushing the mixture toward the sides of the bowl. Pour buttermilk into the well. Mix gently with a fork just until everything is combined. The dough will be crumbly and shaggy, so avoid over-mixing.
- Place the dough on a floured surface and form it into a square about 6 to 7 inches long on each side, then roll the dough into a rectangle about 9 by 12.
- First Turn: Position the rectangle so the short side faces you, and fold the dough into thirds by folding the bottom third up and then the top third down like an envelope.
- Second Turn: Rotate the dough 90 degrees and gently roll the dough into a rectangle again. Position the rectangle so the short side faces you and fold the dough into thirds again.
- Third Turn: Rotate the dough 90 degrees and gently roll the dough into a rectangle again. Position the rectangle so the short side faces you and fold the dough into thirds again.
- Form the dough into an 8 to 9-inch square, place it on a parchment-lined baking sheet, and put them in the freezer for about 10 minutes or until the dough is firm.
- With a sharp knife, trim off the edges of the dough and then cut out 9 square-shaped biscuits. Do not twist or pull the knife.
- Transfer the biscuits to a baking sheet lined with parchment paper. Place them 1 inch apart from each other and the edge of the pan. Brush the tops of the biscuits with a little melted butter.
- Bake for 15-20 minutes or until the tops are golden brown. Rotate halfway through baking.
- Let them rest for about 10 minutes, then serve with cream gravy, jam, or make into your favorite biscuit sandwich.