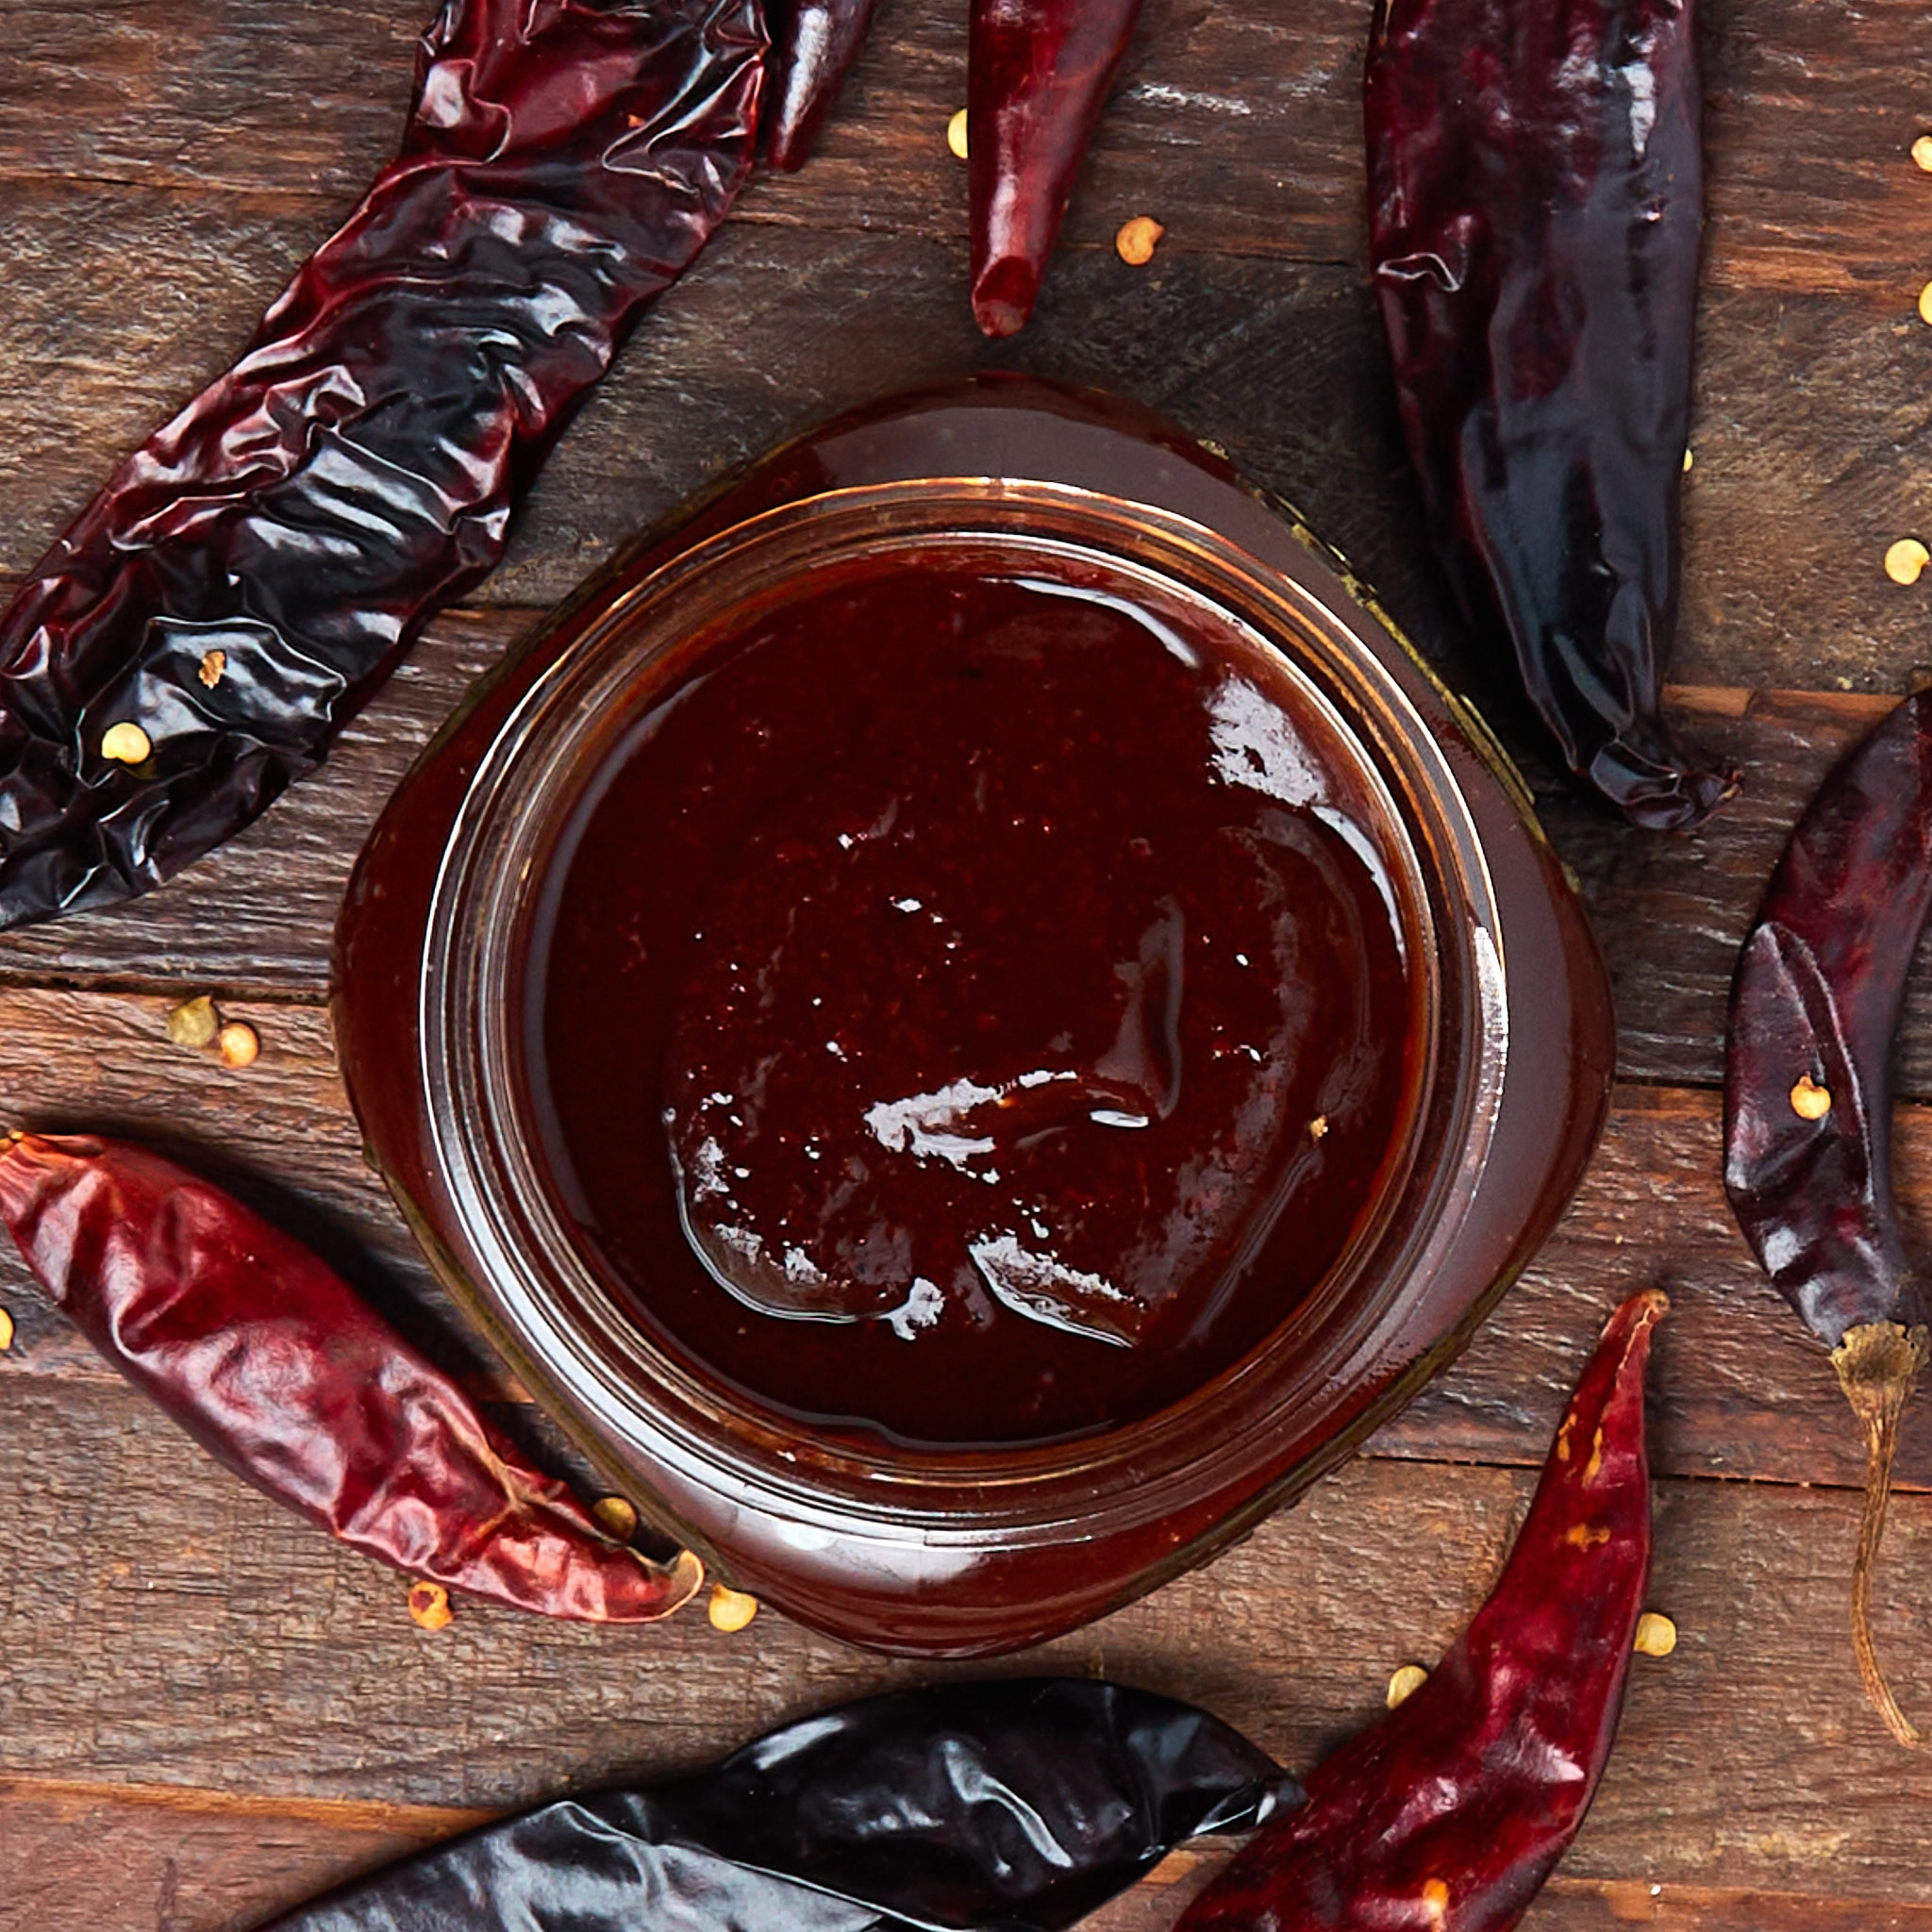
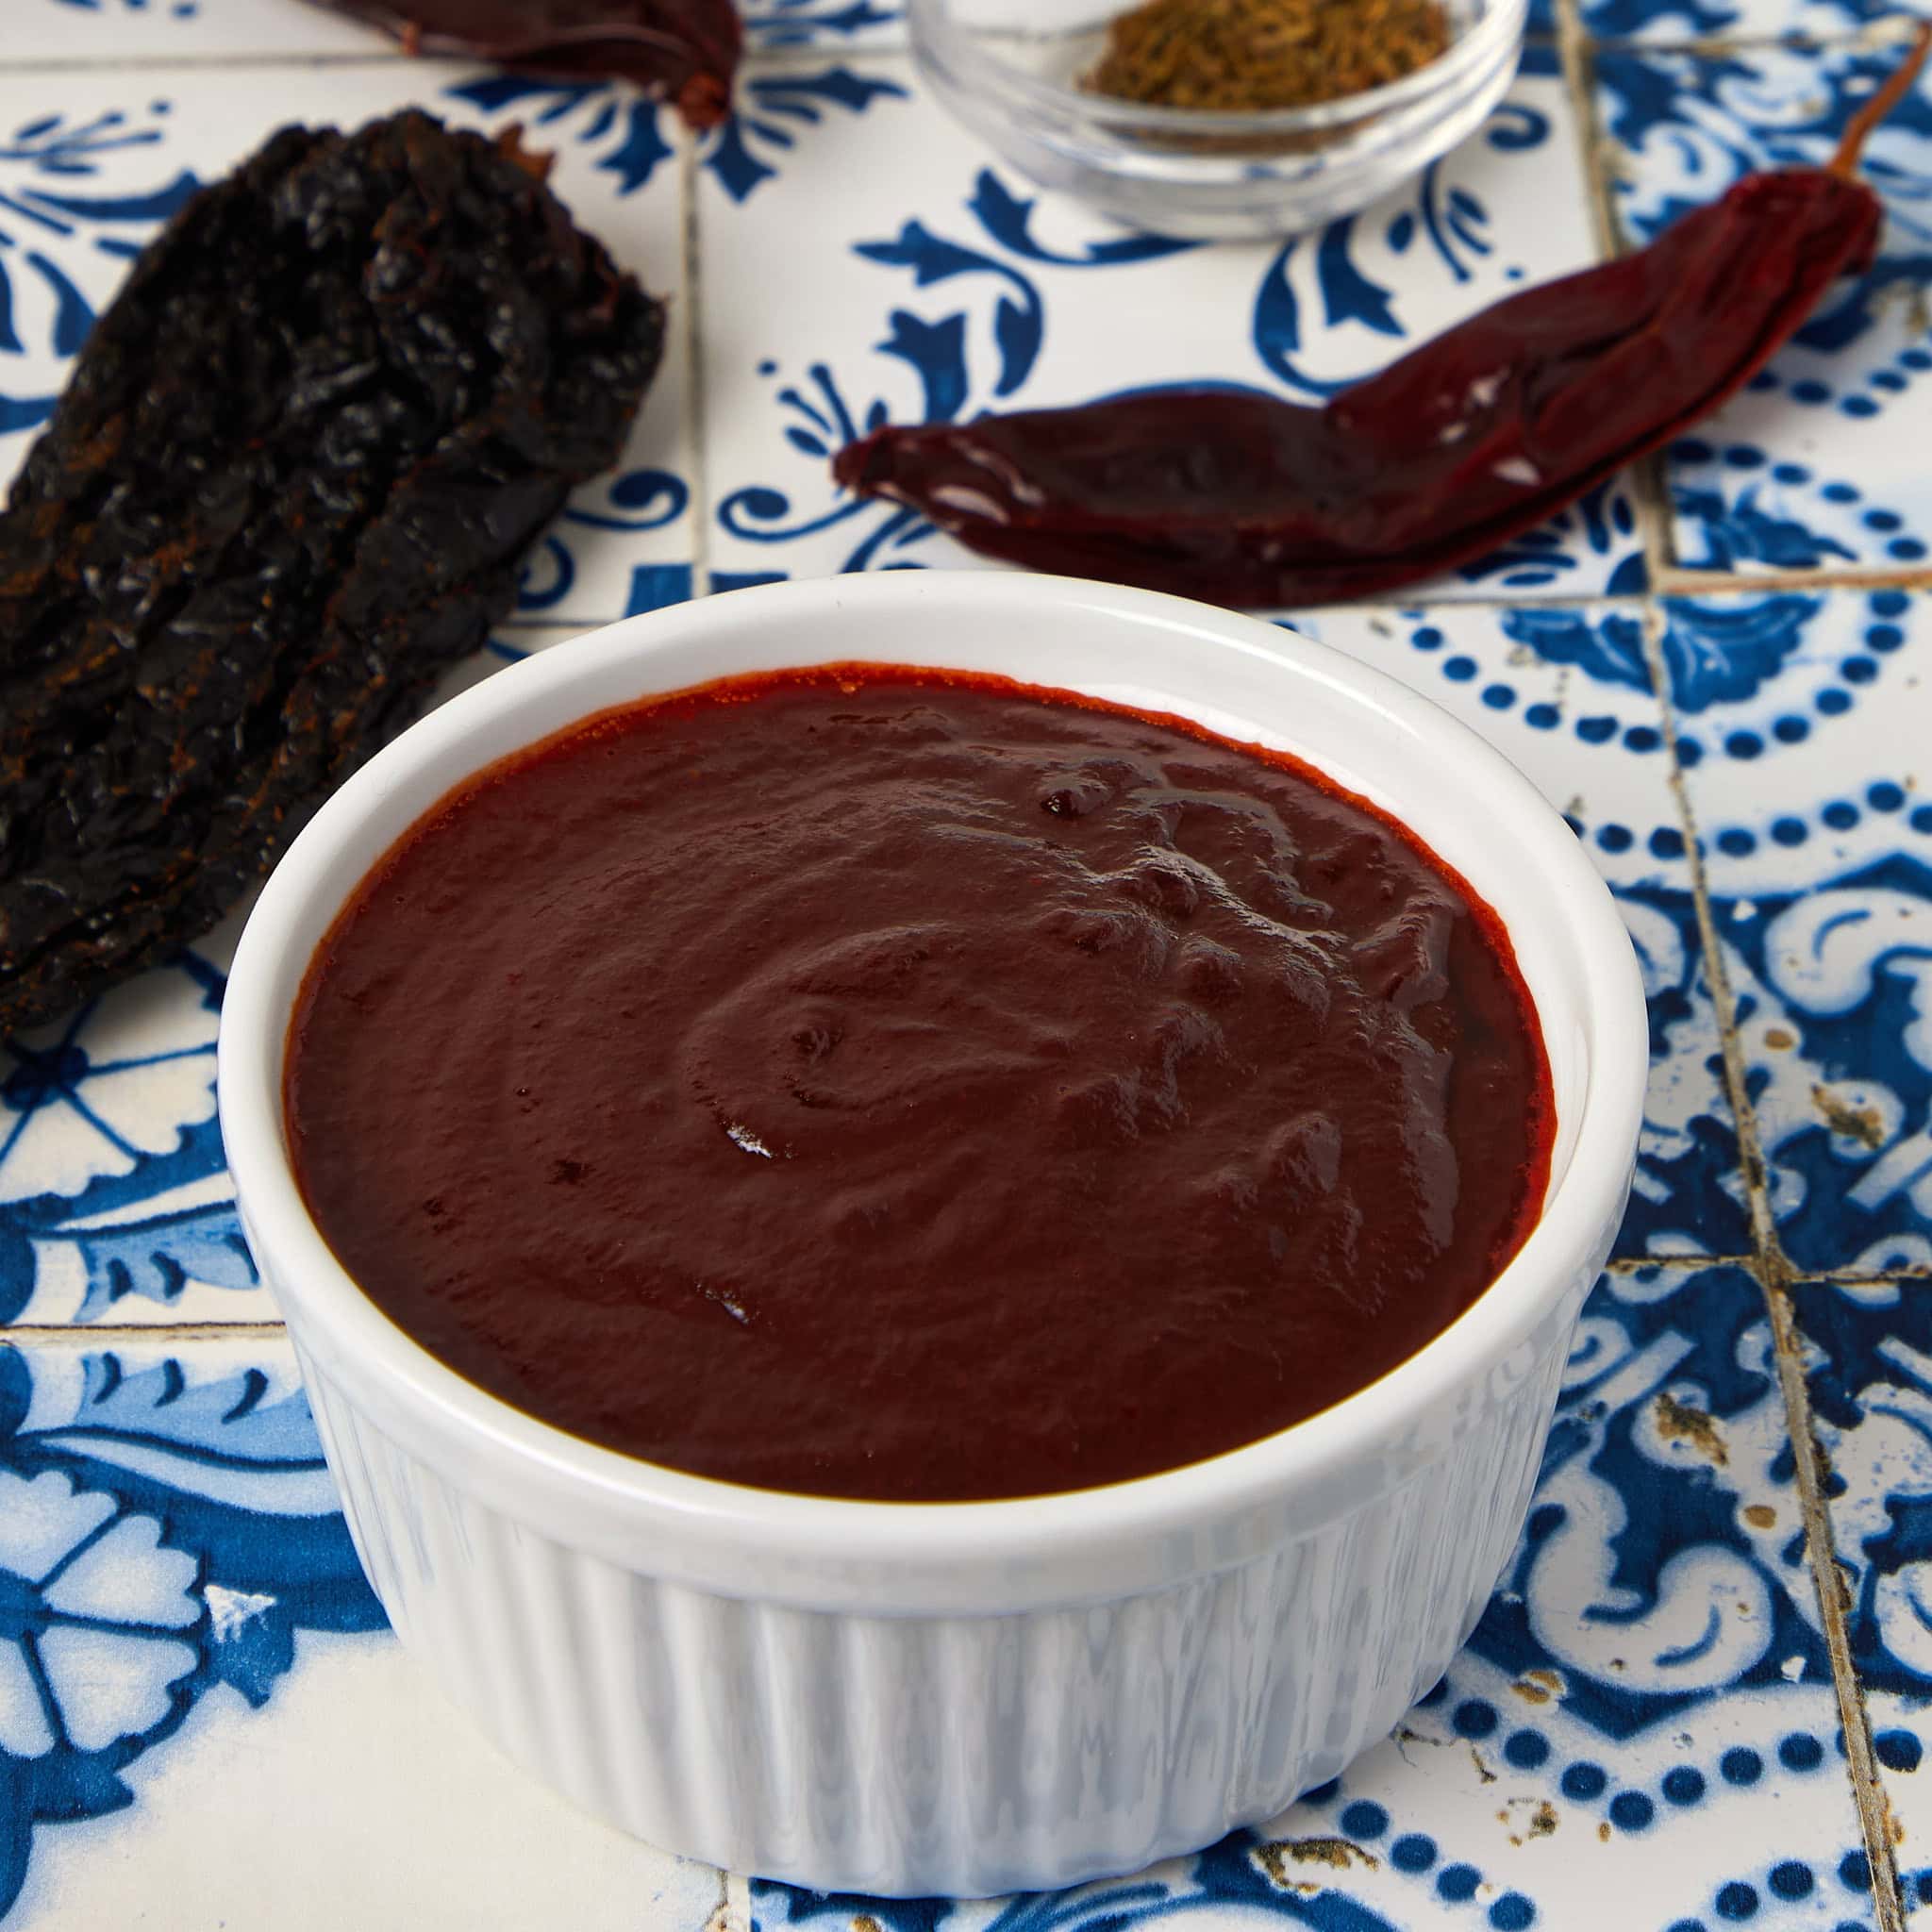
Chili paste is a thick, concentrated sauce made from dried chiles blended with liquid and spices. It’s a staple in many Mexican kitchens and one of the easiest ways to build deep flavor without relying on bottled sauces or powders. This homemade chili paste uses guajillo and ancho chiles, a combination that delivers gentle heat, subtle sweetness, and depth. It’s flavorful without being overpowering, making it versatile across a wide range of dishes, from tacos and chili to braised meats and beans.

Want To Save This Recipe For Later?
We keep this paste in regular rotation. It’s the base of our Texas chili and game day beer chili, and it’s what gives our red chile chicken street tacos that rich, complex flavor that makes people ask for the recipe. Once you make it a few times, it becomes less of a recipe and more of a pantry habit.
What Is Chili Paste
Chili paste is a concentrated chile sauce that falls between chile powder and hot sauce. It’s thicker than most sauces and has a texture similar to tomato paste, delivering more depth than dried chile flakes or powder.
Rehydrated dried chiles give the paste its body, and then it’s blended to a smooth consistency and strained. In Mexican cooking, chili paste often forms the base of sauces, braises, soups, and marinades where flavor matters as much as heat.
In this version, two chiles work together. Guajillos bring mild warmth with a slight tan, and anchos add sweetness and a deeper, almost cocoa-like richness. Together, they create a balanced chili paste that enhances dishes without taking over.
Key Ingredients and Substitutions
This recipe needs six ingredients and about 20 minutes to transform dried chiles into a versatile cooking paste.
The complete ingredient list and measurements are listed in the printable recipe below.
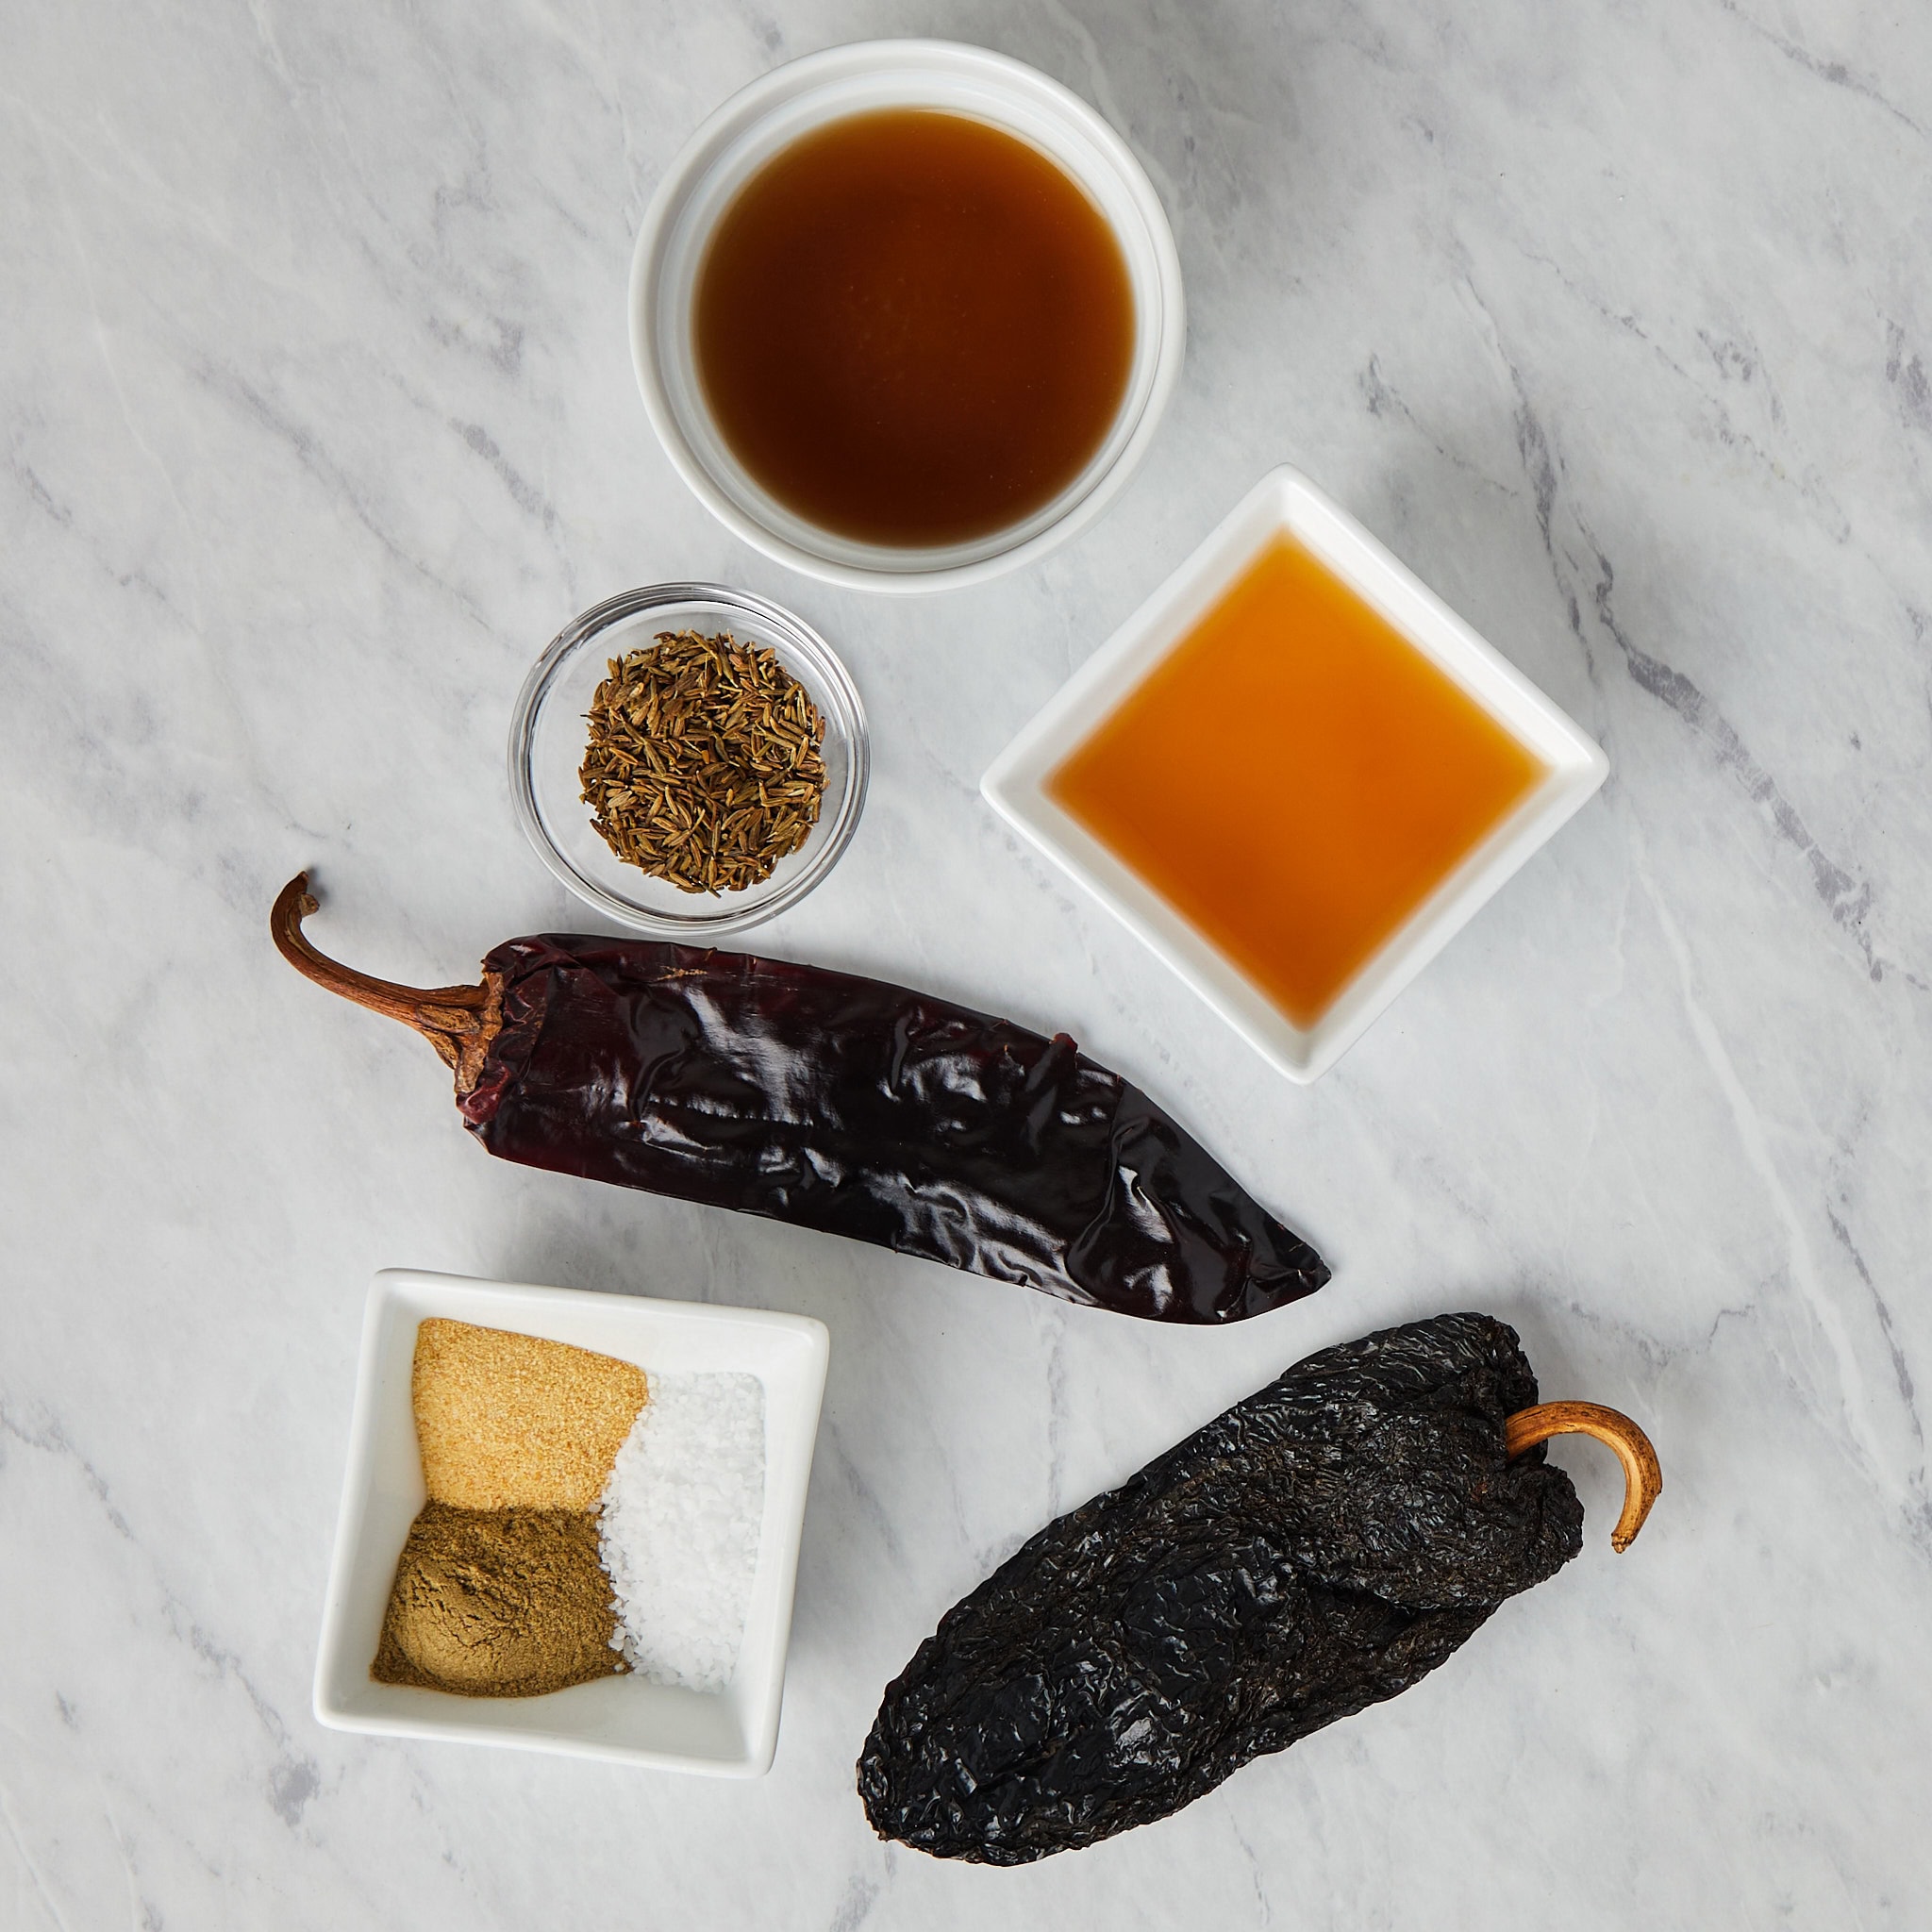
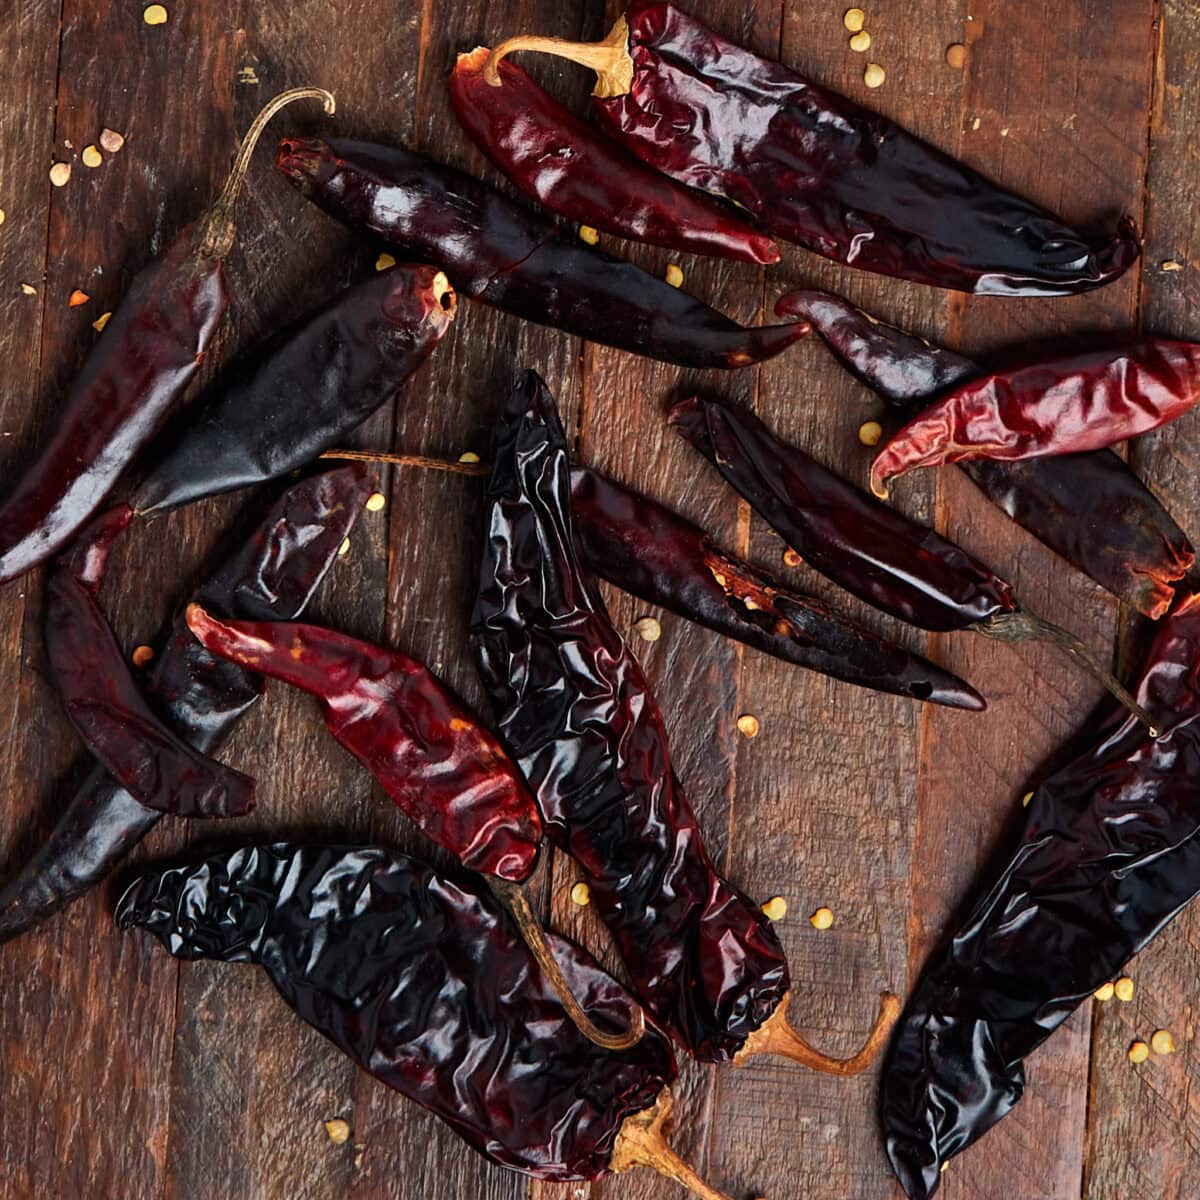
- Dried Guajillo Chiles: These mild chiles bring fruity, tangy notes with gentle heat. They’re among the most common dried chiles in Mexican cooking and appear in everything from salsas to moles. If you can’t find guajillos, substitute dried New Mexico or California chiles for a similar flavor.
- Dried Ancho Chiles: Anchos are dried poblano peppers with deep, sweet flavor and hints of dried fruit. They add body and richness without much heat. Substitute dried pasilla chiles if anchos aren’t available.
- Chicken Stock: Stock provides the liquid base and adds savory depth. Use low-sodium stock to control the salt level. Vegetable stock works if you want to keep the paste vegetarian.
- Apple Cider Vinegar: The vinegar brightens the chiles and balances their natural sweetness. You can leave it out, but you will need to increase the stock to maintain the liquid-to-chile ratio.
- Mexican Oregano: This herb is different from Mediterranean oregano. It’s more citrusy and pairs naturally with Mexican chiles. If you can’t find it, use half the amount of regular oregano or skip it entirely rather than overpowering the paste with the wrong flavor.
- Spices: We used a combination of garlic powder, cumin, and kosher salt. Adjust the salt to your taste, particularly if you’re using the paste in dishes that will be seasoned later.
How to Make Chili Paste with Dried Chiles
Here are the quick, step-by-step instructions with visuals; you can find the full instructions, including the exact ingredients, in the recipe card below.
Pro-tip: Toast the chiles just until they puff slightly and smell fruity. Over-toasting makes them bitter and ruins the flavor of the entire batch.
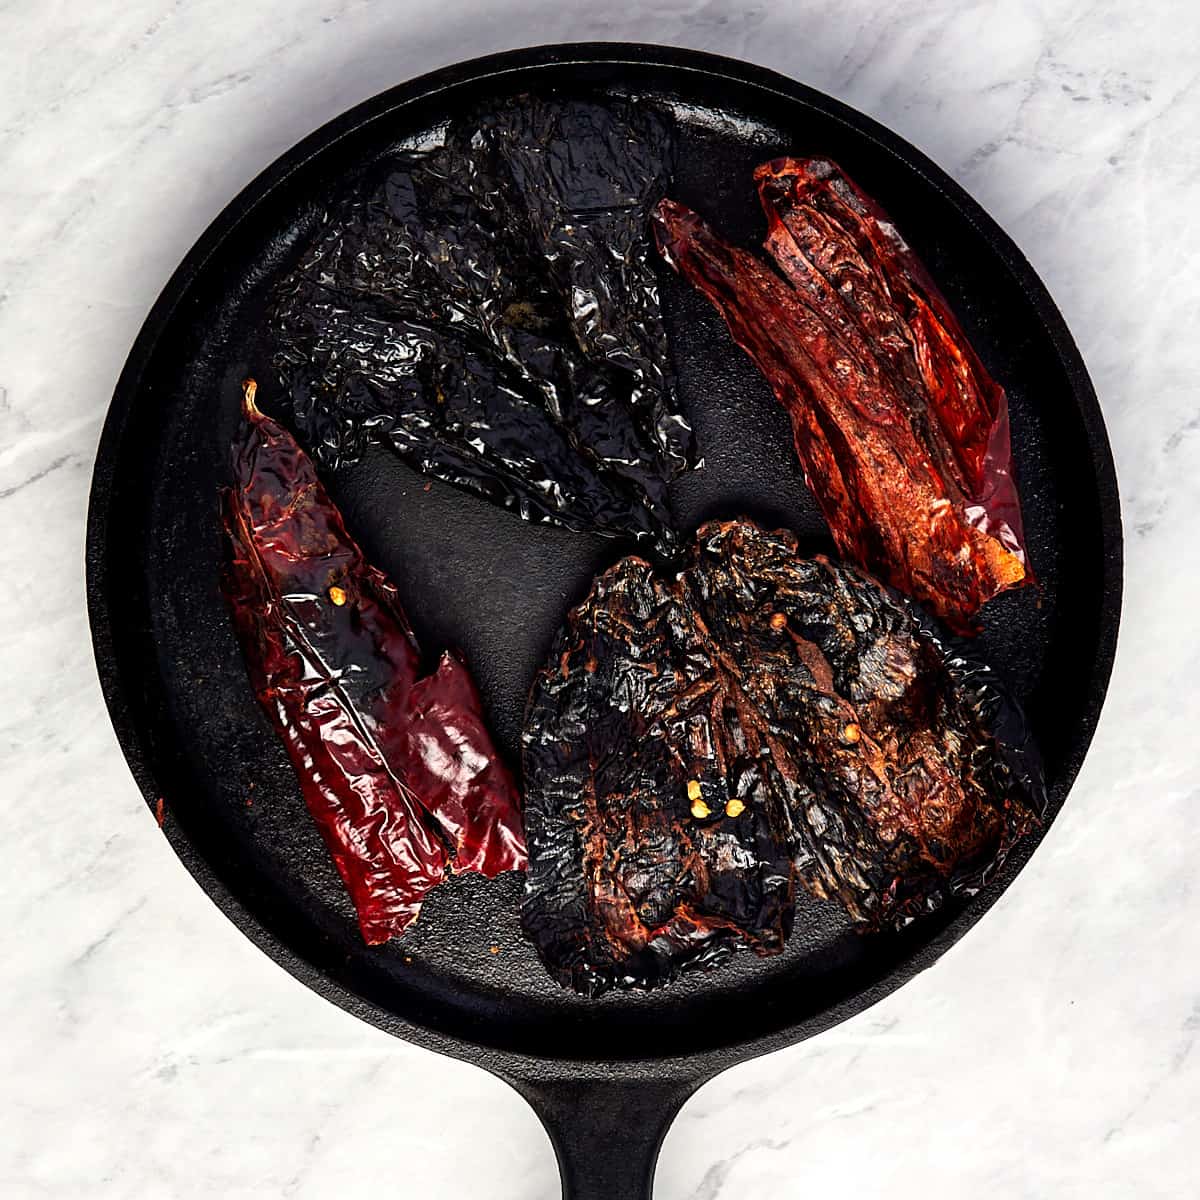
1. Prep and Toast the Chiles: Cut open the dried chiles and shake out the seeds. The seeds don’t add much flavor and can make the paste gritty. Heat a cast-iron skillet over medium heat. Working in batches if needed, press the chiles flat against the hot surface for 20 to 30 seconds per side. You’ll smell a fruity, warm aroma when they’re ready. The chiles should darken slightly. Don’t walk away from the stove during this step. Burned chiles taste acrid and can’t be saved.
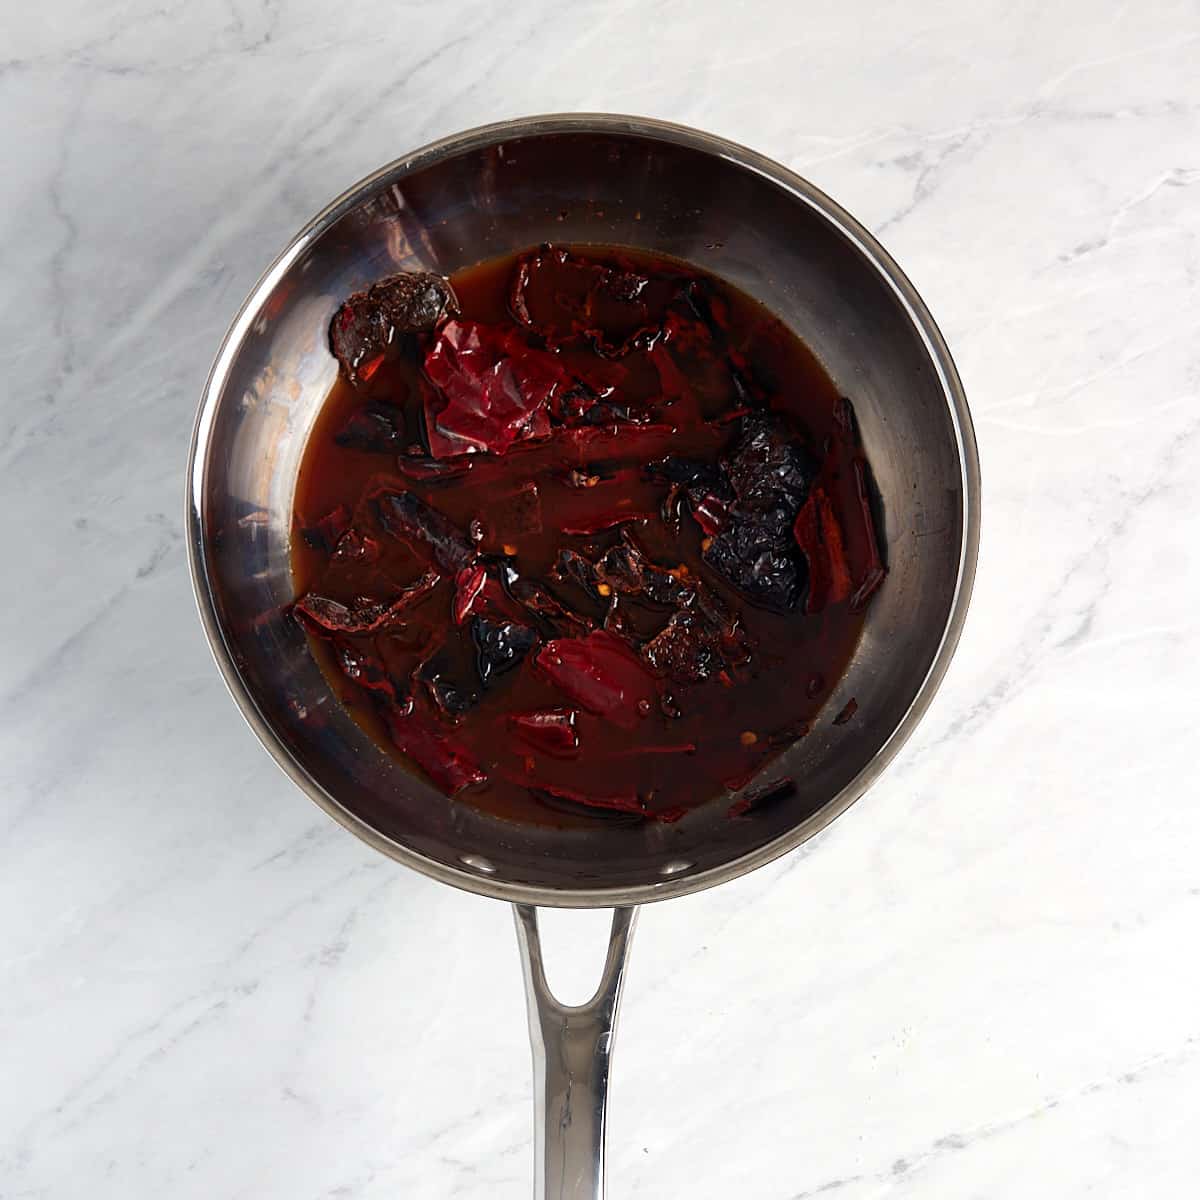
2. Simmer the Chiles: Tear the toasted chiles into smaller pieces and add them to a medium saucepan with the chicken stock and apple cider vinegar. Bring to a simmer and cook for 10 minutes. The chiles will soften, and the liquid will turn deep red.
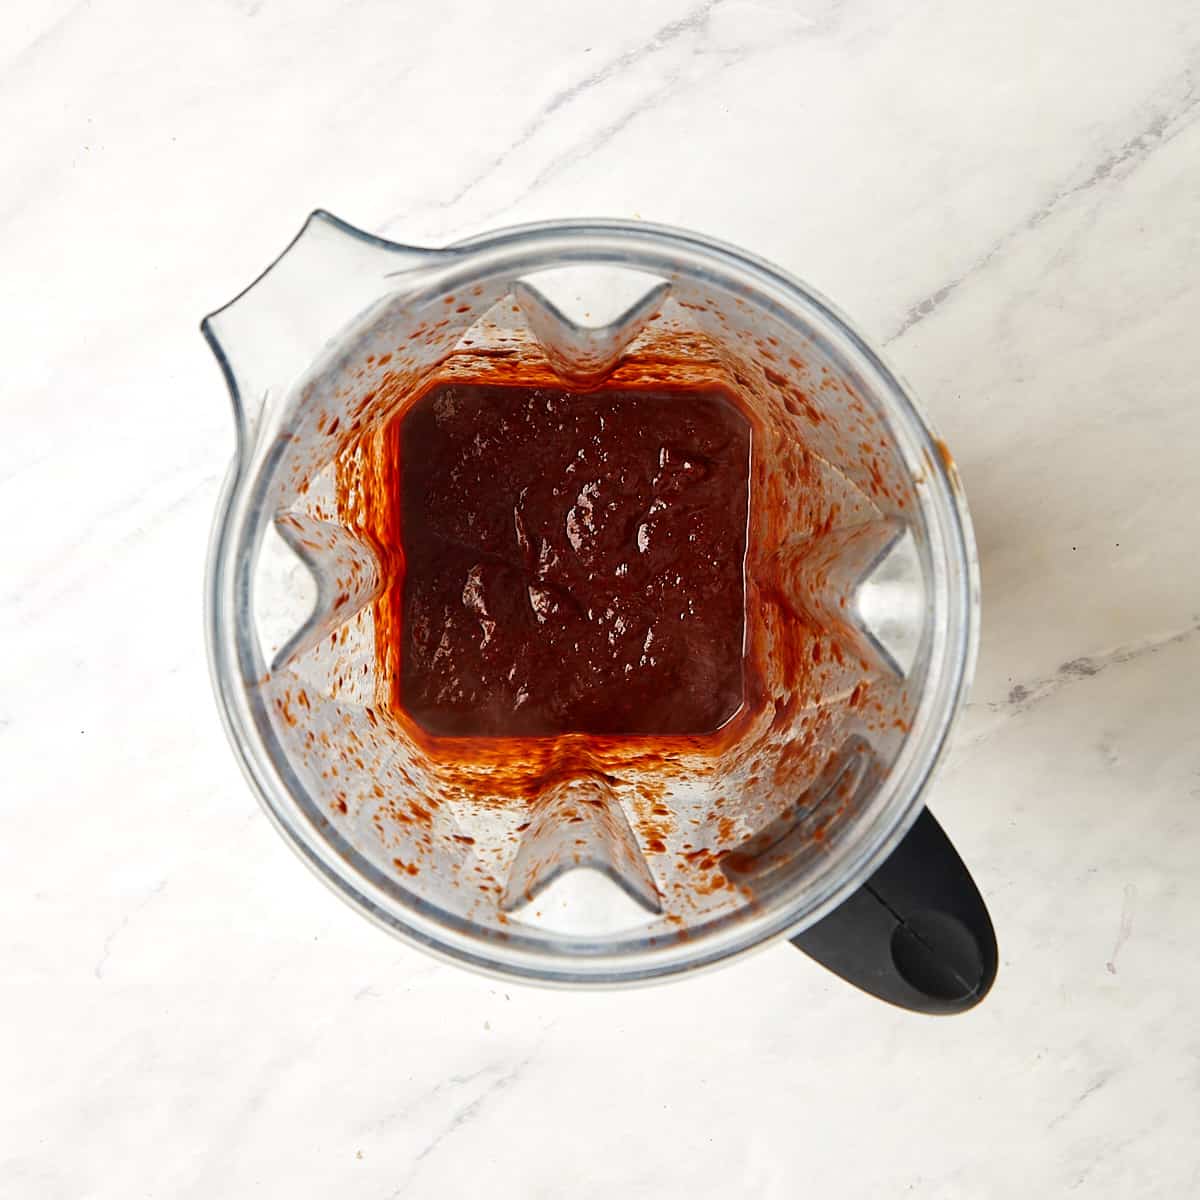
3. Blend the Paste: Transfer the chiles and liquid to a blender. Add the Mexican oregano, garlic powder, ground cumin, and kosher salt. Blend until completely smooth. This might take a minute or two. Stop and scrape down the sides if needed.
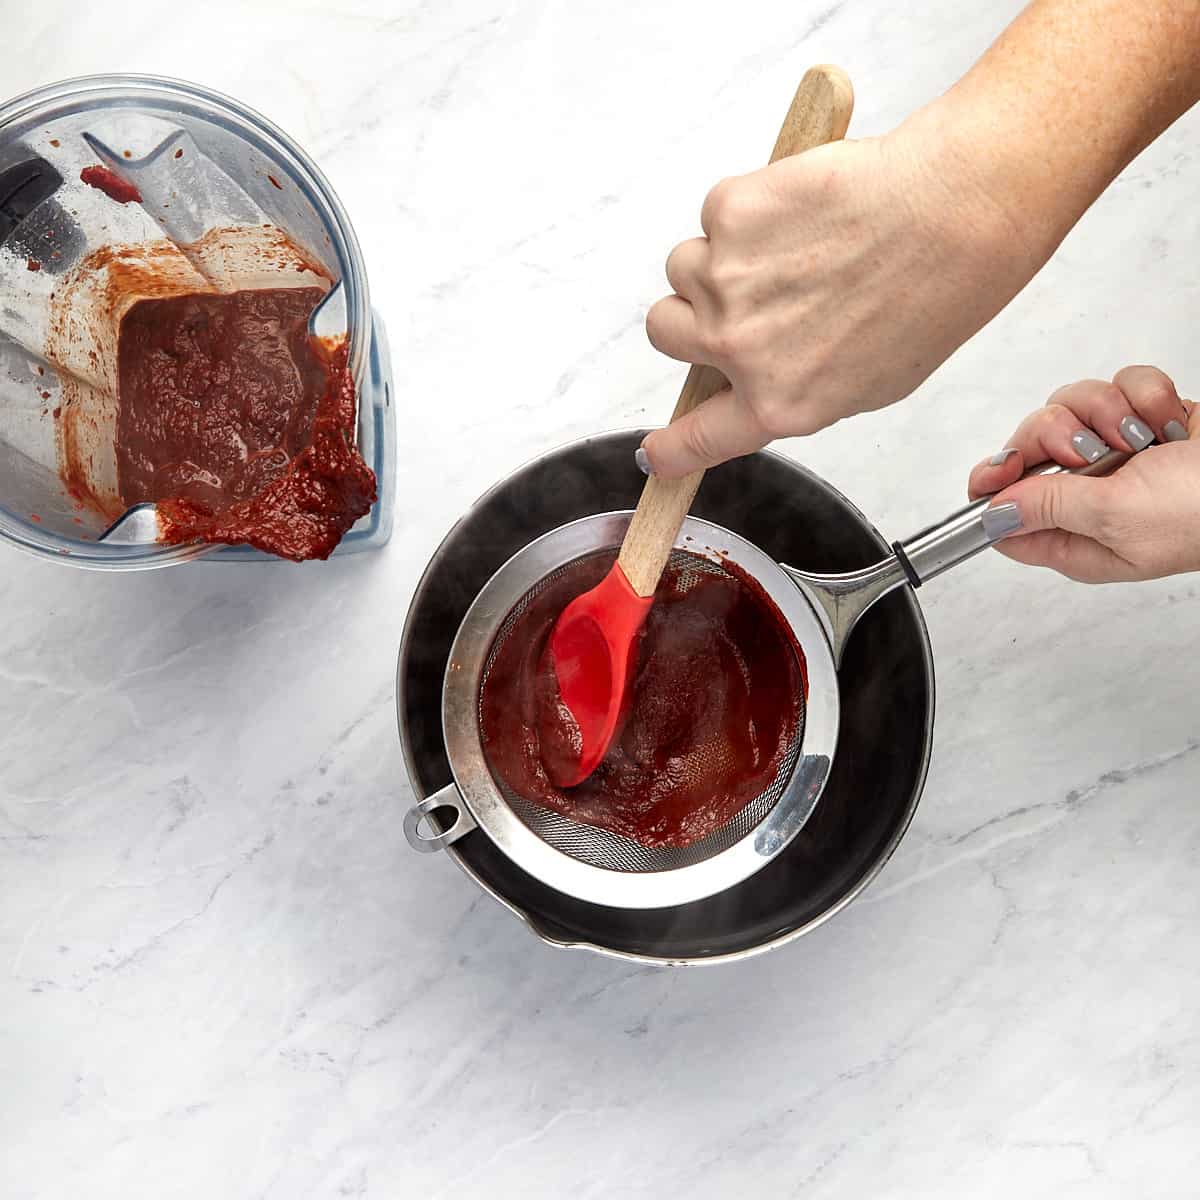
4. Strain the Mixture: Pour the blended paste through a wire strainer set over a bowl. Use a spatula to press the mixture through, working it back and forth. This removes any bits of stem or seed that didn’t break down in the blender. You’ll end up with a smooth, thick paste. Any fibrous bits left in the strainer can be discarded.
How to Use Chili Paste
This chili paste delivers depth of flavor without overpowering heat. Think of it as a building block rather than a finishing sauce.
For sauces and braises, thin the paste with stock or water and use it as a base. That’s how we build the foundation for Texas chili and game-day beer chili, where the chile flavor needs to hold up through a long simmer without overwhelming the dish.
It’s also good in tacos, enchiladas, and quesadillas. Stir a few spoonfuls into shredded chicken for red chile chicken street tacos, and dredge tortillas lightly in the paste before rolling enchiladas. Or spread a thin layer inside a quesadilla before adding cheese and fillings.
It’s also great for breakfast, too. Swirl it into scrambled eggs, spread a thin layer inside an omelet before folding, or drizzle it into the filling for breakfast burritos. A little goes a long way, especially early in the day.
Pro-Tip
Start with less than you think you need. You can always add another spoonful, but once it’s in the pot, it’s there to stay.
Make-Ahead and Storage
Make-Ahead: The chili paste can be made up to five days in advance. Store it in an airtight container in the refrigerator. The flavors will develop and meld during storage, making the day-two paste taste even better than freshly made.
How to Store: Keep the paste in a jar or airtight container in the refrigerator for up to one week. For longer storage, freeze the paste in ice cube trays or one-cup portions. Once frozen, pop the cubes out and store them in a freezer bag for up to three months.
Recipe Tips and Notes
- Remove all the seeds. Most of the heat in dried chiles comes from the seeds and ribs. Removing them gives you a paste with flavor instead of just fire. If you like heat, leave a few seeds from the guajillo chiles, or add some chile de árbol or pasilla chiles.
- Watch the chiles carefully when toasting. The line between perfectly toasted and burned is thin. Stay at the stove and use your nose. The chiles should smell fruity and warm, not smoky or bitter.
- Blend until smooth. Take an extra minute to ensure the paste is completely smooth in the blender. A few pulses won’t cut it. You want a silky texture that will incorporate easily into whatever you’re cooking.
- Strain for the best texture. Straining removes any stubborn bits that didn’t break down. It’s the difference between a smooth, professional paste and one that’s gritty or fibrous.
- Start with less. When using the paste in a recipe for the first time, start with half the amount you think you need. You can always add more, but you can’t pull it back out once it’s mixed in.
Frequently Asked Questions
More Recipes to Try
Looking for more ways to use dried chiles and build big flavors? Try these other favorites:
- Texas Chili – This thick, meaty chili gets its deep flavor from dried chiles and slow simmering.
- Red Chile Chicken Street Tacos – Tender chicken simmered in red chile sauce and served on warm corn tortillas with fresh toppings makes for an authentic taco experience.
- Game Day Chili – Perfect for feeding a crowd, this chili packs layers of flavor from toasted spices and dried chiles. It’s the kind of chili that wins competitions.
Let’s Connect! If you make this recipe or any other recipe on Casual Epicure, please don’t forget to rate the recipe and leave a comment below. It helps others who are considering making our recipes and we love hearing about your cooking experiences. And if you snapped some shots, share them on Instagram, and be sure to tag @casual.epicure so we can feature them in our stories.
Homemade Chili Paste
Want To Save This Recipe For Later?
Equipment
- Medium Cast-Iron Skillet (8 inches)
- Medium Saucepan (2-3 Quarts)
Ingredients
- 3 dried guajillo chiles
- 3 dried ancho chiles
- 1 ½ cups chicken stock
- 1 ½ tablespoons apple cider vinegar
- 1 ½ teaspoons Mexican oregano
- ½ teaspoon garlic powder
- ½ teaspoon ground cumin
- 1 teaspoon kosher salt
Instructions
- Cut open the dried chiles and remove the seeds.
- Roast in a preheated cast-iron skillet for 20-30 seconds per side. Watch for a fruity smell and darkening (leather-like appearance). Avoid over-toasting. Tear or cut toasted chiles into pieces.
- In a medium saucepan, combine chicken stock, apple cider vinegar, and roasted chiles. Simmer for 10 minutes.
- Pour the chiles, stock, and vinegar into a blender. Add Mexican oregano, garlic powder, kosher salt, and ground cumin. Blend until smooth.
- Using a spatula, work the chile paste through a wire strainer to remove residual chile stems or seeds.