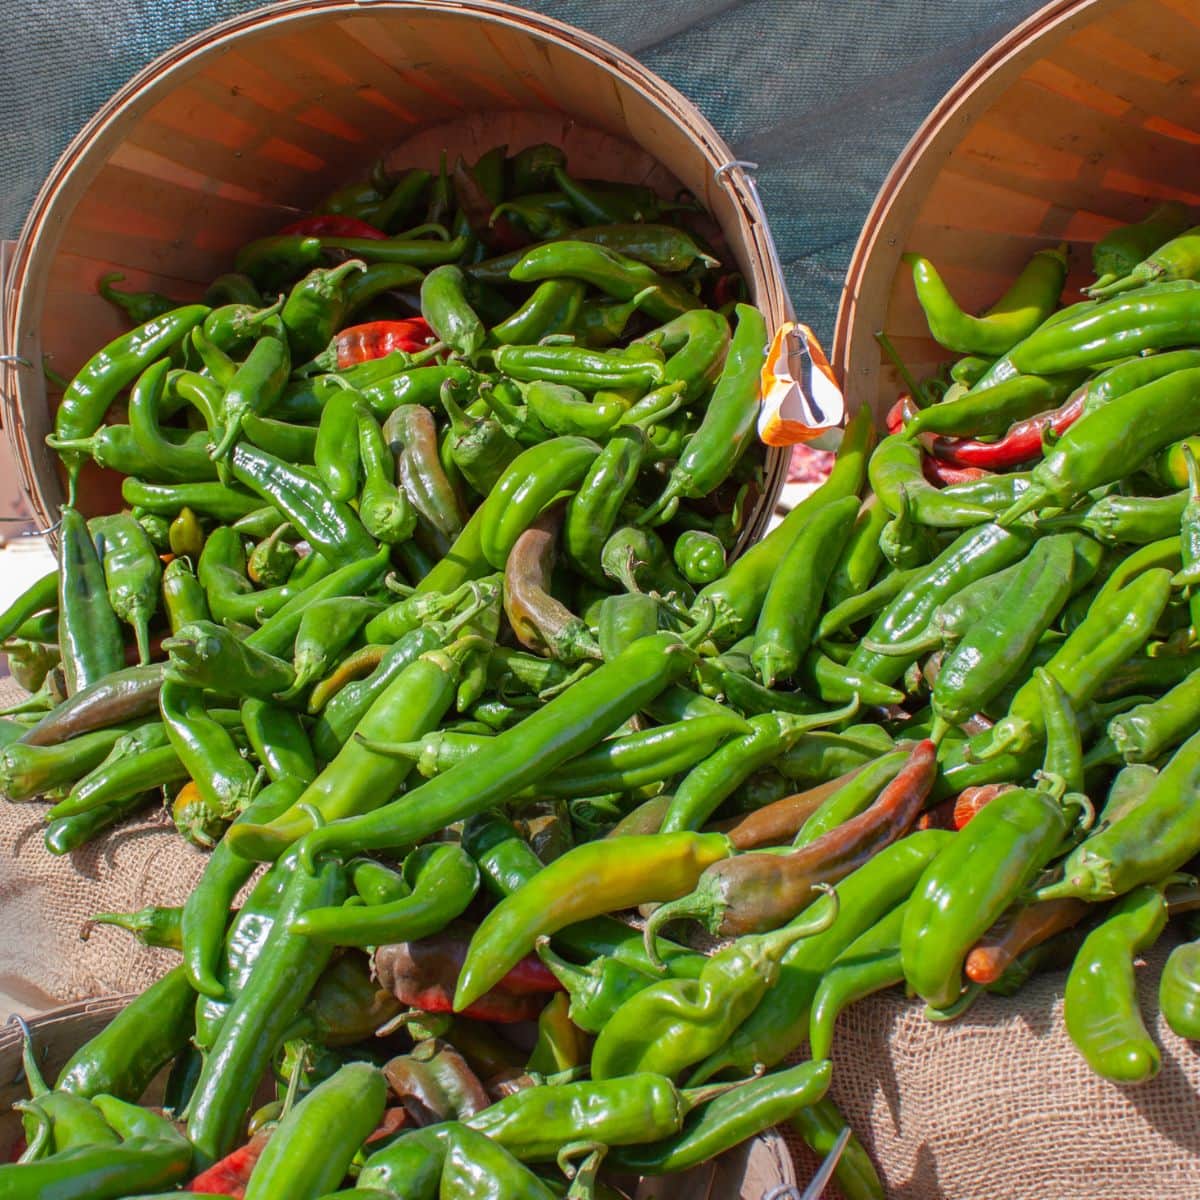
The late summer in Texas is brutally hot, but we still look forward to it every year since August is the start of Hatch chile season. These renowned peppers, grown in the fertile fields of the Hatch Valley in New Mexico, are celebrated for their smoky, earthy flavor and varying heat levels, ranging from mild to hot. Roasting these chiles is a time-honored tradition, bringing out their unique taste and aroma. We have options for roasting hatch chile on the grill, oven, or stovetop, so you can enjoy this late-summer produce throughout the year!
Want To Save This Recipe For Later?
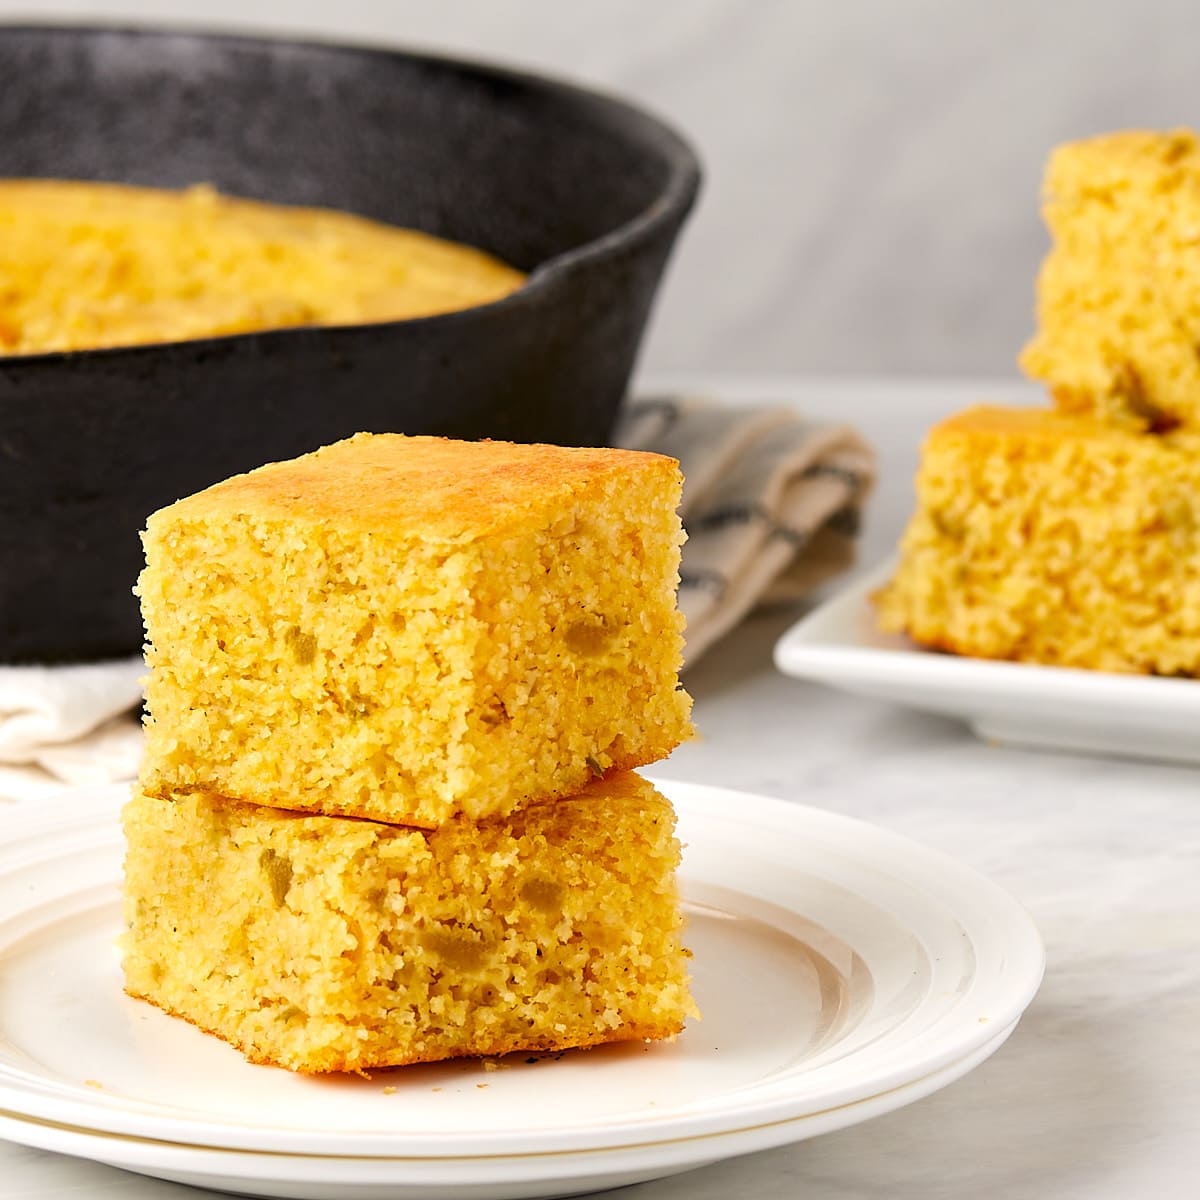
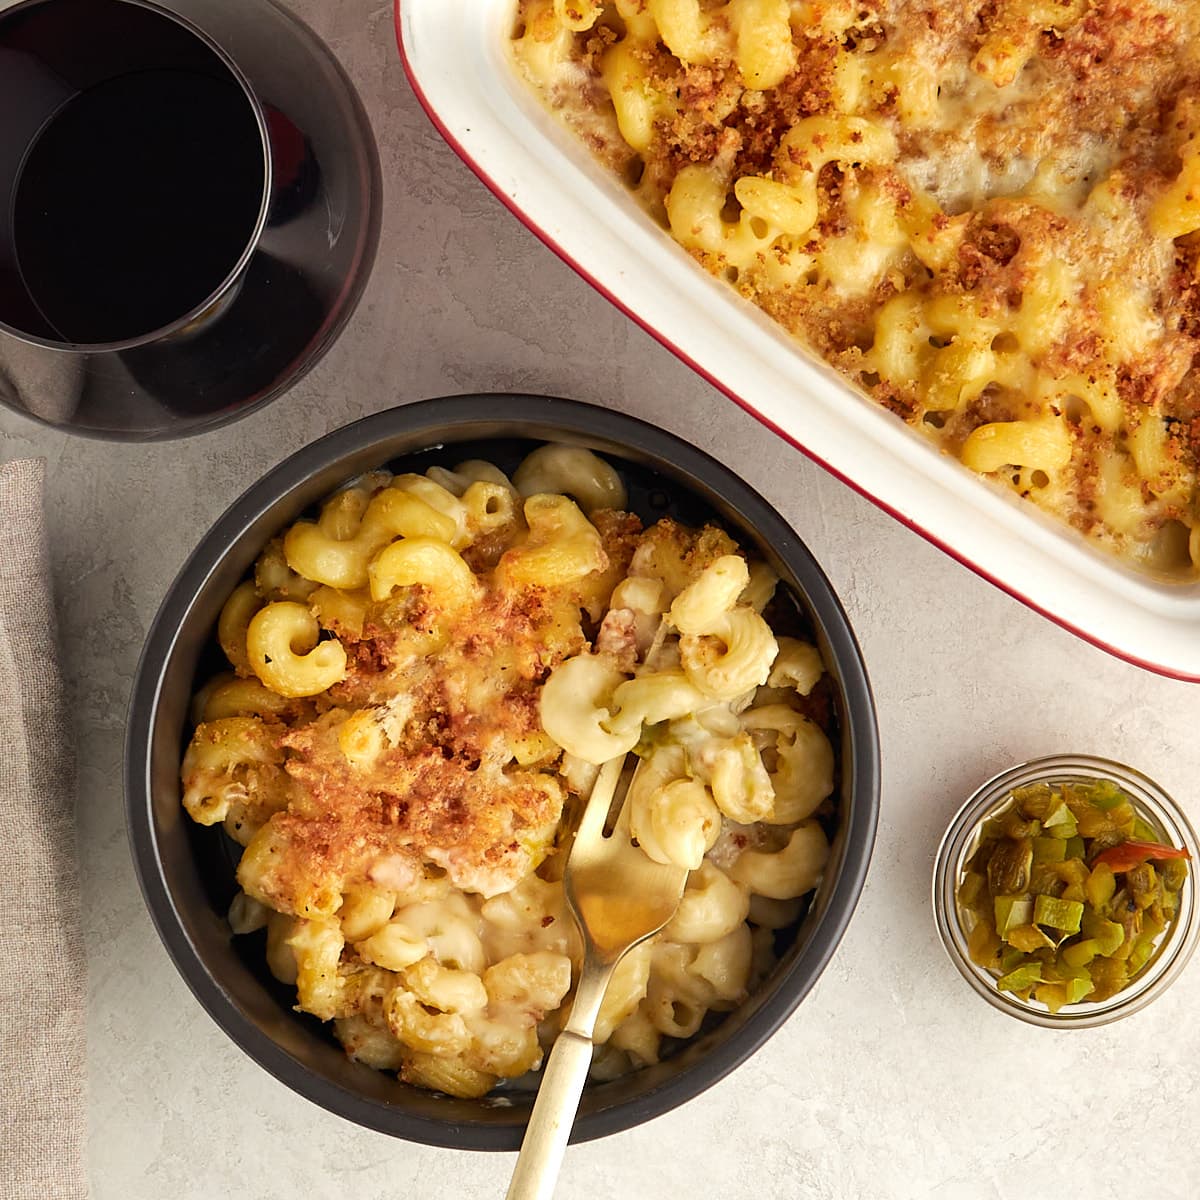
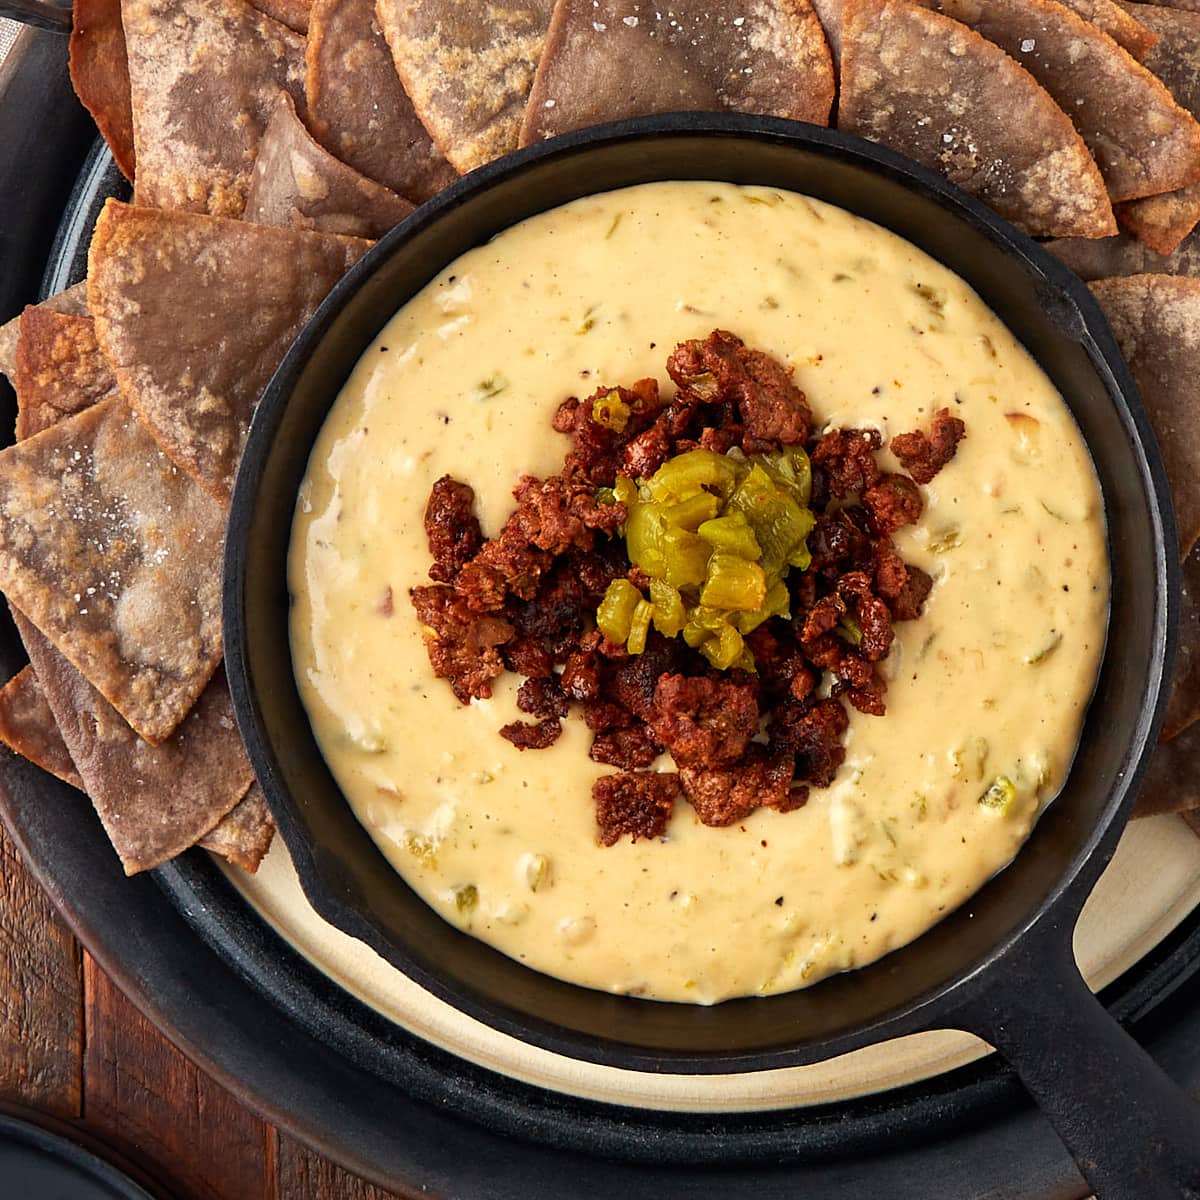
If you love cooking with Hatch chiles, you’ll want to try our Hatch chile mac and cheese for a creamy, spicy comfort food favorite. Our Hatch queso is perfect for a twist on the traditional queso appetizer for game days or casual gatherings. Our green chile cornbread is the perfect side for soups and stews.
What are Hatch Chiles
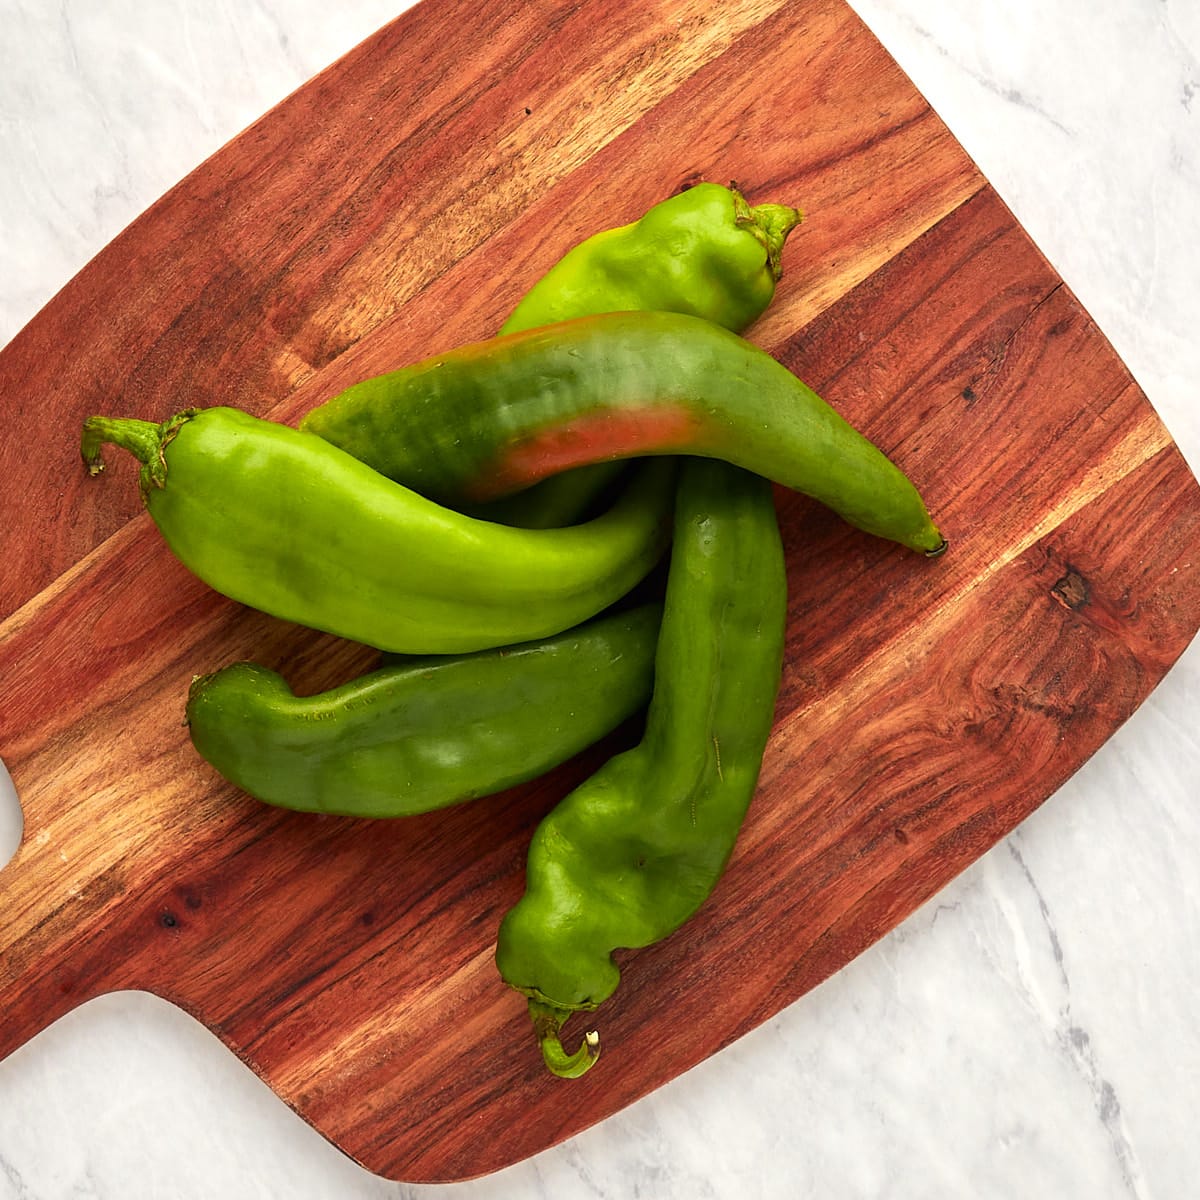
Hatch chiles, often called Hatch green chiles, are grown in Hatch Valley of New Mexico and have a very short cultivation season from August to September, making these chiles a hot commodity for a short while. Their thick skin and meaty walls make them perfect for roasting, bringing out their buttery, earthy flavor. They are similar in shape and size to an Anaheim pepper, and range in heat from mild (1,000-1,500 Scoville Units) to hot (2,500-8,000 Scoville Units). The heat can go from Anaheim mild heat to jalapeño spicy, so give them a taste before adding them to a dish.
- Mild to Hot Flavor: Hatch chiles can range in spiciness from mild to hot, depending on the specific variety and growing conditions. This range of heat makes them suitable for different recipes or personal preferences.
- Smoky and Earthy Flavor: Hatch chiles have a unique smoky and earthy flavor that sets them apart from other green chiles.
- Versatile Use: Hatch chiles can be used in a wide range of dishes, including green chile salsa, stews, enchiladas, tamales, quesadillas, and many more. They add a distinctive flavor and spiciness to both savory and sweet dishes, such as chocolate chip cookies or apple pie.
- Seasonal Availability: Hatch chiles are seasonal, typically harvested in late summer and early fall.
- Variety: Hatch chiles come in different varieties, each with its own flavor profile and heat level. Some well-known varieties include Big Jim, Sandia, and Joe E. Parker.
- Green and Red Chiles: Hatch chiles are typically harvested when they are green and are used in a variety of dishes. Some green chiles are left to ripen on the plant and turn red. Red Hatch chiles have a sweeter, smokier flavor with less heat than their green counterparts.
How to Select the Perfect Hatch Chile
Selecting the perfect Hatch chile is often key to ensuring your dishes are flavorful and satisfying.
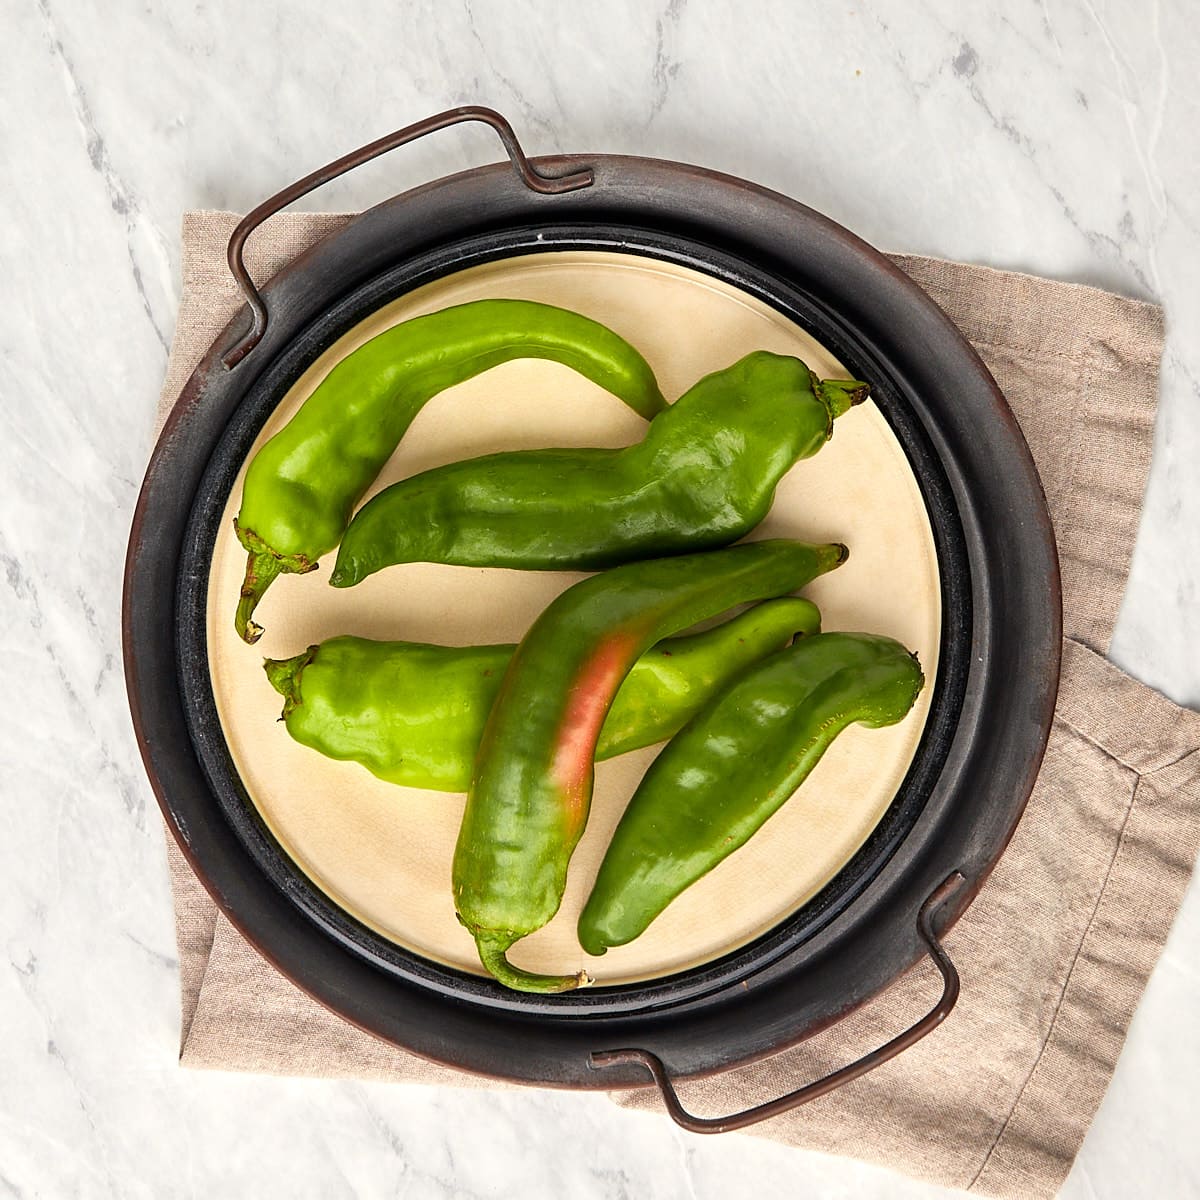
Freshness: Look for chiles that are firm, glossy, and free from blemishes, wrinkles, or soft spots.
Color: Green Hatch chiles are the most common, but you may also find red chiles that have ripened further. Select a color that complements your recipe. Green chiles are milder and slightly spicier, while red chiles are sweeter and less spicy.
Size: Select chiles of the size appropriate for your intended use. Smaller chiles are typically spicier, while larger ones may have a milder flavor.
Stem: Choose chiles with intact stems. The stem should be fresh and not dried out. The stem is often left attached for flavor and as a handle during roasting.
Smell: Gently squeeze the chiles and sniff them. They should have a fresh, peppery aroma. Avoid chiles with no aroma or any signs of rot or mold.
Feel: Chiles should feel heavy for their size, indicating that they are juicy and flavorful.
Consistency: It’s a good idea to check a few chiles in the batch for consistency in terms of color, size, and freshness, especially if you plan to use them in the same dish.
Check for Wrinkles: While some wrinkles are normal, avoid chiles that are overly wrinkled or appear shriveled, as this may indicate they are past their prime.
Key Equipment and Tools
To roast Hatch green chiles, you’ll need some essential tools and equipment to ensure a smooth and successful roasting process.
- Propane Grill or Gas Stove: A propane grill or a gas stove is preferred for roasting Hatch chiles. The open flame provides direct heat to char the chiles and infuse them with a smoky flavor.
- Tongs: Long-handled tongs are essential for safely turning the chiles while they roast. This prevents you from getting too close to the open flame.
- Aluminum Foil (optional): Some people prefer to line the grill grates with aluminum foil to facilitate easier cleanup. It’s not essential, but can be a helpful addition.
- Baking Sheet (optional): If you roast the chiles in the oven, you’ll need a standard baking sheet to place the chiles on. It’s a good idea to line the baking sheet with aluminum foil to make cleanup easier.
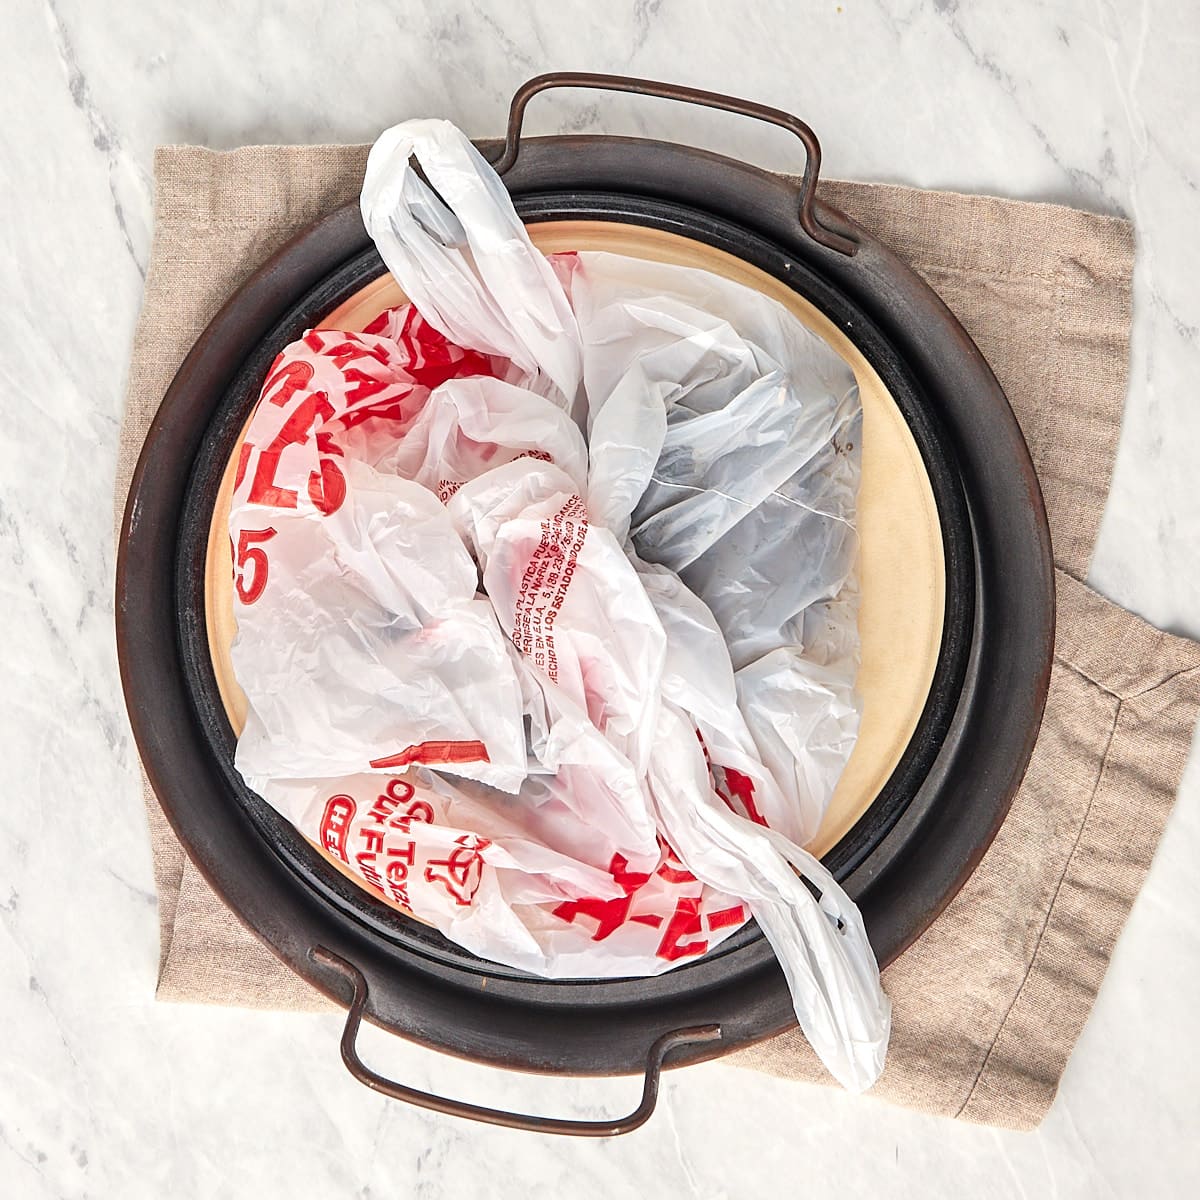
- Brown Paper Bag, Plastic Bag, or Plastic Wrap: After roasting, you’ll need a brown paper bag, plastic bag, or plastic wrap to allow the chiles to steam, which makes the peeling process easier.
- Heat-Resistant Gloves (optional): If you’re roasting a large number of chiles or have sensitive skin, heat-resistant gloves can protect your hands from the chiles’ heat.
How to Roast Hatch Chiles
Here are the quick, step-by-step instructions with visuals; you can find the full instructions, including the exact ingredients, in the recipe card below.
Pro-tip: Be patient when roasting Hatch chiles. Chiles should be roasted evenly on all sides to achieve that signature charred look and smoky flavor. Rushing the process might result in uneven roasting, with some areas undercooked and others overcooked.
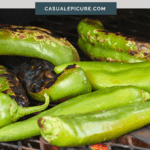
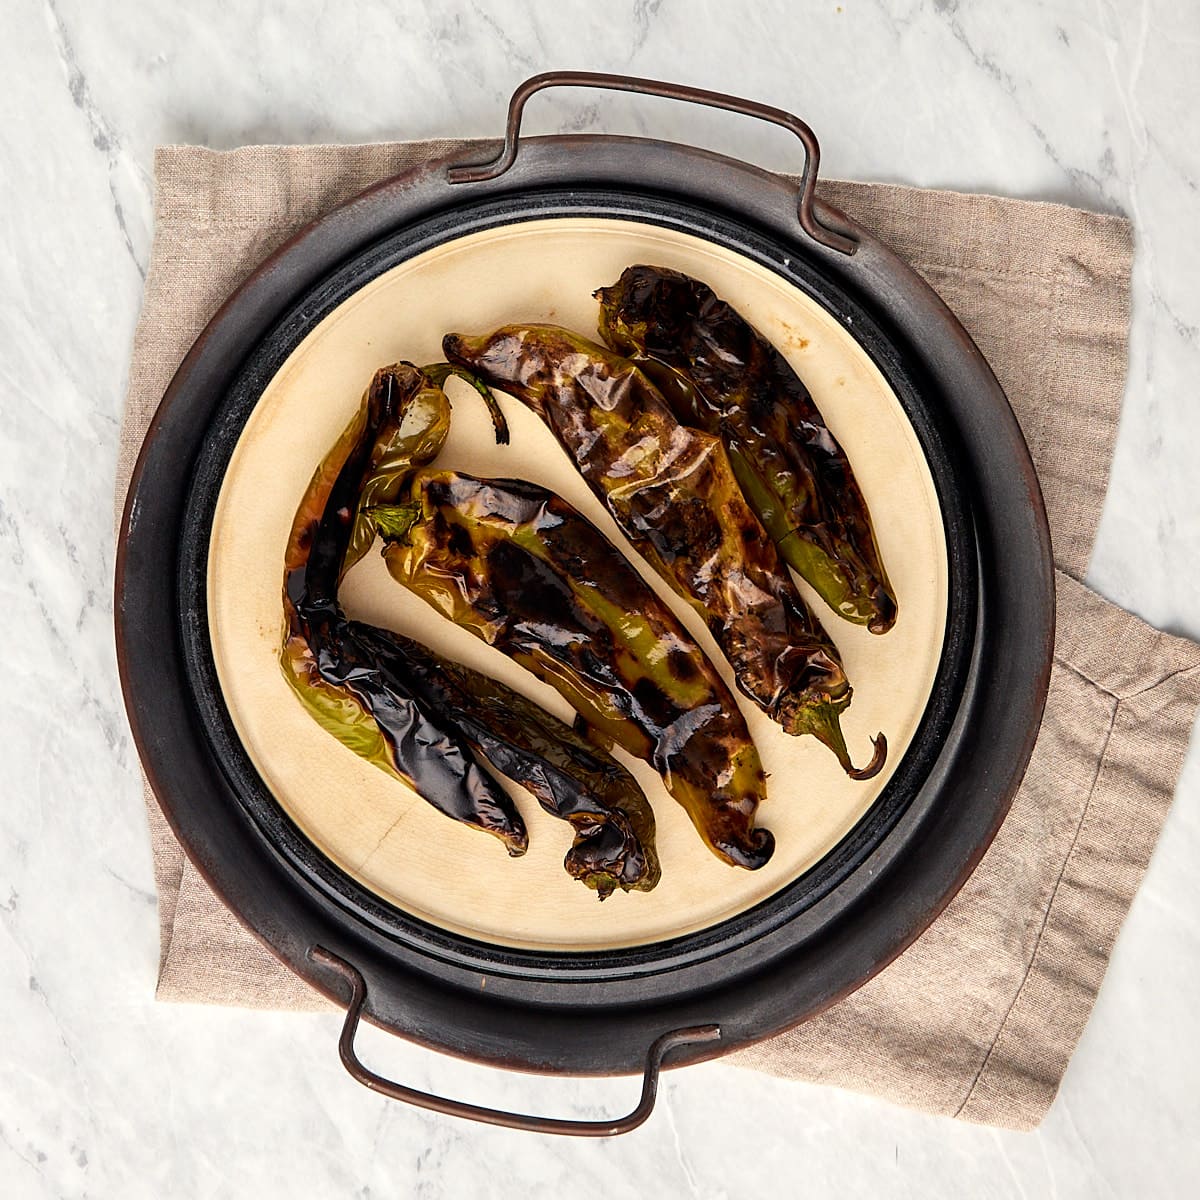
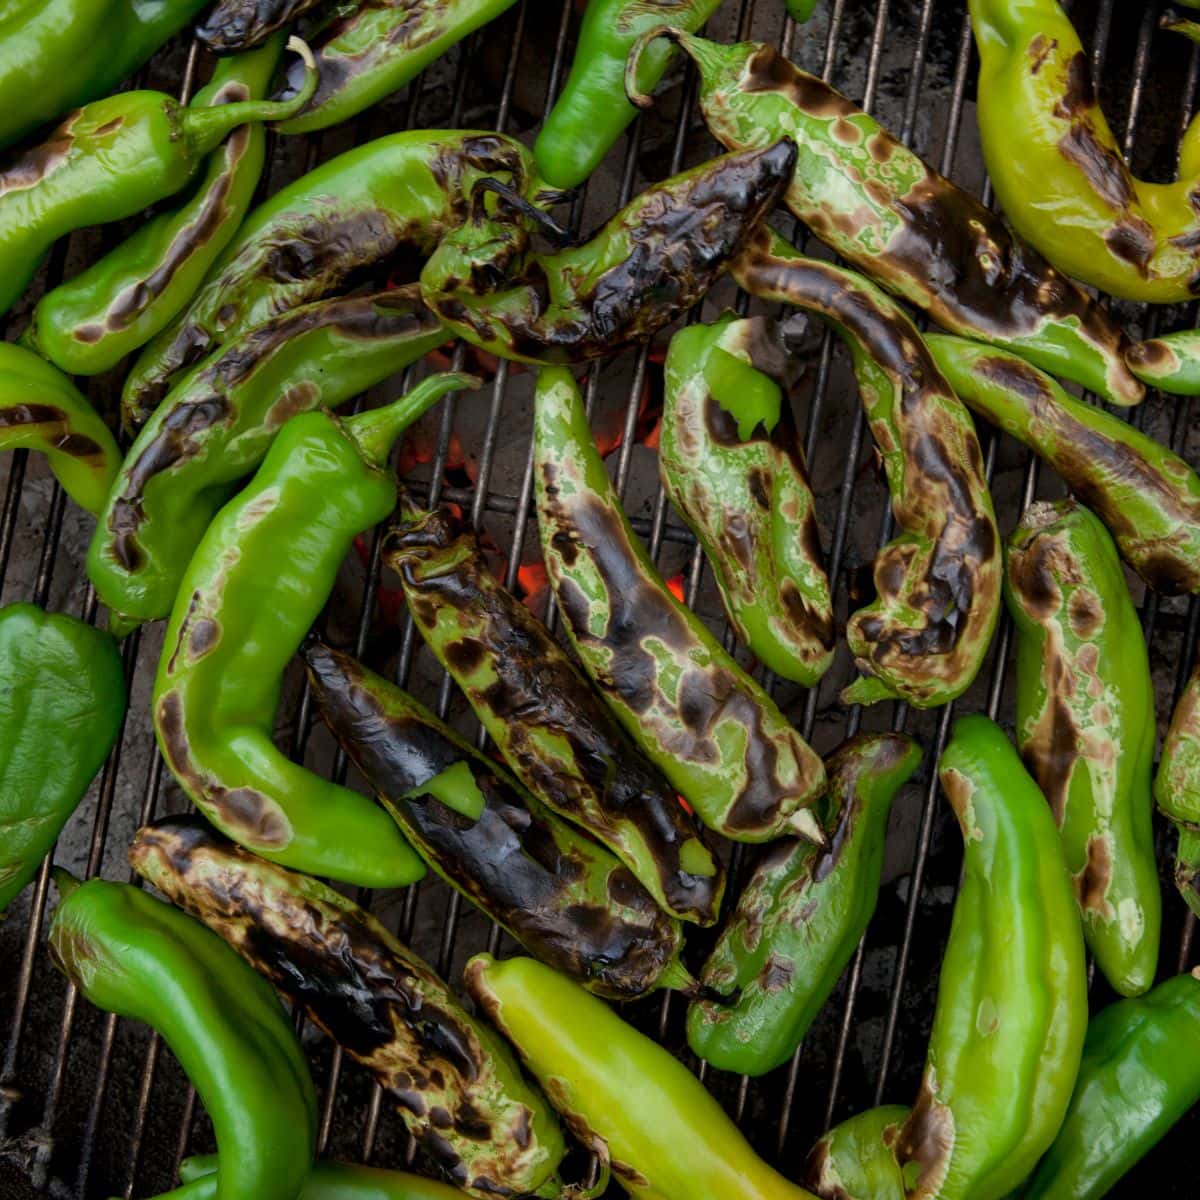
Hatch green chiles are known for their thick, meaty flesh, transforming into a velvety, smoky delight when roasted. The roasting process enhances their flavor and makes them easier to peel. Once roasted, these chiles can be used in salsas, soups, stews, sandwiches, and virtually any dish that needs a zesty kick. Our preferred method for roasting chiles is on the grill, as it infuses them with a nice smoky flavor. You can also roast them in the oven or on the stovetop.

How to Roast Hatch Chiles on the Grill
1. Preheat the Grill: Start by preheating your propane grill to medium-high heat. You want the grill to be hot enough to char the chiles but not so hot that they burn too quickly.
2. Prepare the Chiles: Rinse the Hatch chiles thoroughly under cold water and pat them dry with a paper towel. You can leave the stems intact; they add flavor and make the chiles easier to handle.
3. Grill the Chiles: Place them directly on the grill grates, ensuring they are evenly spaced and not overcrowded. The goal is to allow each chile to roast properly.
4. Roast and Turn: Roast the chiles for about 5-7 minutes on one side. You will notice the skin blistering and charring. Use tongs to flip the chiles and roast the other side for an additional 5-7 minutes. The total roasting time will depend on your grill’s heat, so monitor the chiles closely.
How to Roast Hatch Chiles in the Oven
1. Preheat the Oven: Preheat your oven to the “Broil” setting. You want the broiler to be on, which generates high, direct heat from the top.
2. Prepare the Chiles: Rinse the Hatch chiles thoroughly under cold water and pat them dry with a paper towel. You can leave the stems intact; they add flavor and make the chiles easier to handle.
3. Line the Baking Sheet: Cover a baking sheet with aluminum foil. This will make cleanup easier and prevent the chiles from sticking to the pan.
4. Place Chiles on the Baking Sheet: Lay the chiles on the baking sheet, ensuring they are evenly spaced and not overcrowded. The chiles should be placed about 4-6 inches below the broiler.
5. Roast and Turn: Place the baking sheet with the chiles in the oven under the broiler. Roast the chiles for about 5-7 minutes on one side. You’ll notice the skin blistering and charring. Use oven-safe gloves or kitchen tongs to flip the chiles carefully and roast the other side for another 5-7 minutes. The total roasting time will depend on your oven’s broiler heat, so keep a close eye on the chiles.
How to Roast Hatch Chiles on the Stove
1. Prepare the Chiles: Rinse the Hatch chiles thoroughly under cold water and pat them dry with a paper towel. You can leave the stems intact; they add flavor and make the chiles easier to handle.
2. Use an Open Flame: Turn on your gas stove burners to medium-high. You’ll roast the chiles directly over the open flame, so ensure good ventilation.
3. Place the Chiles on the Burners: Using tongs, carefully place the chiles directly on the burner grates, making sure they are evenly spaced and not too crowded.
4. Roast and Turn: The chiles’ skin will blister and char as they roast. Use tongs to turn the chiles to ensure even roasting. Roast each side for about 5-7 minutes, or until the skin is well charred. The total roasting time will depend on the size and heat of your chiles.
5. Transfer to a Baking Sheet: After roasting, transfer the hot chiles to a baking sheet lined with aluminum foil. This step is essential to catch any drips and ensure the chiles don’t stick to the counter.
Steaming and Peeling Hatch Chiles
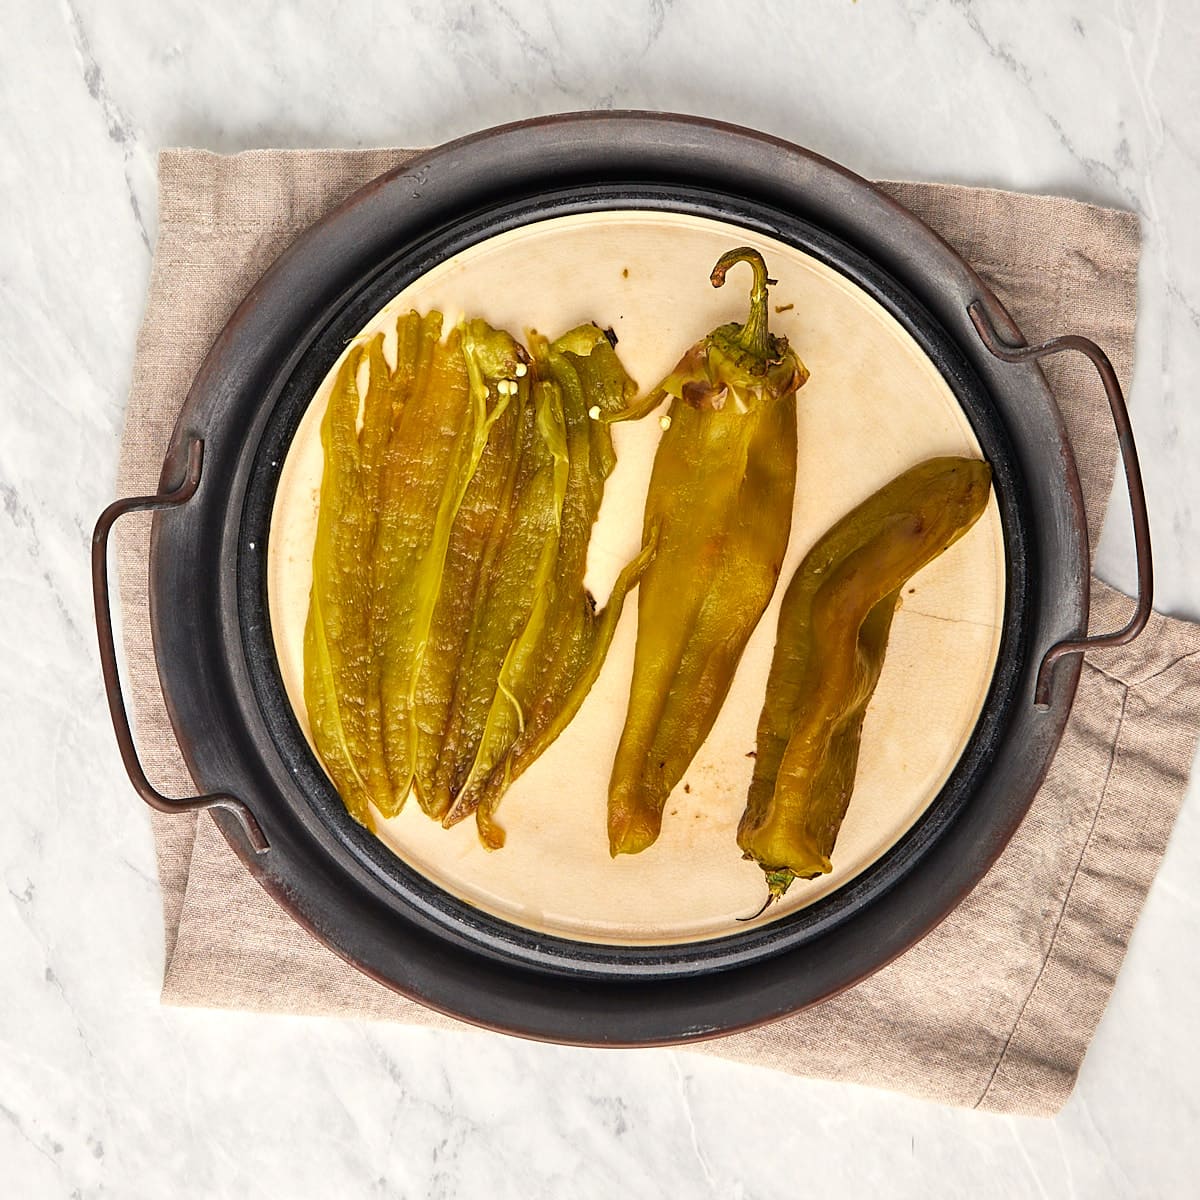
Once your chiles are roasted, transfer them to a plastic bag or wrap them in plastic wrap. Allow them to steam for about 10-15 minutes; this makes the peeling process a breeze. Once the chiles have steamed and are cool enough to handle, gently peel away the charred skin, starting at the stem end. If they were roasted and appropriately steamed, the skin should come off easily; if not, you will need to pick off the skin carefully. You can wear gloves to protect your skin from the chiles’ heat.
If you prefer milder chiles, you can cut a small lengthwise slit in the chile and remove the seeds and ribs. Once peeled and deseeded, the roasted Hatch chiles are ready to use in your favorite recipes. They can be stored in the freezer for later use if you have extra.
How to Use Hatch Chiles
Hatch chiles can be used in a wide range of dishes to add a unique flavor and a touch of spiciness. Here are some of our favorite ways to use Hatch chiles.
- Hatch Chile Salsa: Make a flavorful Hatch chile salsa by blending roasted chiles with tomatillos, onions, cilantro, and lime juice. Use it as a dip, topping, or sauce for a variety of dishes.
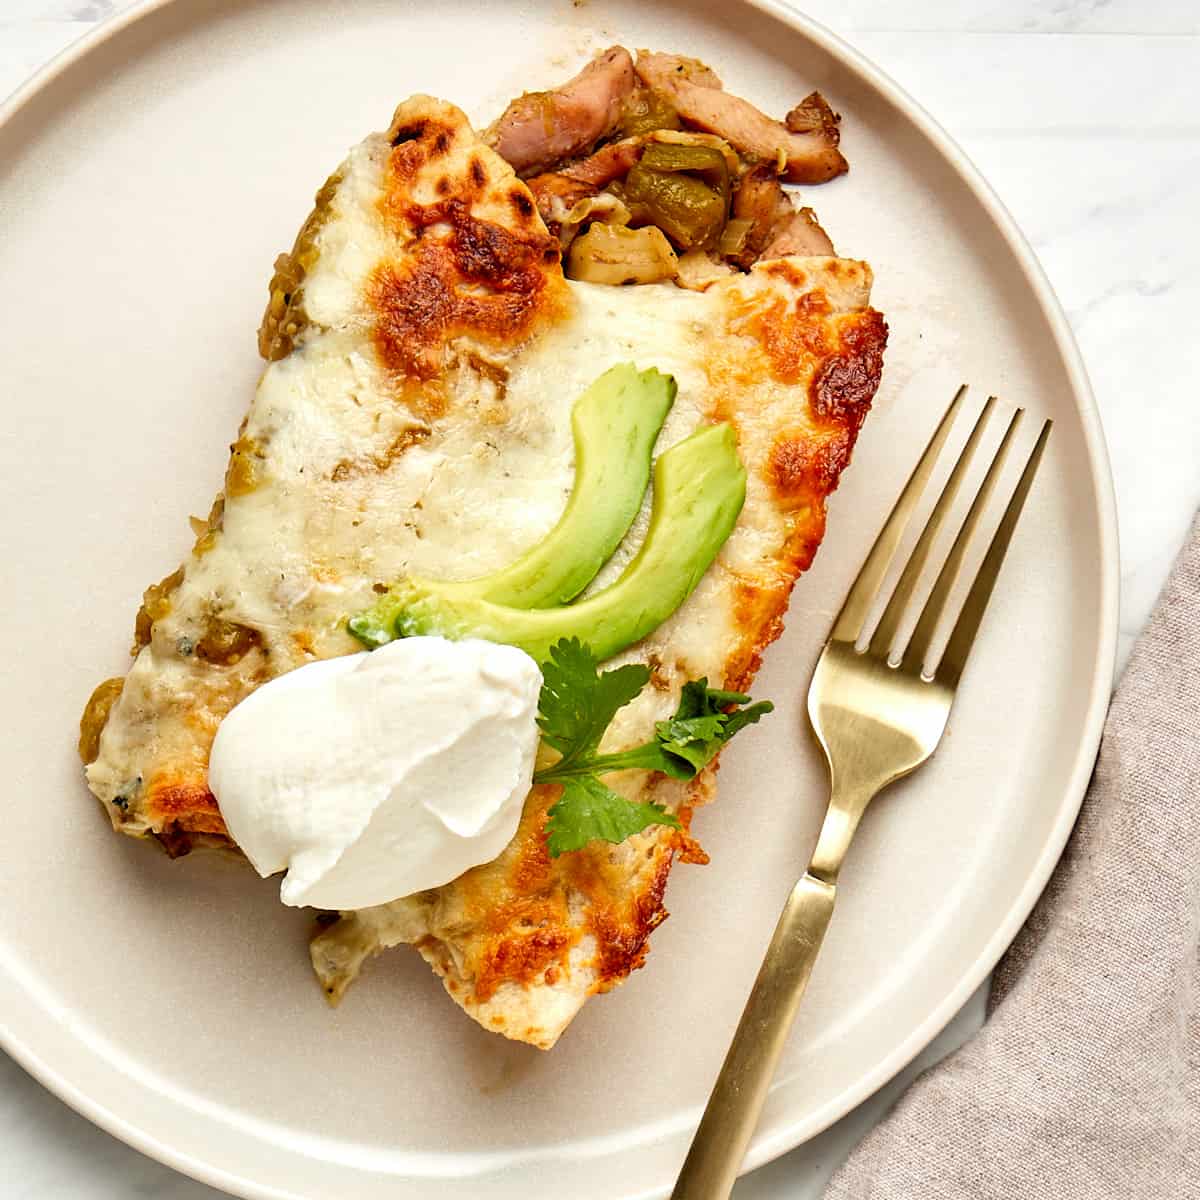
- Hatch Chile Enchiladas: Fill corn tortillas with a mixture of roasted Hatch chiles, cheese, and your choice of protein (such as chicken, beef, or beans). Top with red or green enchilada sauce, bake, and enjoy.
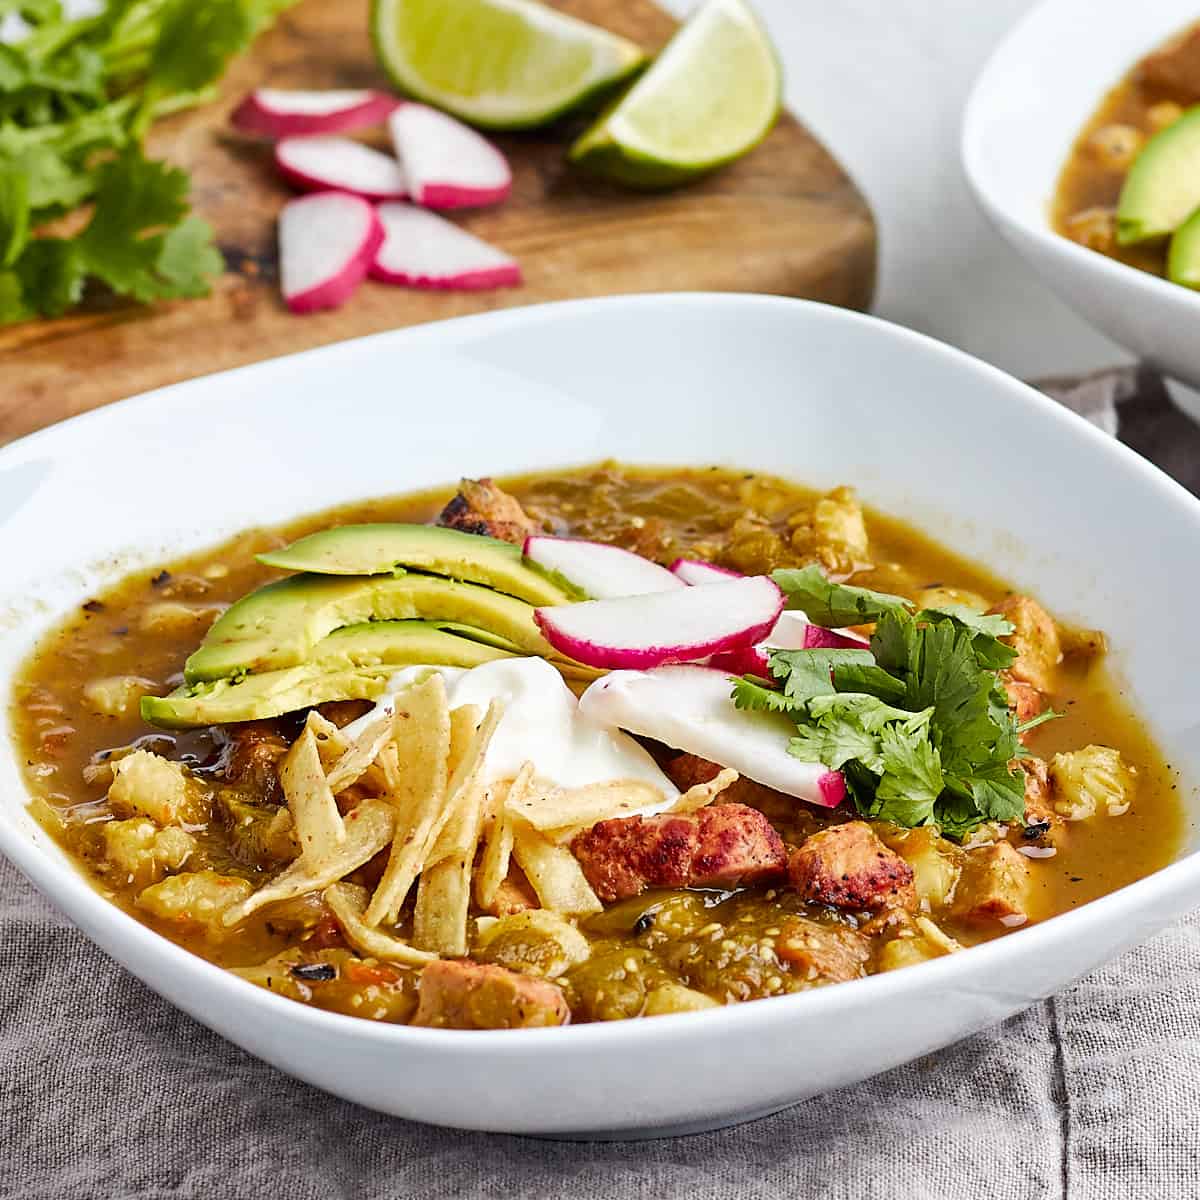
- Hatch Chile Stew: For a rich and spicy flavor, add roasted Hatch chiles to a hearty stew with pork, beef, or chicken. It’s a popular choice for green chile stew.
- Hatch Green Chile Cheeseburgers: Mix chopped roasted Hatch chiles into burger patties for a delicious and slightly spicy twist on classic burgers. The classic New Mexico-style cheeseburger simply piles a generous amount of roasted and julienned Hatch peppers between the cheese and bun.
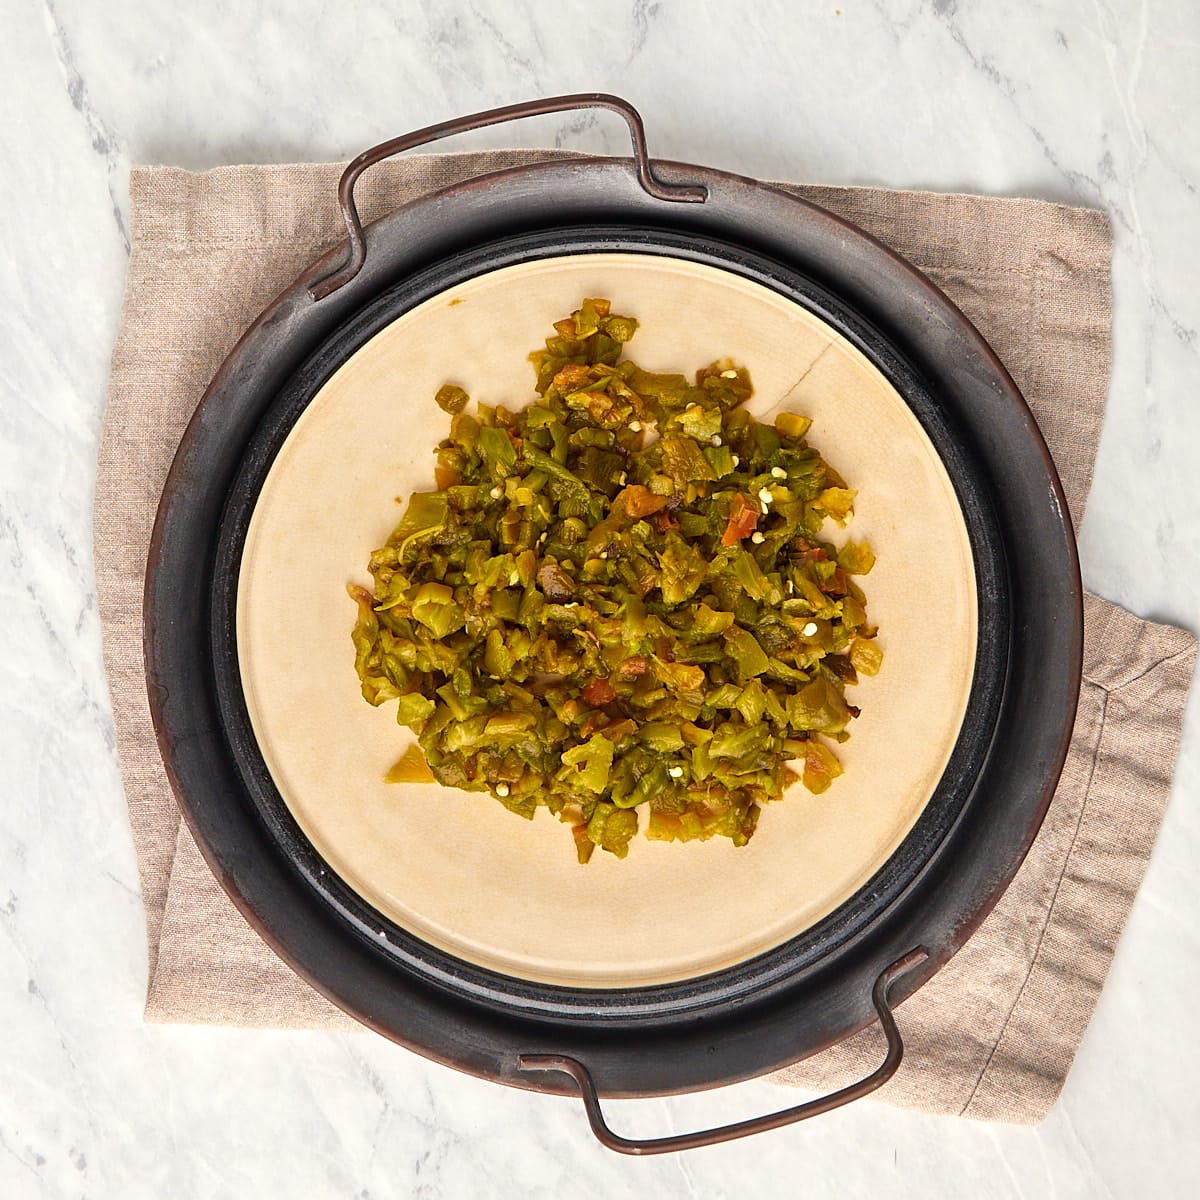
- Hatch Chile Relish: Dice roasted Hatch chiles and mix them with onions, tomatoes, and fresh herbs for a flavorful relish to top grilled meats or sandwiches.
- Hatch Chile Quesadillas: Layer roasted Hatch chiles with cheese between tortillas to make tasty quesadillas. For variety, add chicken, black beans, or sautéed vegetables.
- Hatch Chile Cornbread: Incorporate roasted, diced Hatch chiles into your cornbread batter for a spicy and savory cornbread that pairs well with chili, stews, or barbecue.
- Hatch Chile Mac and Cheese: Add roasted Hatch chiles to your mac and cheese for a zesty, smoky flavor. It’s a great way to spice up a classic comfort food.
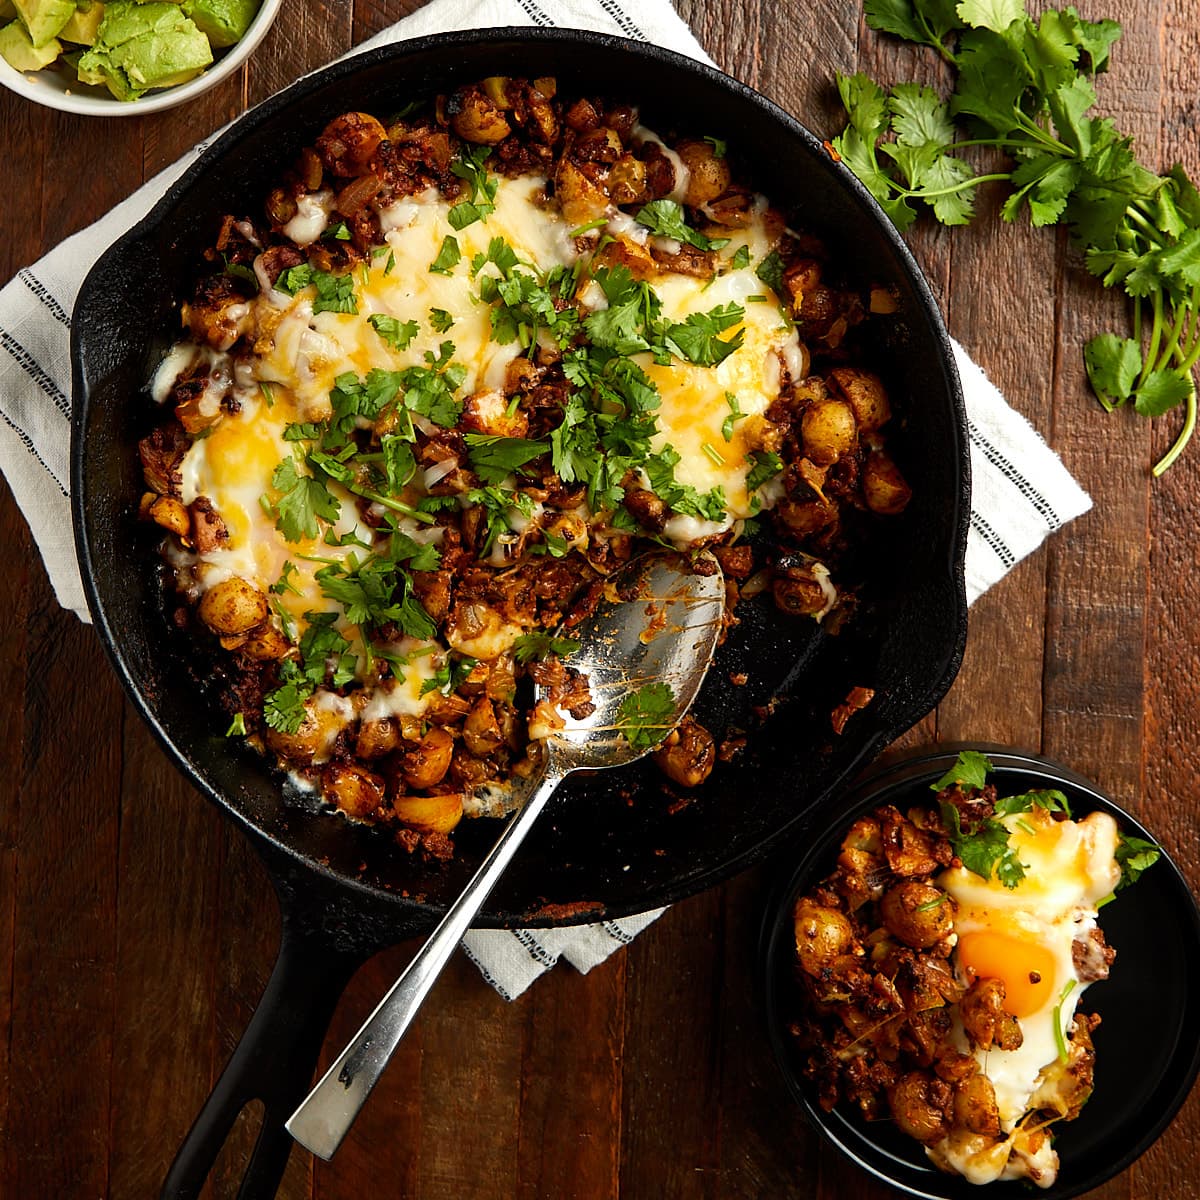
- Hatch Chile Breakfast Skillet: Cook potatoes, eggs, and chorizo with diced roasted Hatch chiles. Add eggs and cheese, then cook until eggs are set.
- Hatch Chile Queso: Use roasted Hatch chiles in your favorite queso recipe for a unique and spicy twist.
- Hatch Chile Soup: For a smoky, spicy kick, incorporate roasted Hatch chiles into various soup recipes, such as chicken tortilla soup or potato soup.
- Hatch Chile Corn Salsa: Combine roasted Hatch chiles, corn, black beans, tomatoes, onions, and lime juice to create a flavorful salsa that can be served with tortilla chips or used as a topping for grilled meats.
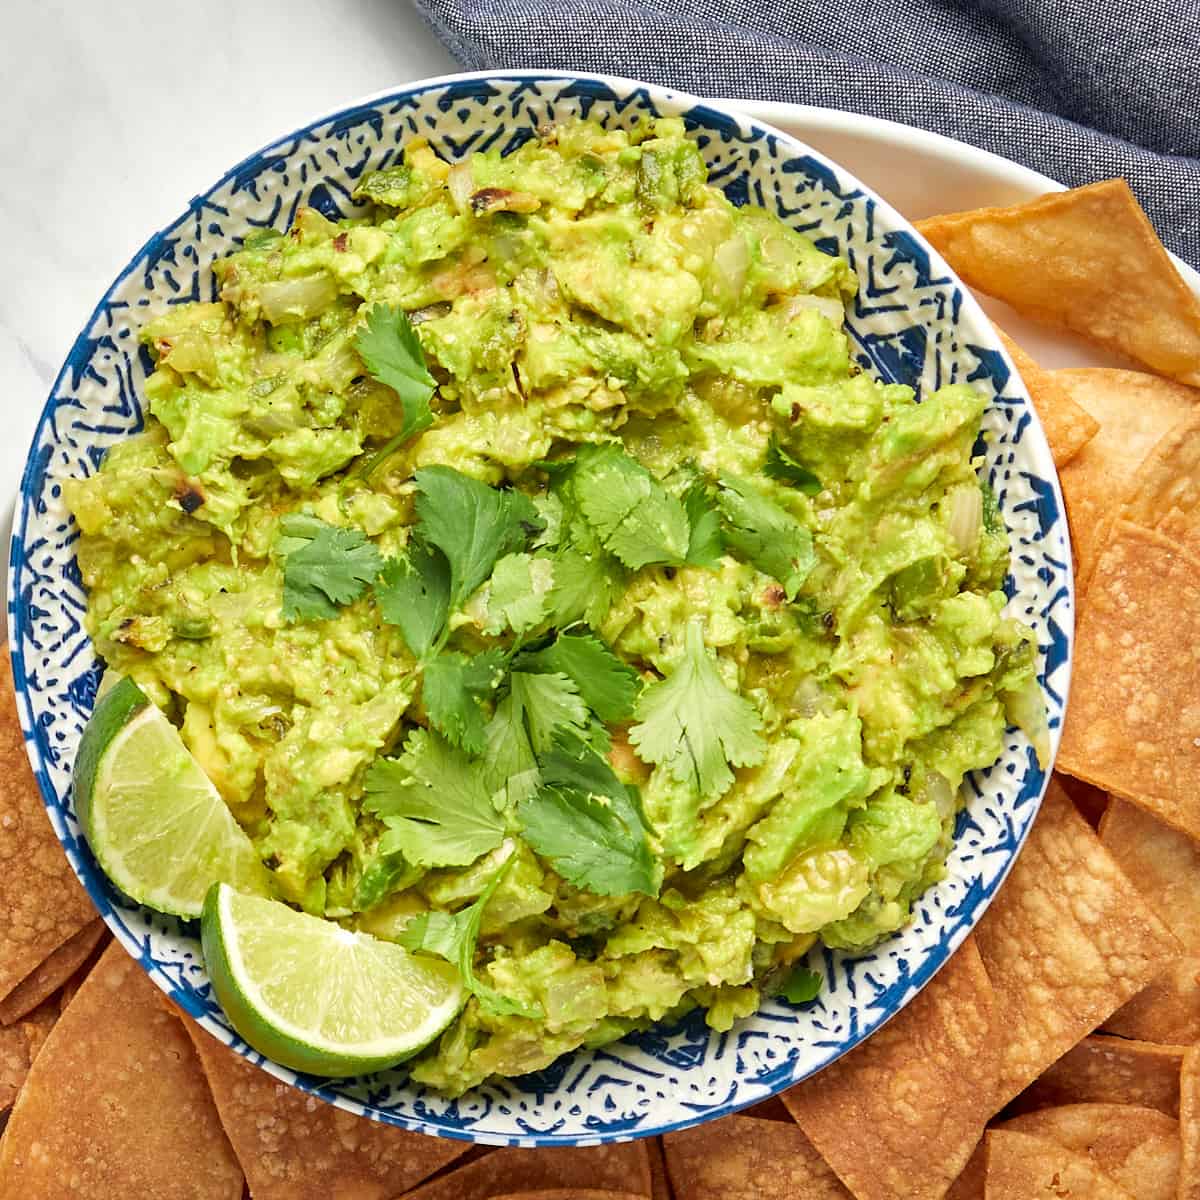
- Hatch Guacamole: To make roasted guacamole, use roasted Hatch chiles, tomatillos, avocados, onions, and garlic.
Freezing and Storage
Freezing and storing Hatch green chiles is a great way to enjoy their smoky flavor and spiciness throughout the year.
Freezing Hatch Green Chiles: After roasting and peeling them, allow them to cool completely at room temperature. Once they’re cool, you can leave the chiles whole or cut them into the desired size. Divide the chiles into portion sizes that you will likely use in one recipe. This makes thawing and using later easier without defrosting the entire batch. Place the portioned chiles into airtight, freezer-safe containers or heavy-duty resealable plastic bags. Remove as much air as possible from the containers or bags to prevent freezer burn. It’s helpful to indicate whether they are whole, sliced, or diced.
Storing Frozen Hatch Green Chiles: Place the containers or bags in the freezer, making sure they are flat and not stacked on top of each other. This helps them freeze quickly and evenly. Frozen Hatch chiles can be stored for 6-12 months without a significant loss of quality. However, for the best flavor, it’s best to use them within the first 6 months.
Thawing and Using Frozen Hatch Green Chiles: When you’re ready to use your frozen Hatch chiles, remove the desired portion from the freezer. Allow them to thaw in the refrigerator, which may take a few hours or overnight. Remember that frozen Hatch chiles may lose some crispness and texture during freezing, but their flavor remains intact. Once thawed, you can use the chiles in various recipes, such as salsas, soups, stews, or any dishes that call for roasted Hatch chiles.
Recipe Tips and Notes
- Safety first. Be cautious when handling the chiles, as they can be pretty spicy. Wearing gloves is not a bad idea!
- Experiment with heat levels. The longer you roast them, the spicier they get. Adjust the roasting time to your preferred heat level.
- Freeze for later. Roasted chiles can be stored in the freezer for months, allowing you to enjoy that smoky flavor all year round.
- Get creative. Roasted Hatch green chiles can be used in everything from salsas and enchiladas to scrambled eggs and burgers. The possibilities are endless.
Frequently Asked Questions
Hatch Chile Recipes to Try
Looking for recipes made with Hatch green chiles? Try these other favorites:
- Green Chile Cornbread – This cornbread recipe perfectly combines Southwest flavors. It combines traditional cornbread with the zing of green chiles to create a mouthwatering side dish that’s easy to make. Ideal as a side dish or a standalone treat, this cornbread is a crowd-pleaser at any meal.
- Hatch Queso – This queso recipe features freshly roasted Hatch green chiles, along with cheddar and Monterey Jack cheeses. It’s rich and creamy, making the perfect snack, appetizer, or party food.
- New Mexico Hatch Green Chile Chicken Enchiladas – These indulgent but not-too-heavy enchiladas are stuffed with chicken, roasted hatch chile peppers, and onions, and topped with a roasted tomatillo green chile sauce and cheese.
- Hatch Chile Mac and Cheese – This recipe combines the rich, gooey goodness of melted cheese with the bold, earthy taste of Hatch chiles, creating a mouthwatering dish that will leave your taste buds dancing.
Let’s Connect! If you make this recipe or any other recipe on Casual Epicure, please don’t forget to rate the recipe and leave a comment below. It helps others who are considering making our recipes and we love hearing about your cooking experiences. And if you snapped some shots, share them on Instagram, and be sure to tag @casual.epicure so we can feature them in our stories.
How to Roast Hatch Chiles
Want To Save This Recipe For Later?
Equipment
- Wood or Gas Grill
- Tongs
Ingredients
- 12-14 Hatch green chiles
Instructions
- Rinse the Hatch chiles thoroughly under cold water and pat them dry with a paper towel. You can leave the stems intact; they add flavor and make the chiles easier to handle.
How to Roast Hatch Chiles on the Grill
- Start by preheating your propane grill to medium-high heat. You want the grill to be hot enough to char the chiles but not so hot that they burn too quickly.
- Place the chiles directly on the grill grates, making sure they are evenly spaced and not overcrowded. The goal is to allow each chile to roast properly.
- Roast the chiles for about 5-7 minutes on one side. You will notice the skin blistering and charring. Use tongs to flip the chiles and roast the other side for an additional 5-7 minutes. The total roasting time will depend on your grill’s heat, so monitor the chiles closely.
How to Roast Hatch Chiles in the Oven
- Preheat your oven to the “Broil” setting. You want the broiler to be on, which generates high, direct heat from the top.
- Cover a baking sheet with aluminum foil. This will make cleanup easier and prevent the chiles from sticking to the pan.
- Lay the chiles on the baking sheet, ensuring they are evenly spaced and not overcrowded. The chiles should be placed about 4-6 inches below the broiler.
- Place the baking sheet with the chiles in the oven under the broiler. Roast the chiles for about 5-7 minutes on one side. You’ll notice the skin blistering and charring. Use oven-safe gloves or kitchen tongs to carefully flip the chiles and roast the other side for an additional 5-7 minutes. The total roasting time will depend on your oven’s broiler heat, so keep a close eye on the chiles.
How to Roast Hatch Chiles on the Stove
- Turn on your gas stove burners to a medium-high flame. You’ll roast the chiles directly over the open flame, so ensure good ventilation.
- Using tongs, carefully place the chiles directly on the burner grates. Make sure the chiles are evenly spaced and not too crowded.
- As the chiles roast, you’ll notice the skin blistering and charring. Use tongs to turn the chiles to ensure even roasting. Roast each side for about 5-7 minutes or until the skin is well-charred. The total roasting time will depend on the size and heat of your chiles.
- After roasting, transfer the hot chiles to a baking sheet lined with aluminum foil. This step is essential to catch any drips and ensure the chiles don’t stick to the counter.
Steaming and Peeling Hatch Chiles
- Once your chiles are roasted, transfer them to a plastic bag or wrap them in plastic wrap. Allow them to steam for about 10-15 minutes.
- Once the chiles have steamed and are cool enough to handle, gently peel away the charred skin, starting at the stem end.
- To deseed the chiles, make a slit along one side with a knife, open them up, and use the knife or your fingers to gently scrape away the seeds and membrane. For less heat, make sure to remove all the white membrane, as this is where much of the heat is concentrated.
- Once they have been peeled and deseeded the roasted Hatch chiles are ready to use in your favorite recipes.